Creating a Project
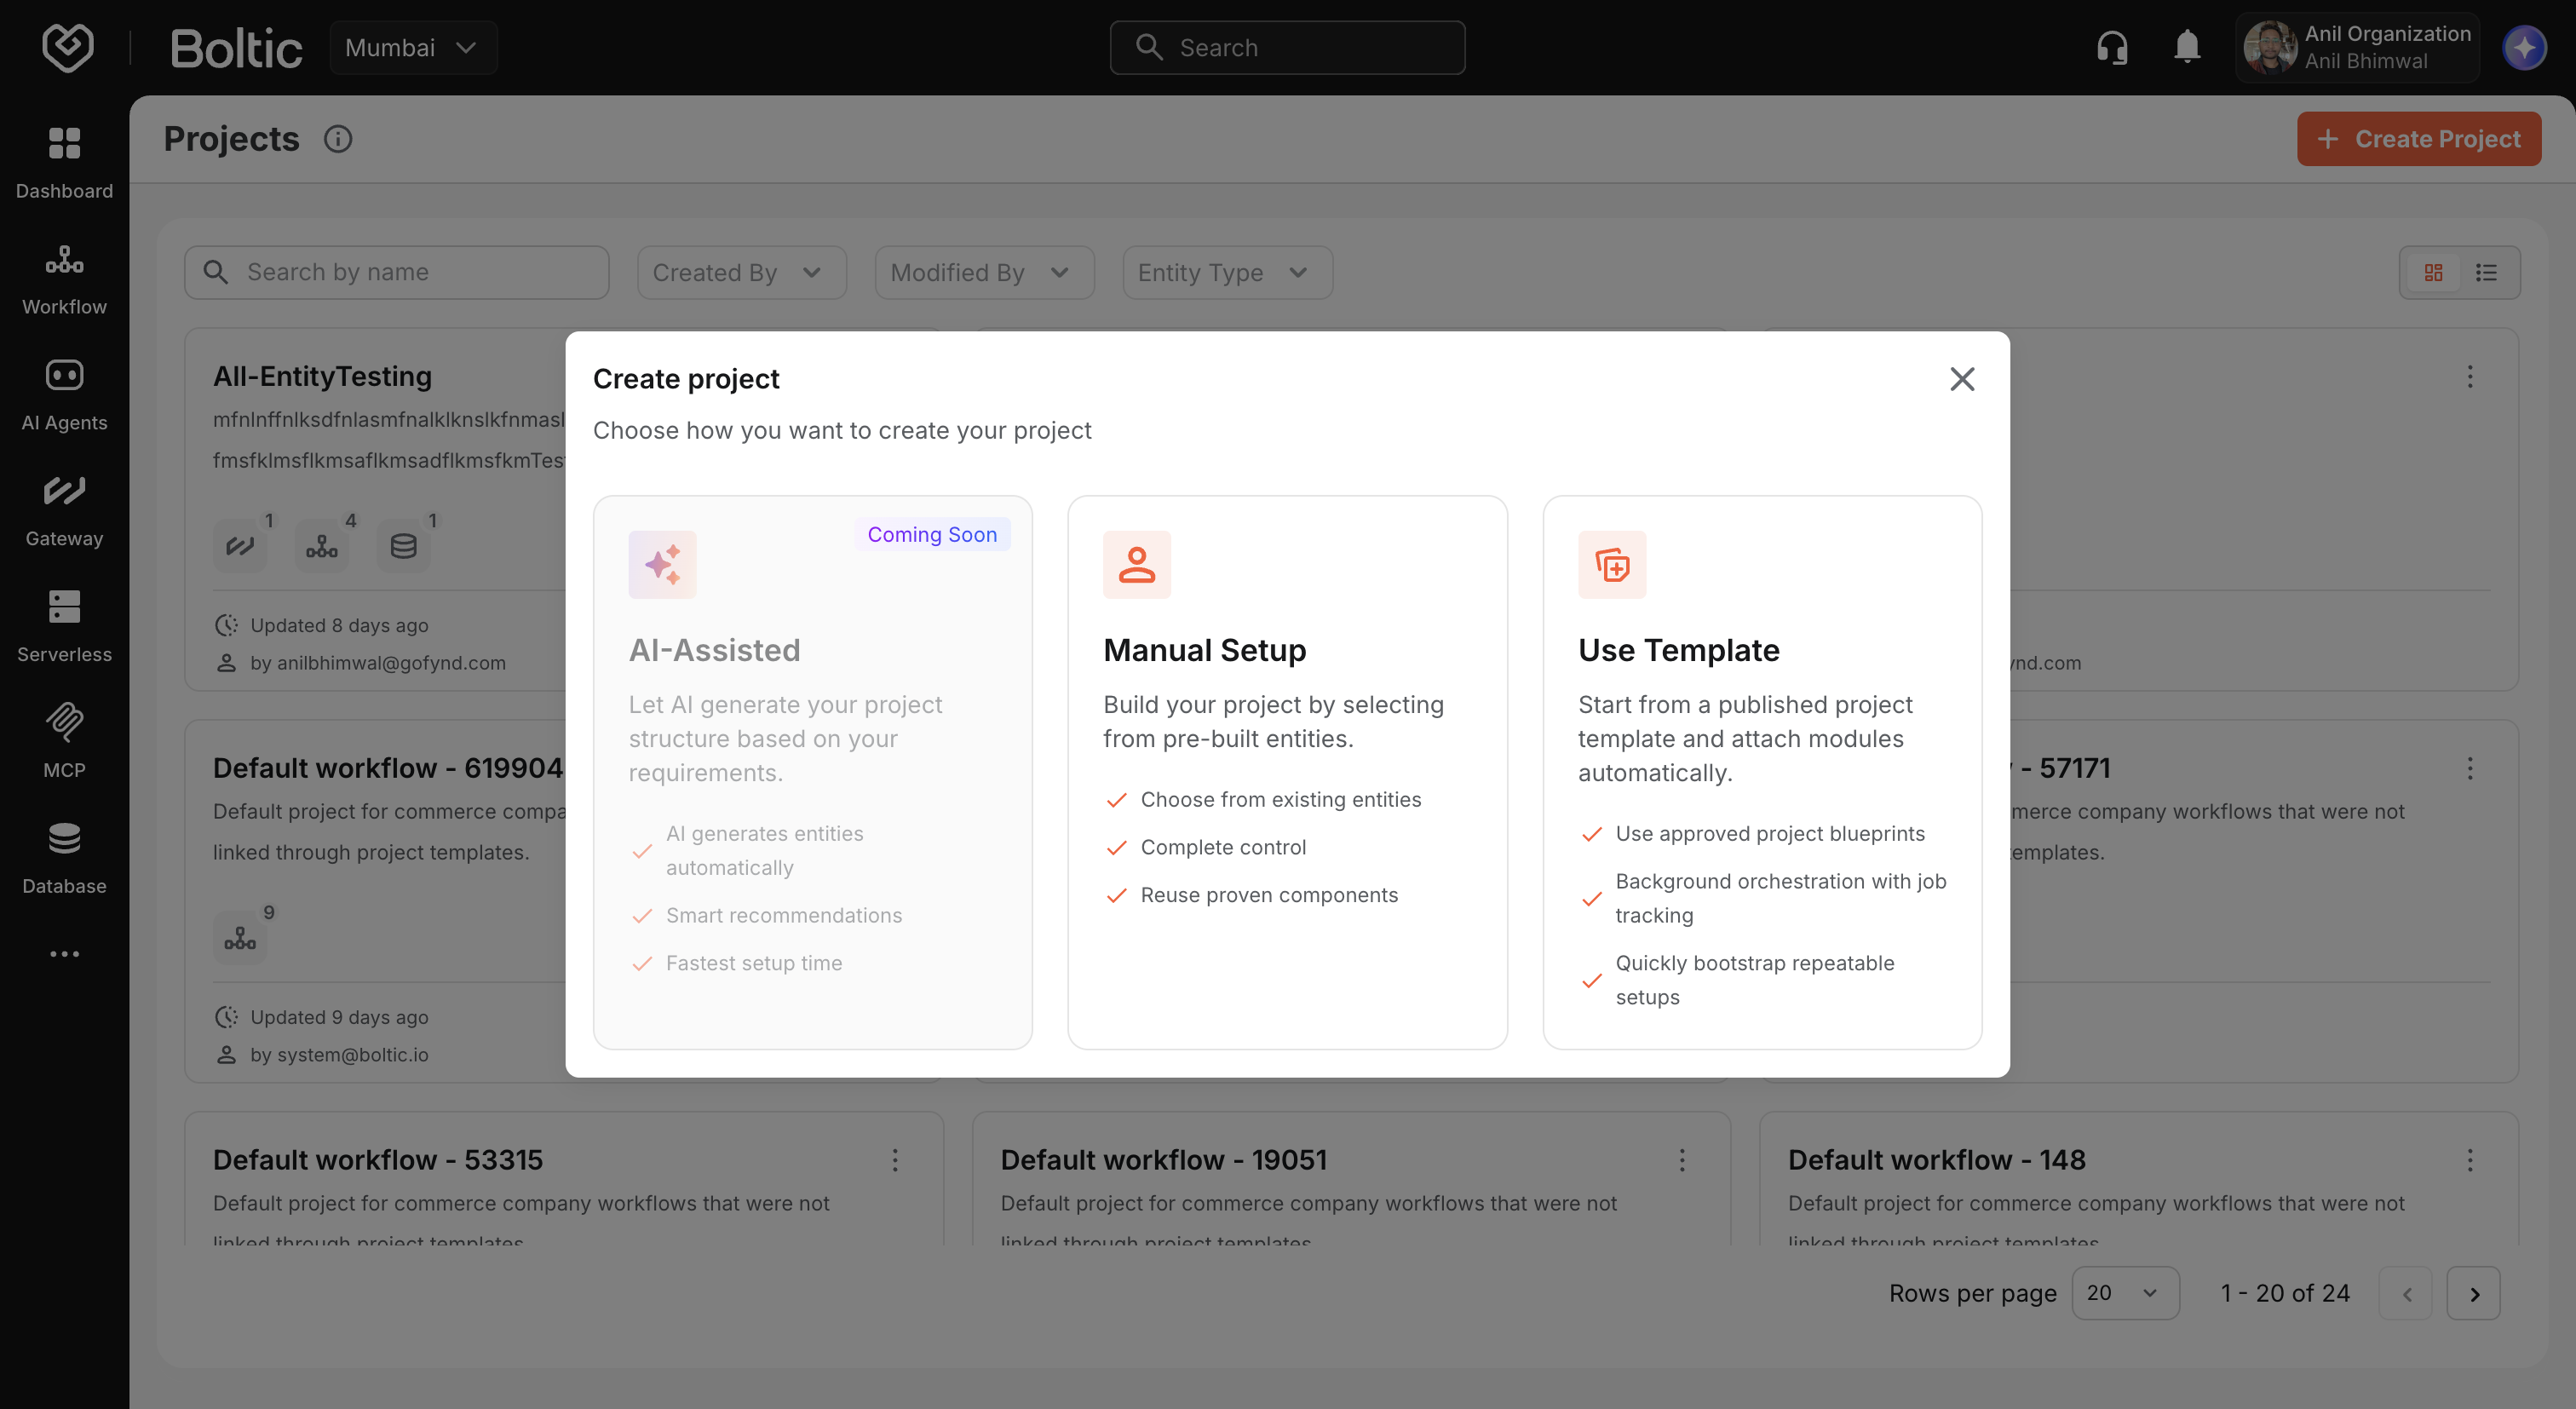
You create projects from the Projects listing page. Choose Manual Setup for a guided wizard, Use Template to bootstrap from an approved blueprint, or wait for AI-Assisted setup (coming soon).
Choose a creation method
- Go to Projects in the left navigation.
- Click Create project.
- Select how you want to build the project:
| Method | Status | Description |
|---|---|---|
| Manual Setup | Available | Name your project, add a description, and optionally link existing entities. |
| Use Template | Available | Start from a published project template; modules attach in the background. See Project templates. |
| AI-Assisted | Coming soon | AI generates project structure and entity recommendations from your requirements. |
 |
|---|
Click Manual Setup to open the creation wizard, or Use Template to browse the template gallery.
Step 1: Details
Enter the core information for your project.
| Field | Required | Rules |
|---|---|---|
| Project name | Yes | 3–50 characters (excluding leading/trailing spaces). Cannot be only whitespace. A character counter shows remaining length. |
| Description | Yes | 10–115 characters. Describe what the project does and its main features. |
Use a name that reflects the business initiative or product— for example, Order Sync Platform or Customer Onboarding v2. This name appears on cards, in the header, and in delete confirmations.
Click Next when both fields are valid.
Step 2: Select entities
Optionally associate existing Boltic resources with the project before it is created. This step is not required—you can skip it and add entities later from the project details page.
Add entity rows
- Click Add entity to add a row.
- For each row, choose an entity type from the dropdown:
- Workflows
- AI Agents — create agents in Kaily first; see AI Agent Setup
- Gateway
- Serverless
- Database Tables
- MCP
- Select a specific resource from the searchable dropdown for that type.
The selector loads existing resources from your organization (workflows from Vortex, gateways from Fluix, tables from Tables, and so on).
Validation rules
- You cannot select the same entity twice in the wizard.
- Each row must have both a type and a selected resource before you proceed.
- If no resources exist for a type, the empty state prompts you to create one first or skip that row. For AI Agents, use the AI Agent Setup guide in Kaily, then return to link the agent to your project.
Remove rows
Click the remove control on a row to drop it from the selection.
Click Next to continue, or proceed with zero entities selected.
Step 3: Review
The review screen summarizes:
- Project name and description
- Entity counts by type (for example, 2 Workflows, 1 Gateway)
- A list of every selected entity with name and type
Use Edit links to jump back to Details or Select Entities if you need changes.
Click Create project to submit. A success notification appears, and you are redirected to the new project's details page after a short delay.
What happens on the server
When you submit the wizard, Boltic:
- Creates the project record in your organization (via the Fluix Projects API).
- Creates project-item associations for each entity you selected in step 2.
- Returns the new project ID so the console can navigate you to the details page.
Entities you did not select remain unchanged in their respective services—they are only linked to the project, not moved or copied.
Create entities in project context later
If you skipped entity selection, open the project after creation and use Add entity on the details page. You can either:
- Create a new workflow, gateway, serverless app, table, or MCP server (linked to this project via a
project_idquery parameter), or - Add an existing resource from your organization.
See Managing entities.
Troubleshooting
| Issue | What to do |
|---|---|
| Create button disabled | Check that name and description meet minimum length rules and that every entity row is complete. |
| Entity dropdown empty | Create the resource in its service first (for example, create a workflow in Workflow Builder), then return to the wizard or add it from the project page. |
| Creation fails | Verify you have subscription access and a stable network connection. Retry; if the error persists, contact support with the error message from the toast notification. |
Next steps
- Project details and tabs — Explore the project dashboard.
- Managing entities �— Add more resources after creation.