Workflow Builder
A workflow is an automation that interacts with your data sources. It consists of a series of interconnected nodes that interact with resources, transform data, and execute additional logic. Each workflow runs automatically using a trigger that is triggered by events.
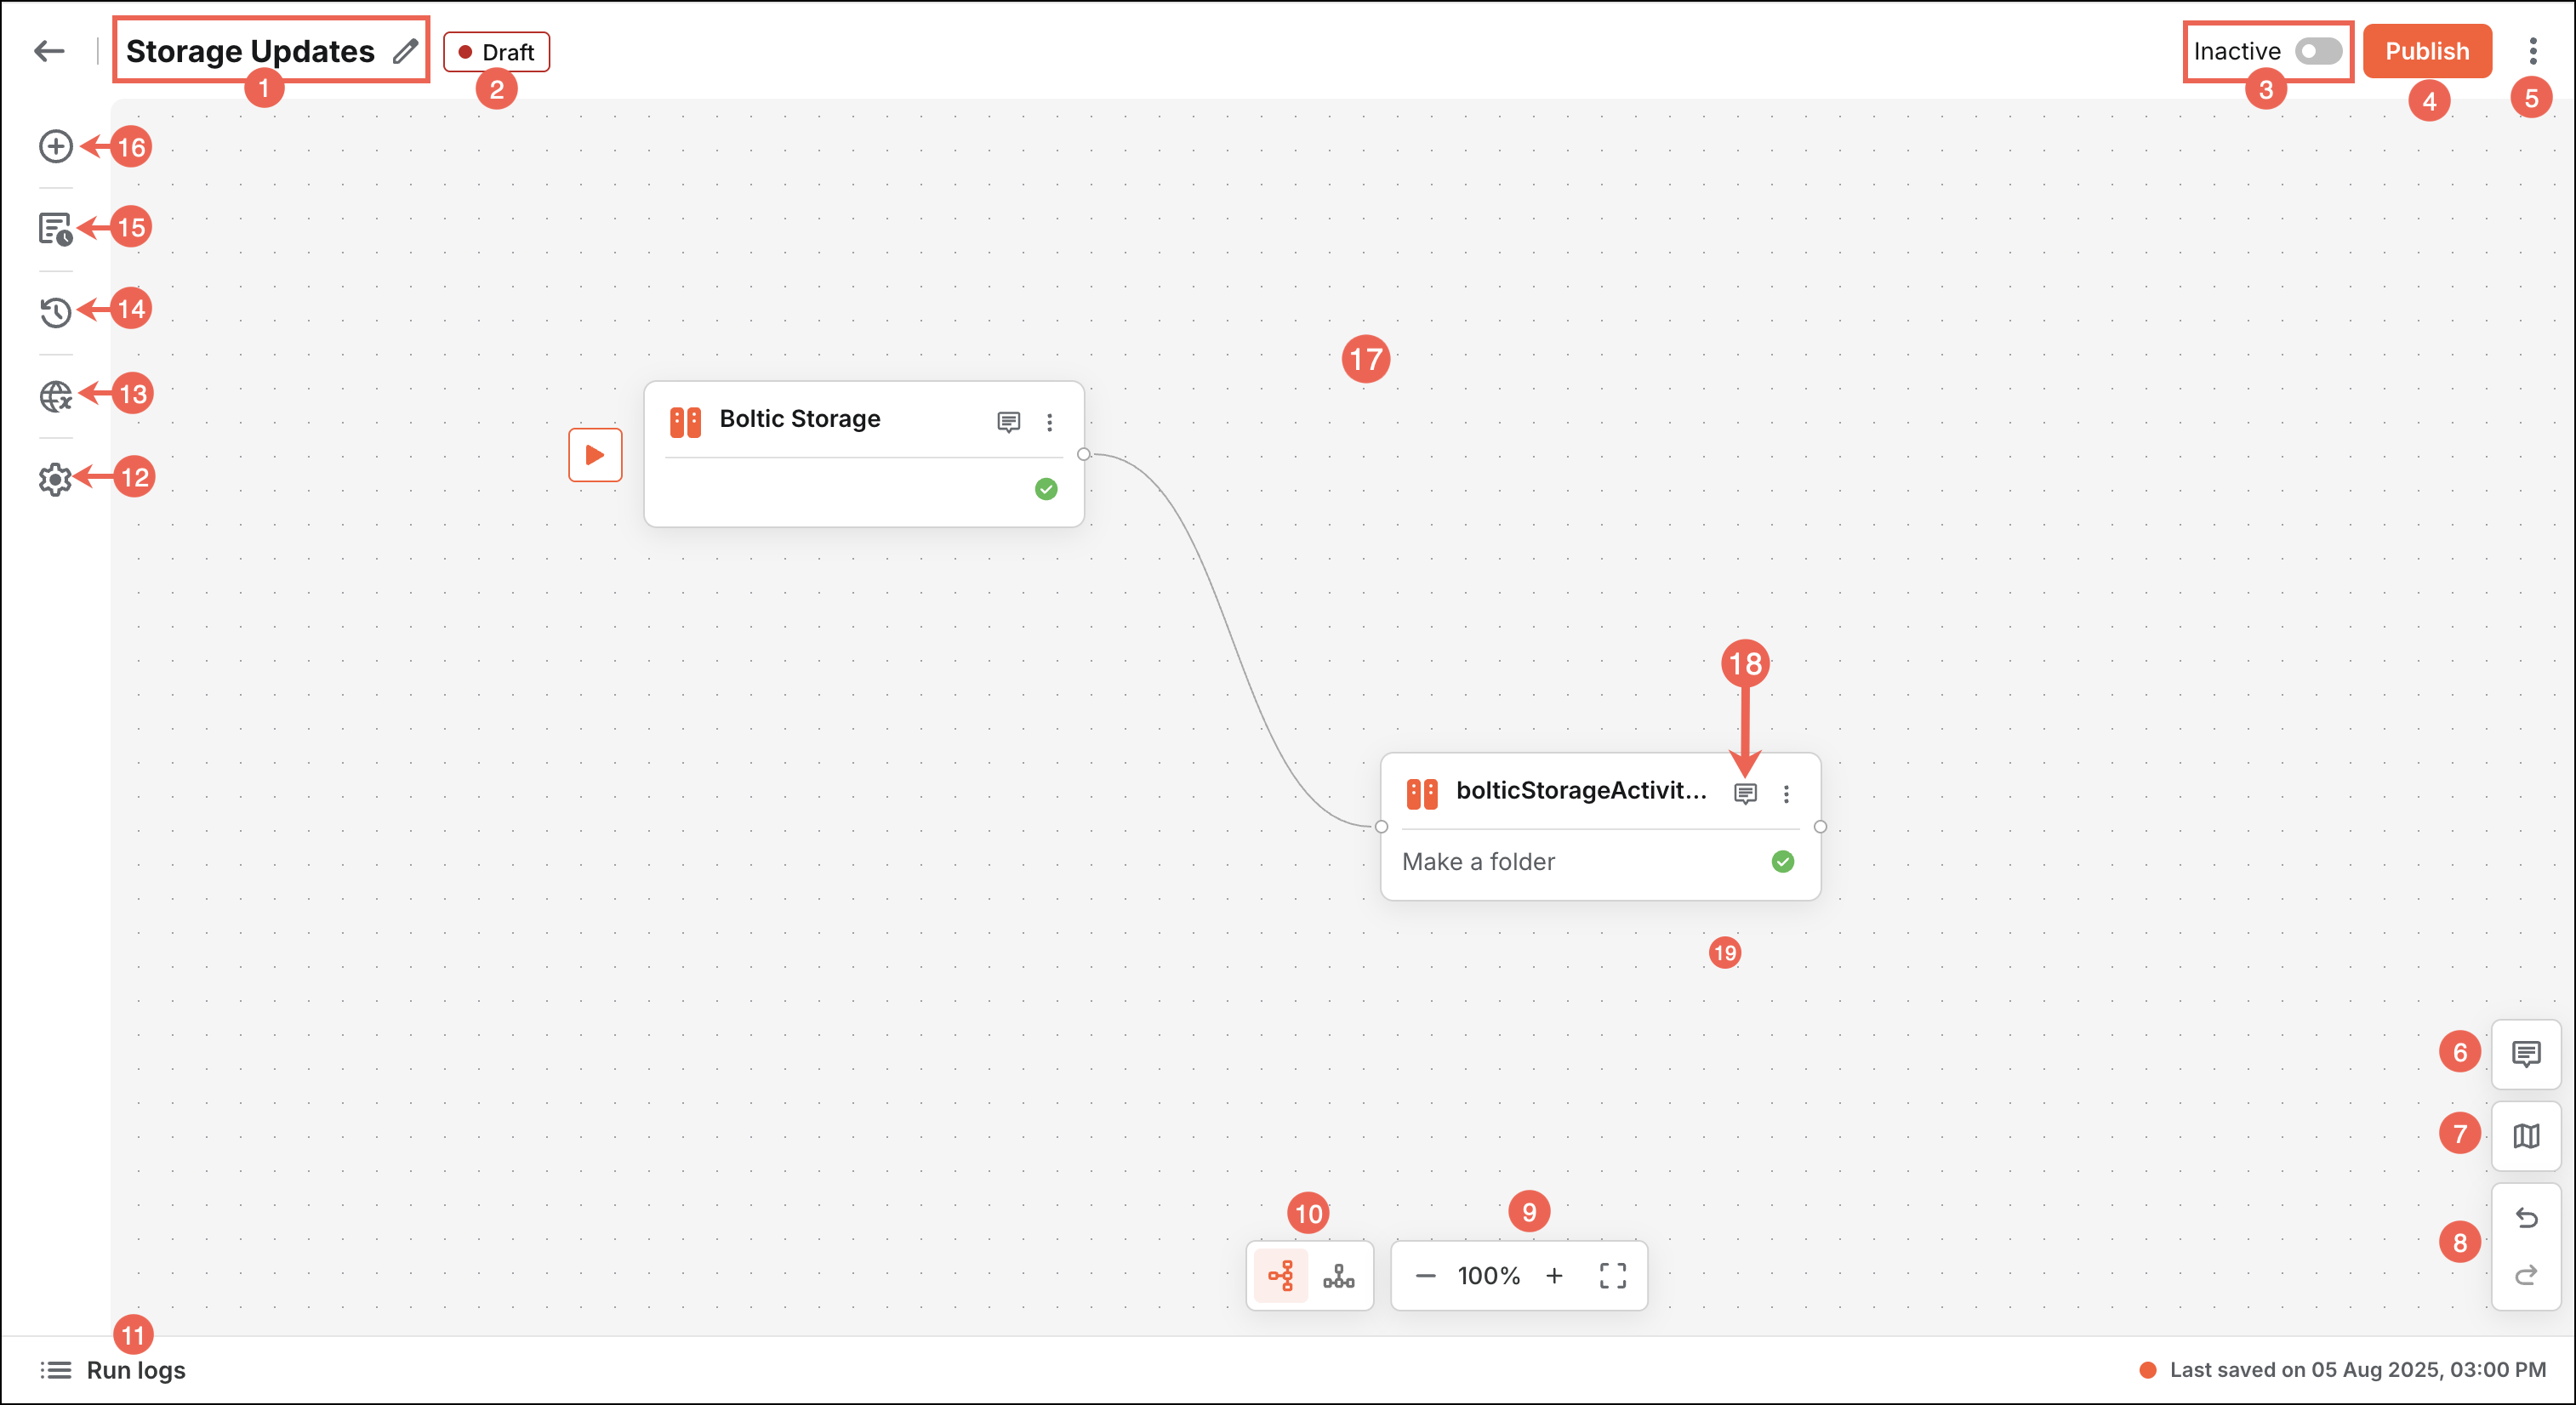
A workflow builder is a workspace for designing, building, and managing workflows. It provides an intuitive, drag-and-drop interface that allows you to visually assemble workflow logic, connect integrations, and configure each step with ease.
| Item No | Component | Description |
|---|---|---|
| 1 | Workflow name | Assign a unique and descriptive name to your workflow to easily identify its purpose among multiple workflows. |
| 2 | Version of the workflow | Use the dropdown menu to select or switch between different versions of your workflow. This allows you to edit, review, or revert to previous states. By default, the version is set to Draft, enabling you to make changes before publishing. |
| 3 | Inactive toggle | Enable or disable the workflow with a single switch. |
| 4 | Publish | Release your workflow to production by publishing it. Refer to Publish for more details. |
| 5 | More Options (⠇) | Access advanced options such as importing workflows from other workflows or sharing your current workflow with others. Refer to Share Workflows for detailed steps. |
| 6 | Toggle Comment | Show or hide reviewer comments and feedback directly within the workflow builder. |
| 7 | Canvas Previewer | Visually navigate and explore different sections of your workflow, especially useful for large or complex workflows. Quickly jump to specific areas for efficient editing and review. |
| 8 | Undo | Instantly undo or redo recent changes to your workflow, allowing you to experiment and iterate safely without losing progress. |
| 9 | Zoom | Fine-tune your view of the workflow canvas by zooming in for detailed editing or zooming out for a high-level overview. |
| 10 | View | Switch between 'Graph View' for a visual, node-based representation and 'Tree View' for a hierarchical, structured outline of your workflow, helping you understand and debug complex logic. |
| 11 | Run logs | Access detailed logs of workflow executions, including timestamps, statuses, and error messages. Use these logs to monitor performance, troubleshoot issues, and ensure reliable automation. |
| 12 | Workflow Configurations | Set up global workflow settings, such as retry policies, timeouts, and environment variables, to control behavior and ensure consistent execution across all integrations. |
| 13 | Global Variables | Define and manage global variables—key-value pairs accessible throughout the workflow. Use them to store reusable data, credentials, or configuration values, promoting consistency and reducing duplication. |
| 14 | Version | View the complete version history of your workflow, including details of each release. Track changes, compare versions, and restore previous states as needed for robust version control. |
| 15 | Execution History | Review the execution history of your workflow, including past runs, statuses, and outcomes. Analyze this data to identify trends, optimize performance, and troubleshoot failures. |
| 16 | Add activity | Add new integrations that are actions triggered by workflow events. |
| 17 | Canvas | The Canvas is your primary workspace for designing workflows. Drag and drop integrations, connect them visually, and arrange the flow to create, modify, and optimize your automation logic with ease. |
| 18 | Comment | Add contextual information, explanations, or notes to your workflow. |
Node
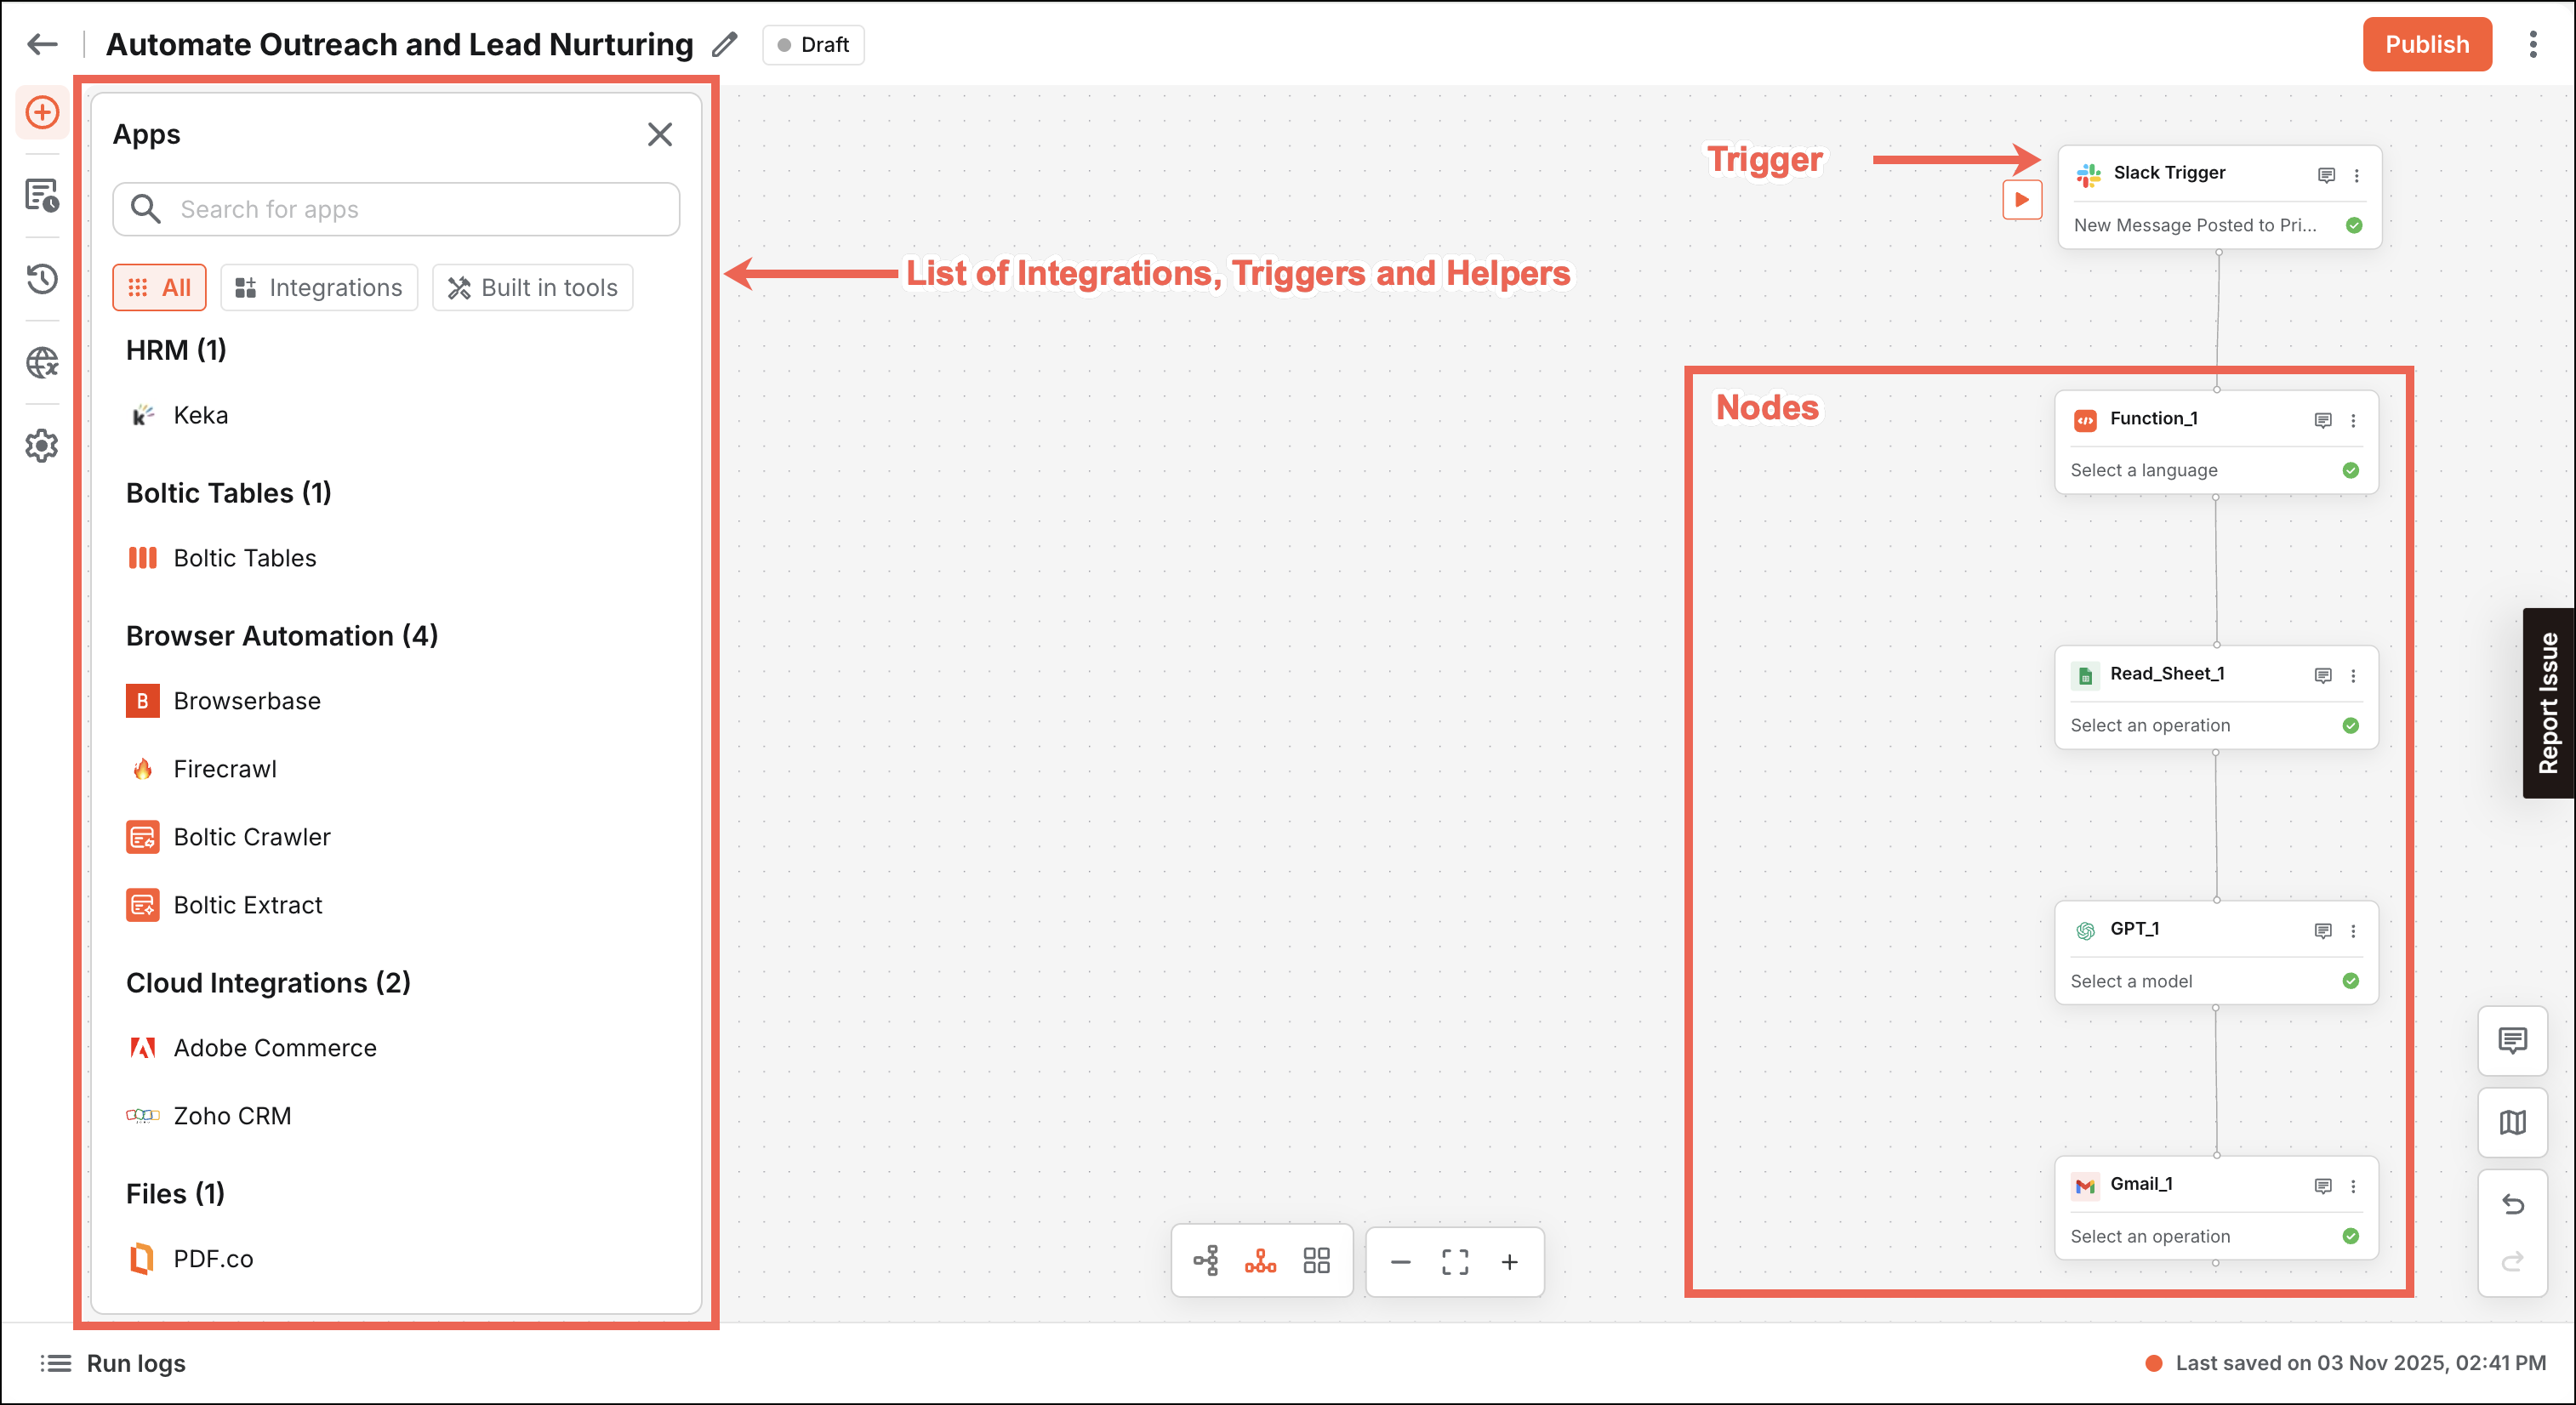
A workflow consists of nodes. Nodes are the individual steps that collectively form the entire process and are the building blocks of a workflow. They represent the actions or operations that a workflow performs, such as transforming data and or interacting with third-party services. You can drag and drop the integrations in the workflow builder, then configure them to interact with data or perform actions. You connect nodes to define the control flow, which determines the order in which each node executes. Nodes can reference the results of previous nodes that have already executed, passing those results along to the next node.
Nodes connect and execute sequentially during a run. This defines the order of operation and flow of data, known as the control flow. The connecting line between nodes visually represents the control flow, which can be a single path or a branch to perform parallel operations.
A node that is part of the control flow is executed during a workflow run, beginning with a trigger.