Import Data
Importing data into Boltic Tables is the fastest way to kickstart your data journey. Tables supports the following file types for import:
- CSV (.csv) – Ideal for spreadsheets and tabular data.
- JSON (.json) – Perfect for structured or nested data.
You can upload files up to 1 GB in size, making it easy to work with large datasets without any hassle.
📌 How to Import Data?
-
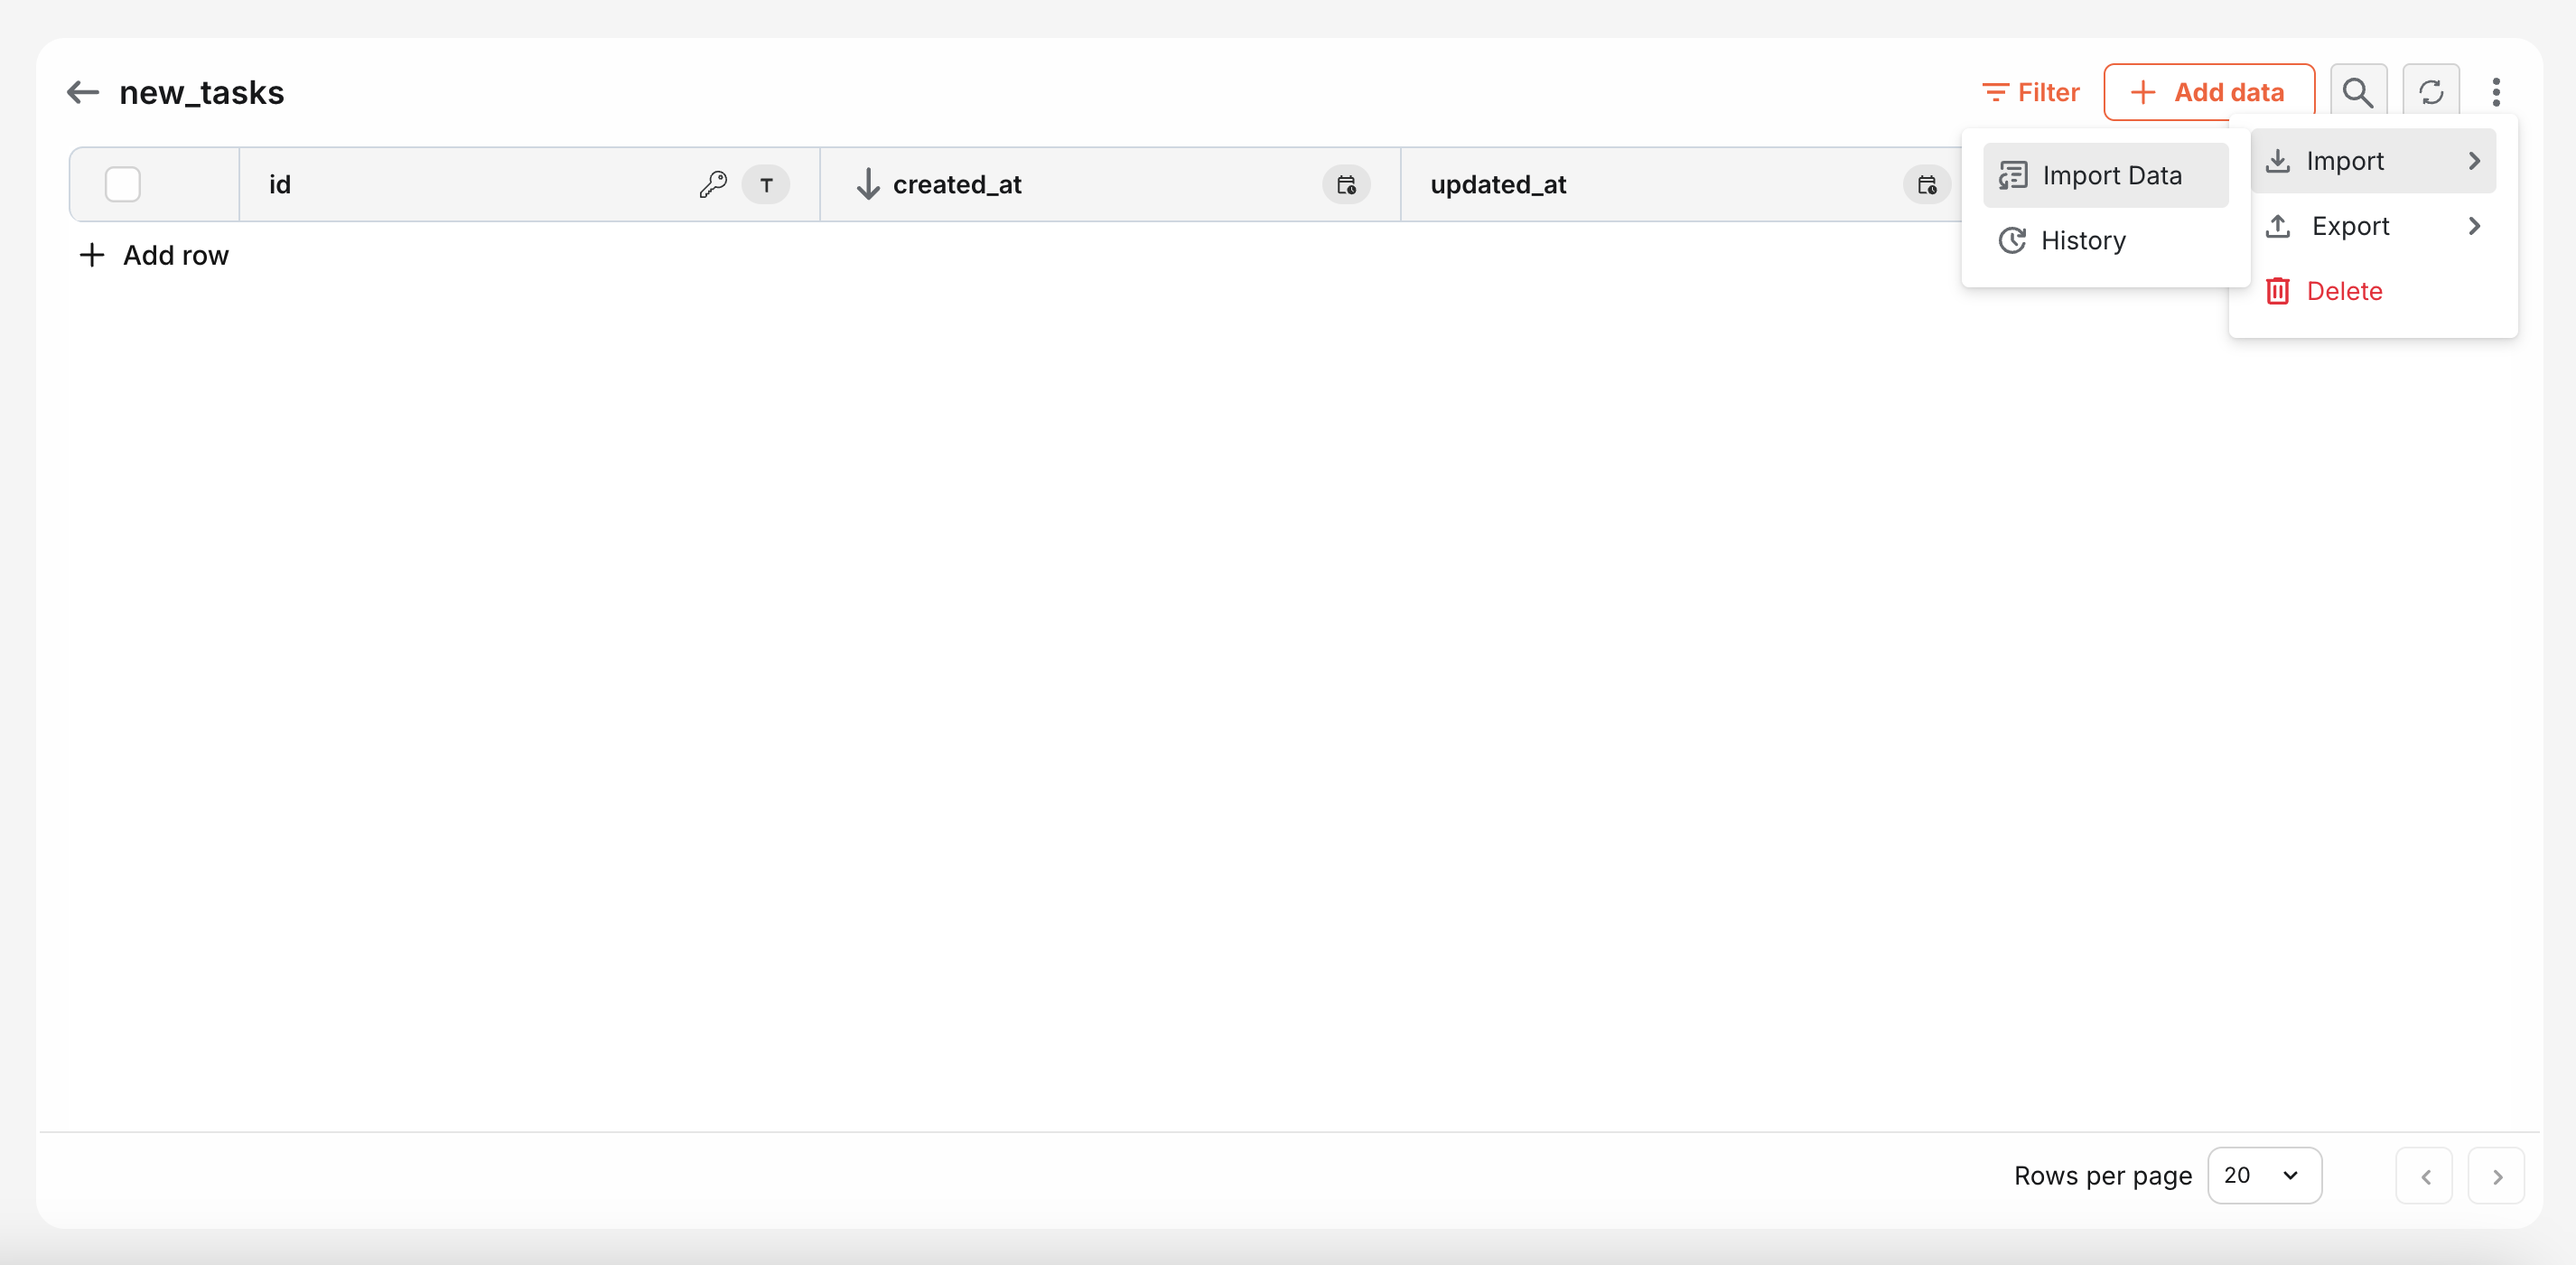
Click the "Import" button on the top-right corner of your Tables workspace and "Import Data".
-
Upload your CSV or JSON file.
-
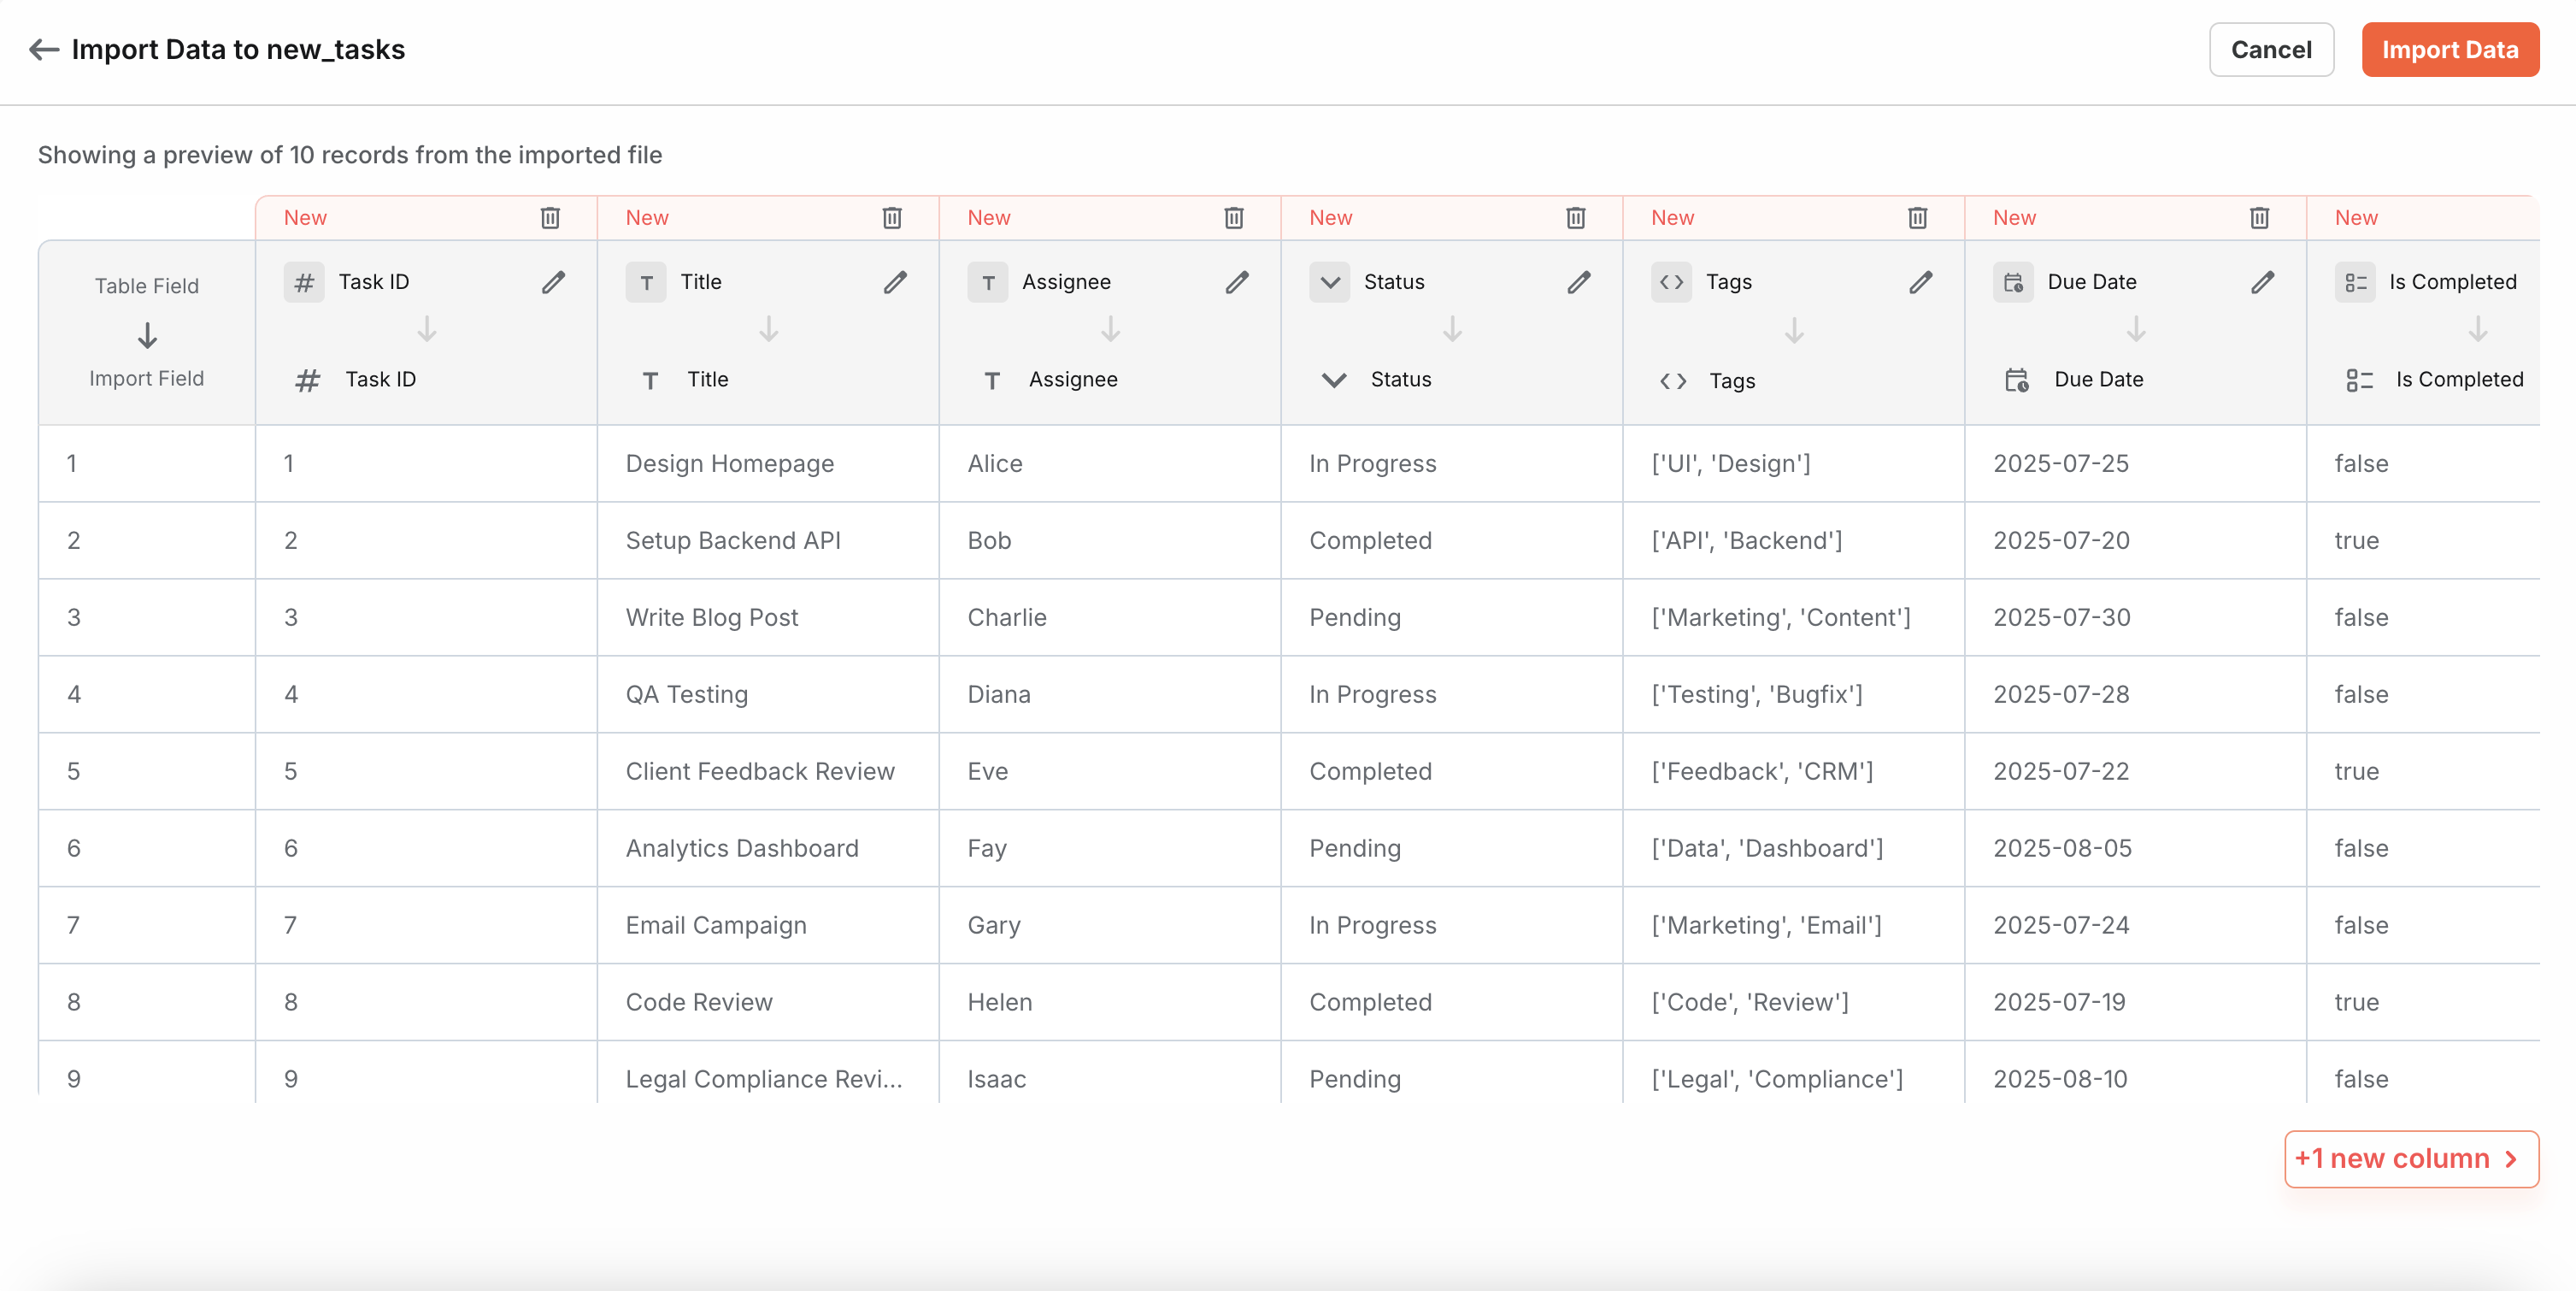
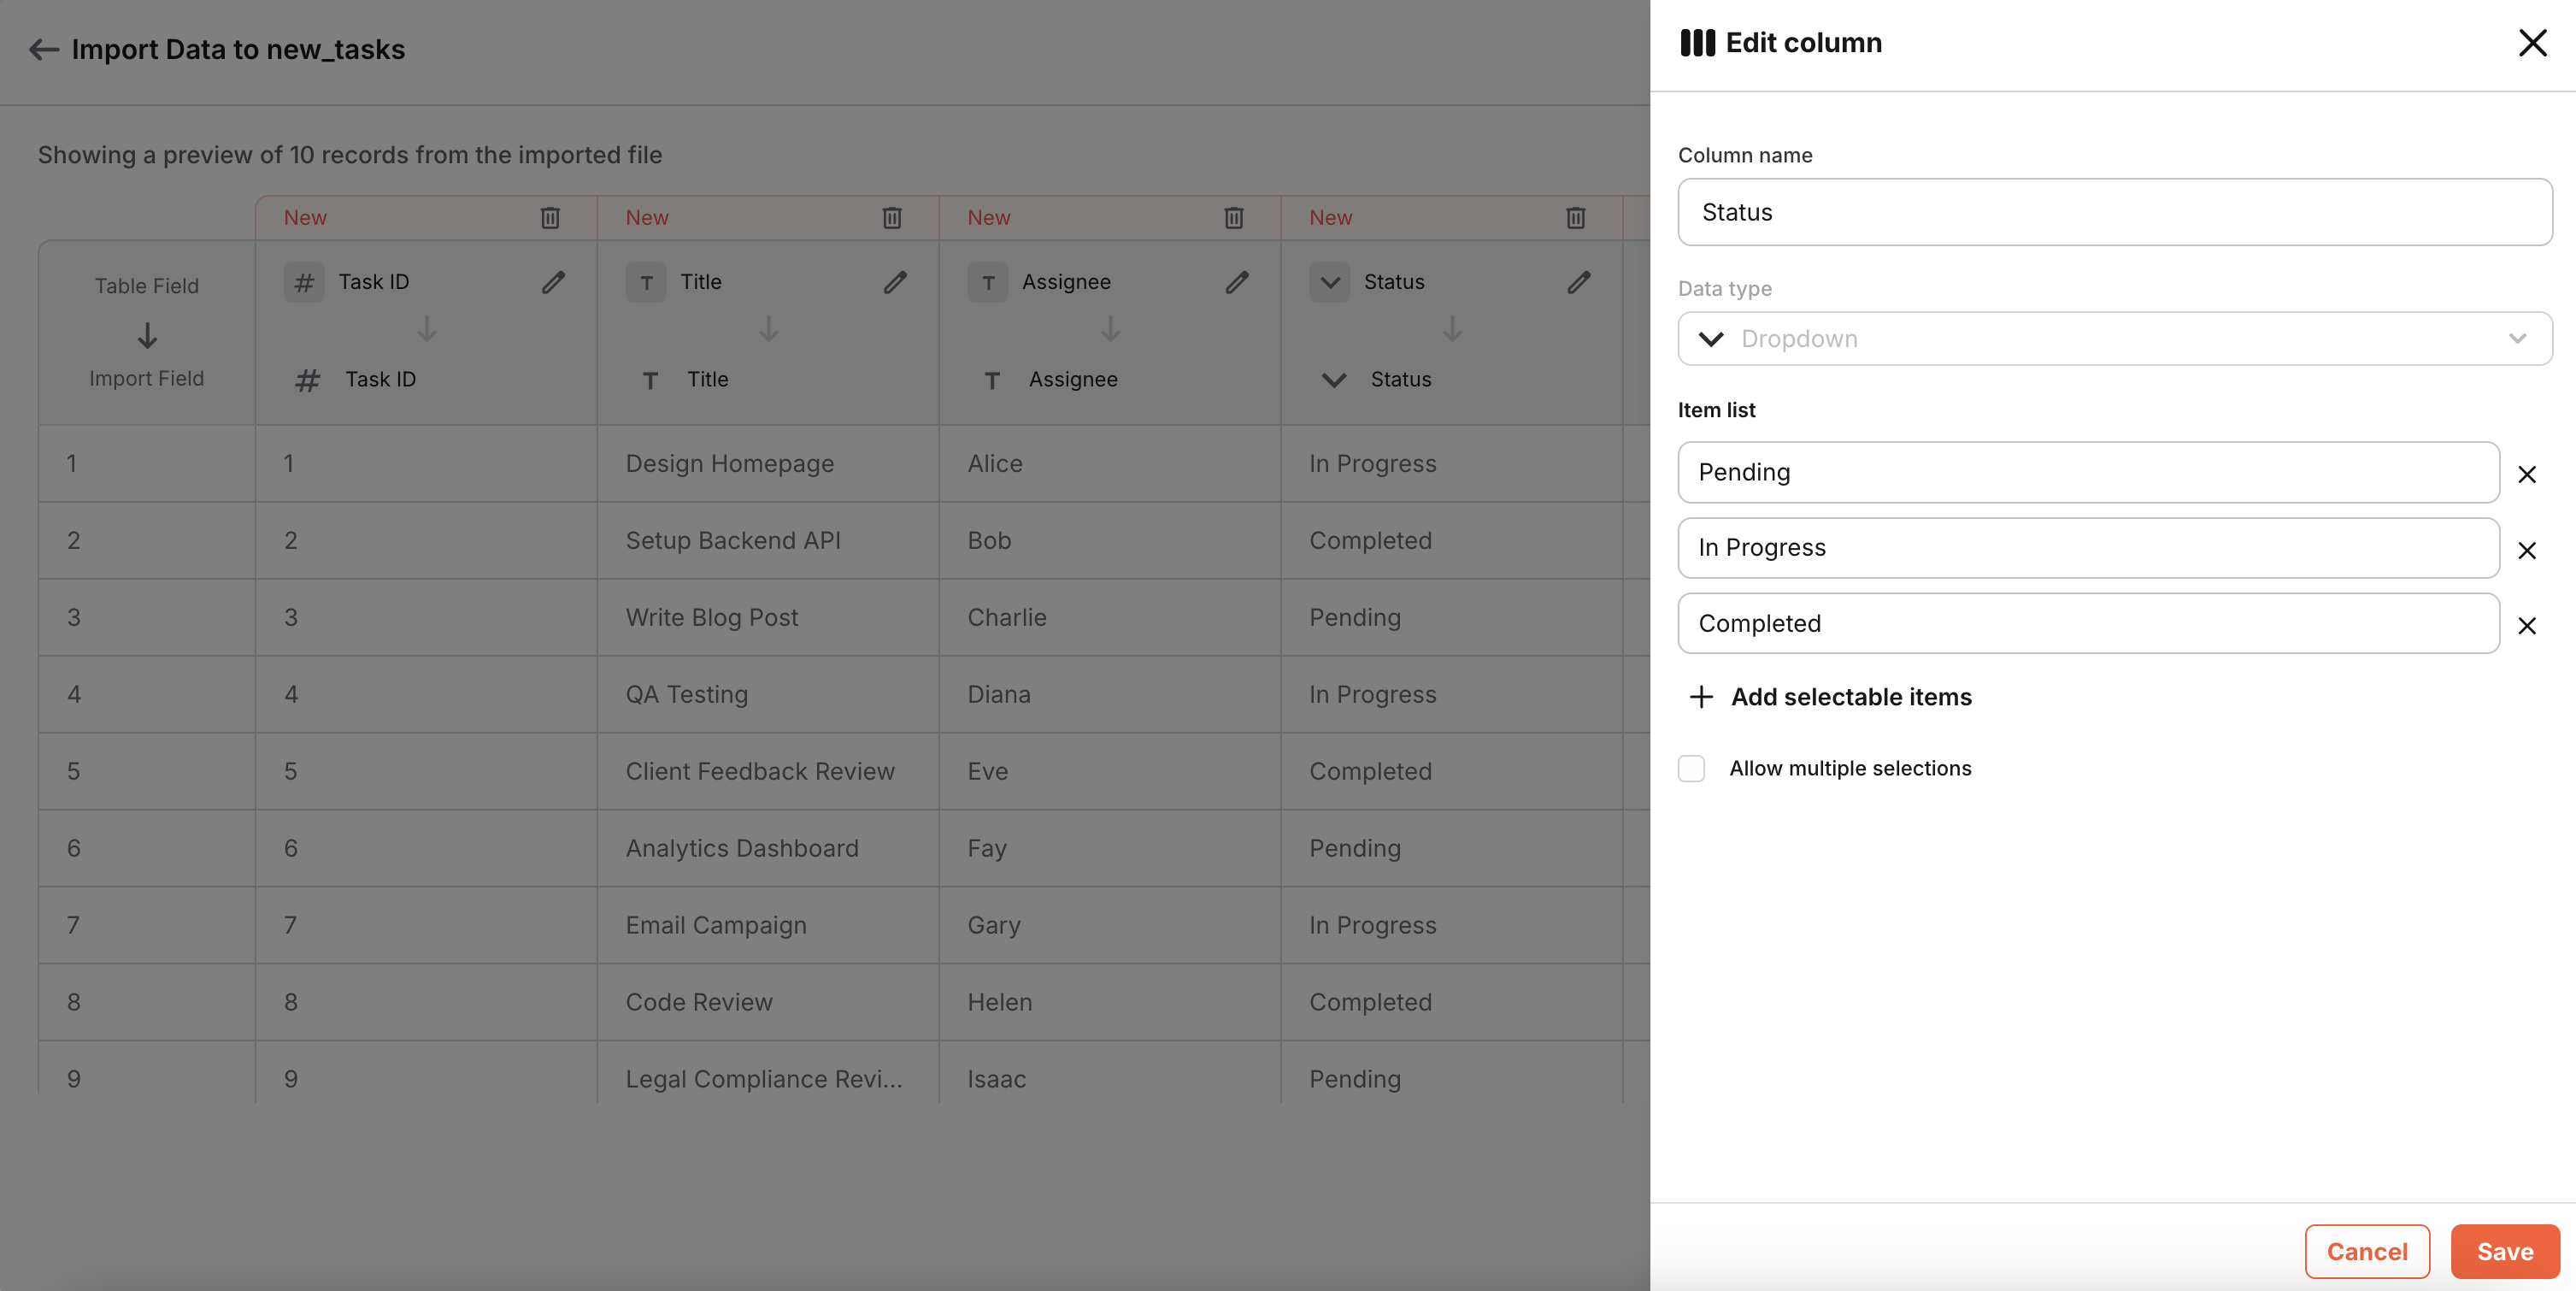
Preview the file structure — map file columns to table columns, update column data types, add constraints, and preview your changes.
-
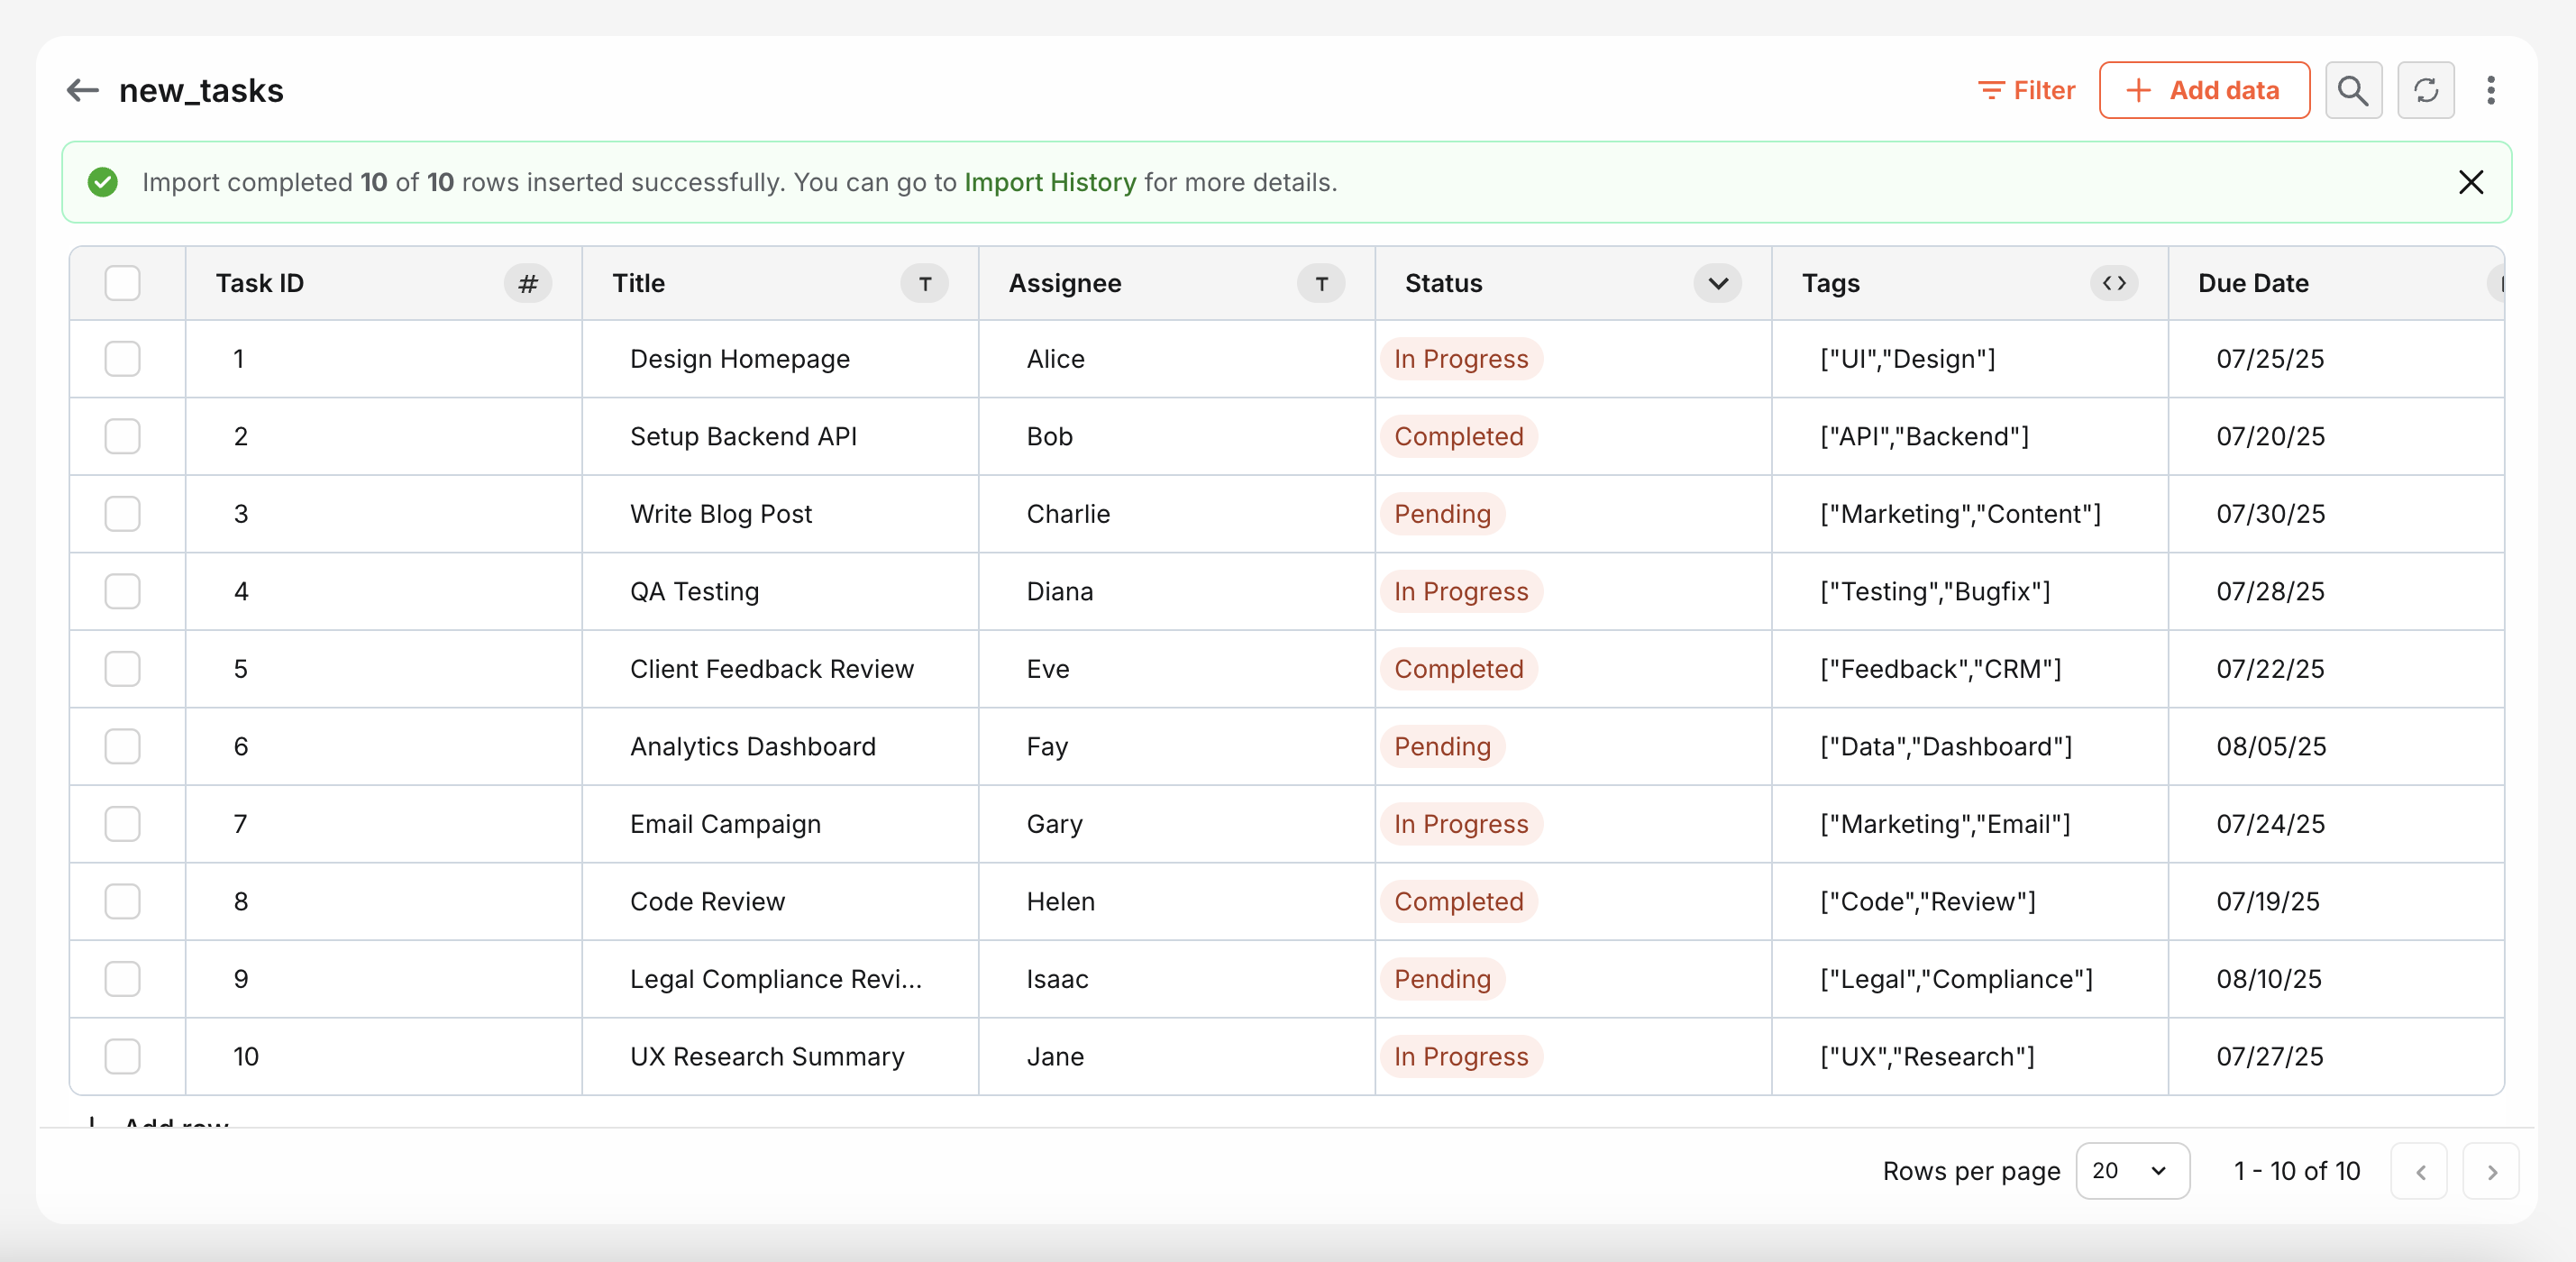
Start Import — watch as the file gets converted into a fully functional Boltic Table.✨✨
-
Track import progress in the notification and import history in the Import History page.
🔔 Important Points
To ensure a smooth and error-free import, please keep the following formatting guidelines in mind when preparing your data.
-
Dropdown Columns:
-
For dropdown columns with multiple options, wrap the list in double quotes and the list values in single quotes within the CSV cell.
Example:
days
"['Monday', 'Tuesday', 'Wednesday']"
-
-
JSON Columns:
-
The outer string should be wrapped in double quotes, and keys and values inside should use single quotes within the CSV cell.
Example (Array of Objects):
student_json
"[{'id': 1, 'name': 'Alice'}, {'id': 2, 'name': 'Bob'}]"
Example (Single Object):
student_json
"{'roll no': 7, 'name': 'Alstair Cook', 'hobbies': ['reading', 'traveling']}"
-
-
Vectors (Dense, Half, or Sparse) Columns:
-
Always enclose vector arrays in double quotes to ensure correct parsing.
Example:
embeddings
"[0.25, 0.5, 0.75, 1.0]"
{
"embeddings": "[0.25, 0.5, 0.75, 1.0]"
}
-
-
Date-Time Columns:
-
Use the ISO 8601 format for all date-time values to maintain consistency and timezone accuracy.
Example:
login_time
2025-07-21T14:30:00Z
{
"login_time": "2025-07-21T14:30:00Z"
}
-
📁 Sample Files for Import
To help you get started quickly and avoid formatting errors, we've provided sample files that you can download and use.
📊 Import History & Monitoring
This section gives you a clear overview of all your import jobs — whether they’re in progress, completed, or failed. You can:
-
Track imports by file name, record count, and success/failure breakdown.
-
View job status in real time: Pending, In Progress, Partially Completed, Completed, or Failed.
-
Download the original file or error logs (.jsonl) if needed.
-
Search and filter by file name or status to quickly locate any import.
💡 If your import partially fails or fails completely, download the .jsonl log file to inspect row-level errors.
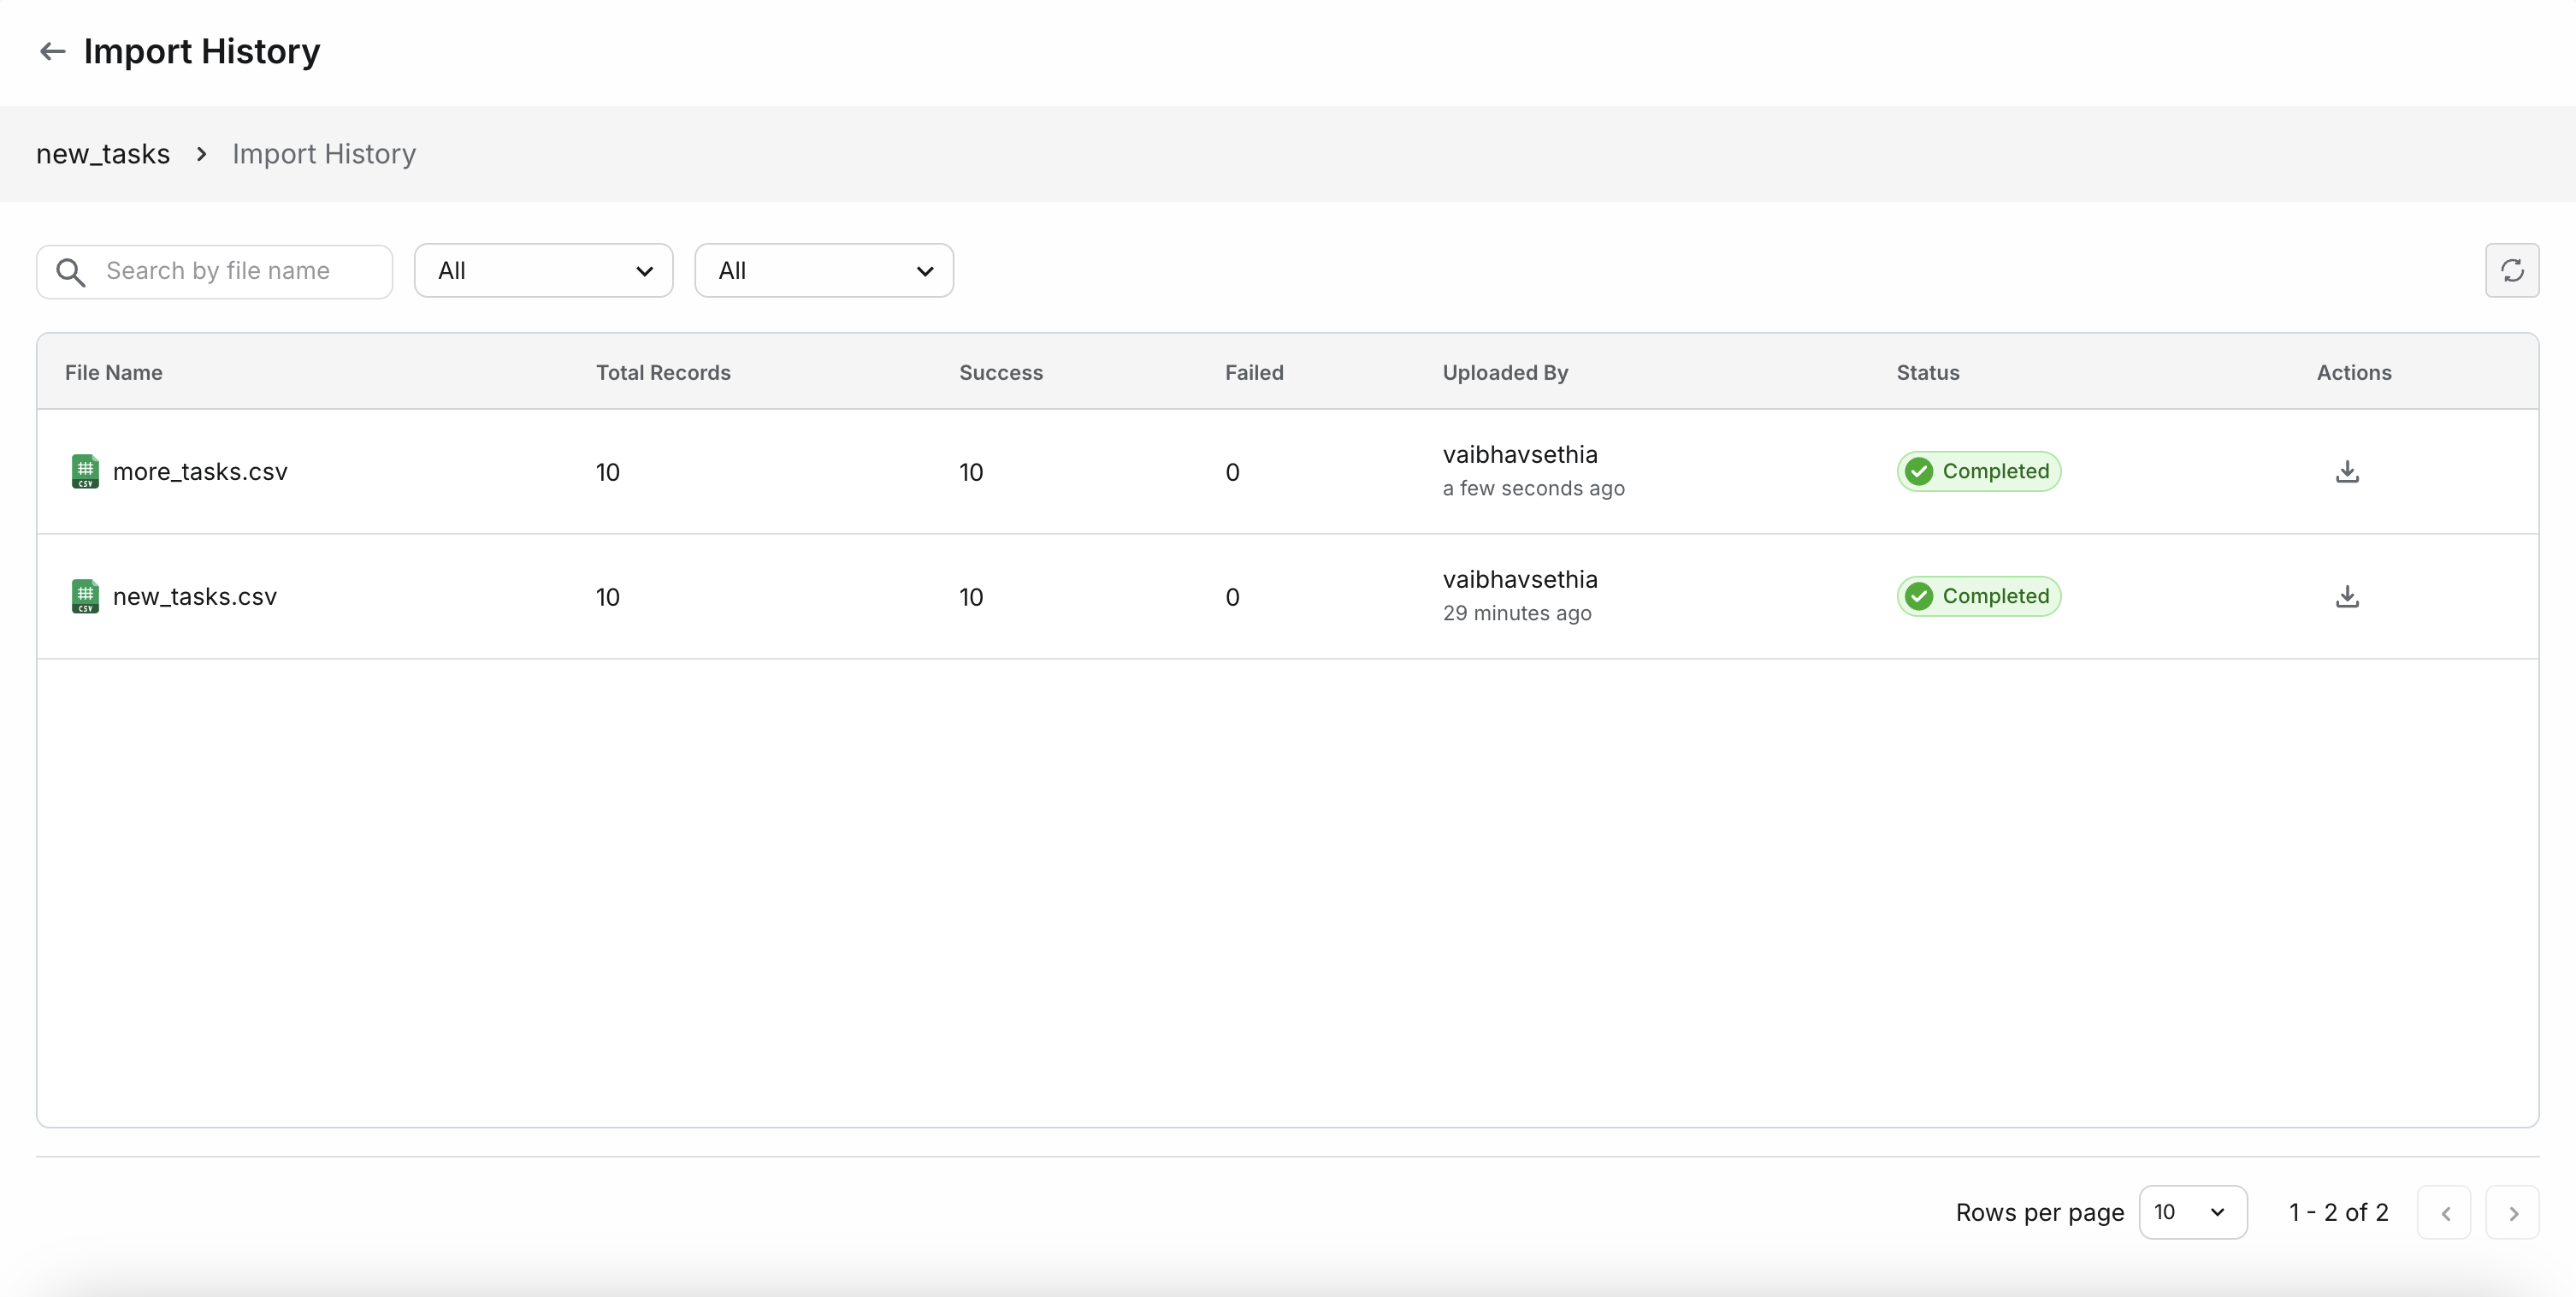
| Field | Description |
|---|---|
| File Name | Original name of the uploaded file |
| Status | One of: Pending, In Progress, Partially Completed, Completed, Failed |
| Total Rows | Number of rows detected in the file |
| Imported Rows | Number of rows successfully imported |
| Failed Rows | Number of rows skipped due to validation or parsing errors |
| Actions | 🔽 Download file, 📄 Download logs (if any) |
🧠 Tips & Best Practices
-
Importing large files? Ensure clean formatting to minimize failed rows.
-
Tables automatically manages the id, created_at, and updated_at columns. However, if your uploaded CSV or JSON file contains values for these fields, the system will map those values directly to the corresponding system columns. This allows you to import historical or external data with full fidelity.