Connect your GitHub
Deploy a serverless application directly from a repository in your GitHub account or organization. Boltic uses the Boltic GitHub App so you can select a repo, branch, and runtime without copying code manually.
You need a Fynd Boltic account and access to the GitHub account or organization that owns the repository.
How it works
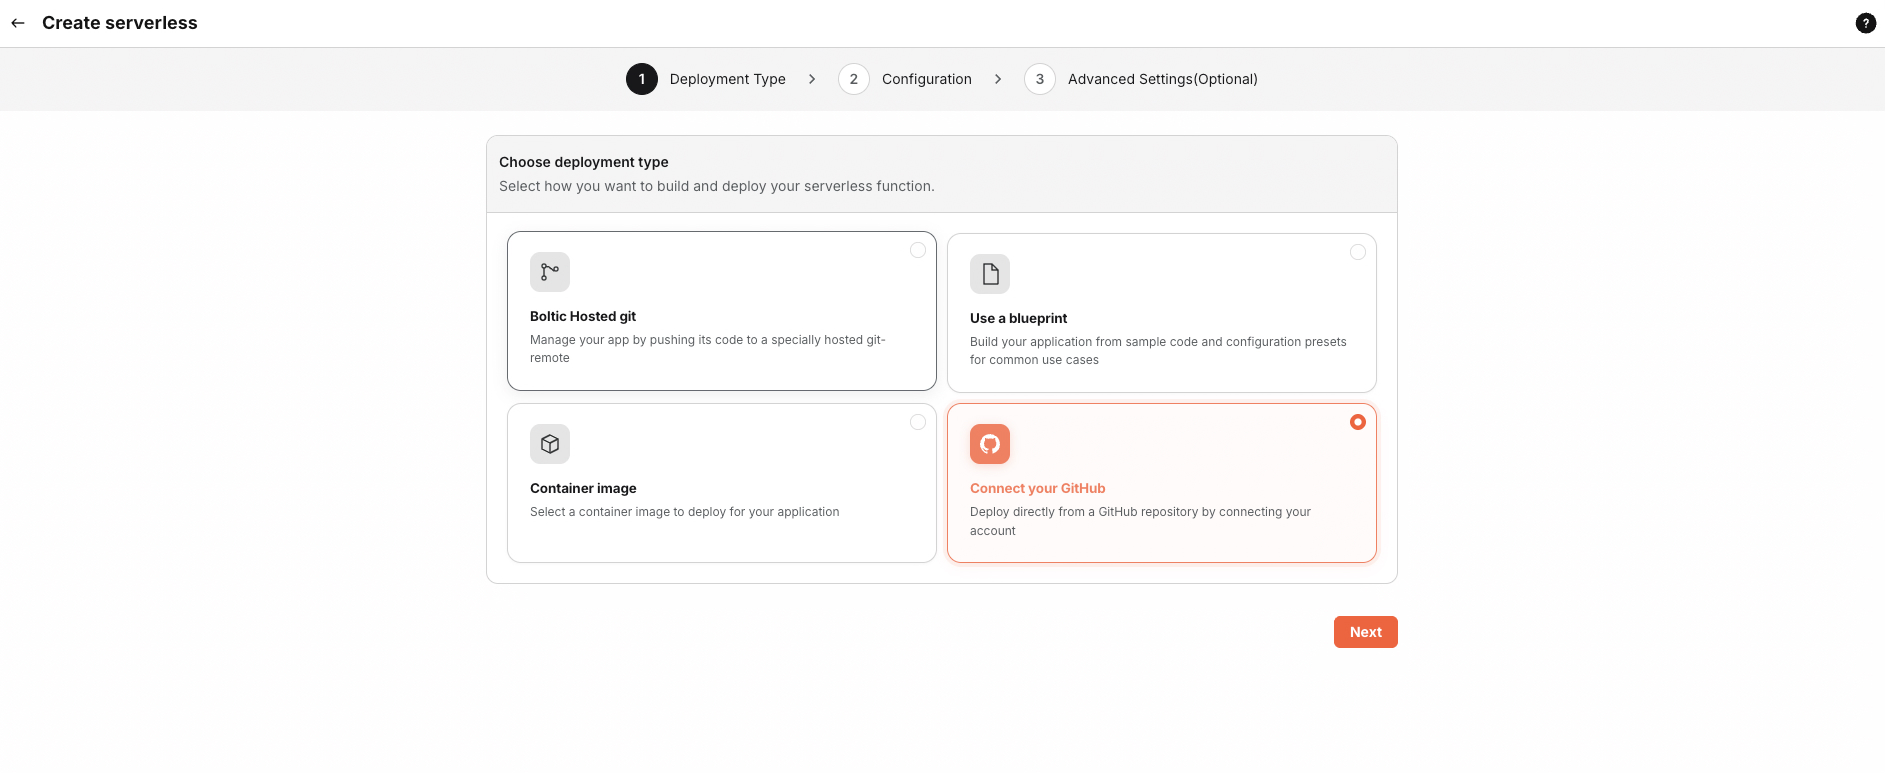
- When you create a serverless app, choose the Connect your GitHub runtime option (alongside Hosted Git, blueprint, and container image).
- In the Import Repository section, complete the flow in order when you are new to Boltic: first authorize your GitHub user with Boltic, then install the Boltic GitHub App for the accounts or organizations you want (each step opens a GitHub popup).
- Use Select account and Select repository to choose where to deploy from, then set Branch to deploy, Language, and Project name.
- Finish creating the app in the wizard. Builds run from the connected repo and branch.
For navigation (Compute → Serverless → Create serverless), see Create an app (console).
Step 1 — Open Create serverless and choose GitHub
-
Go to Compute → Serverless → Create serverless.
-
Under the runtime options, select Connect your GitHub (description: deploy directly from a GitHub repository by connecting your account).
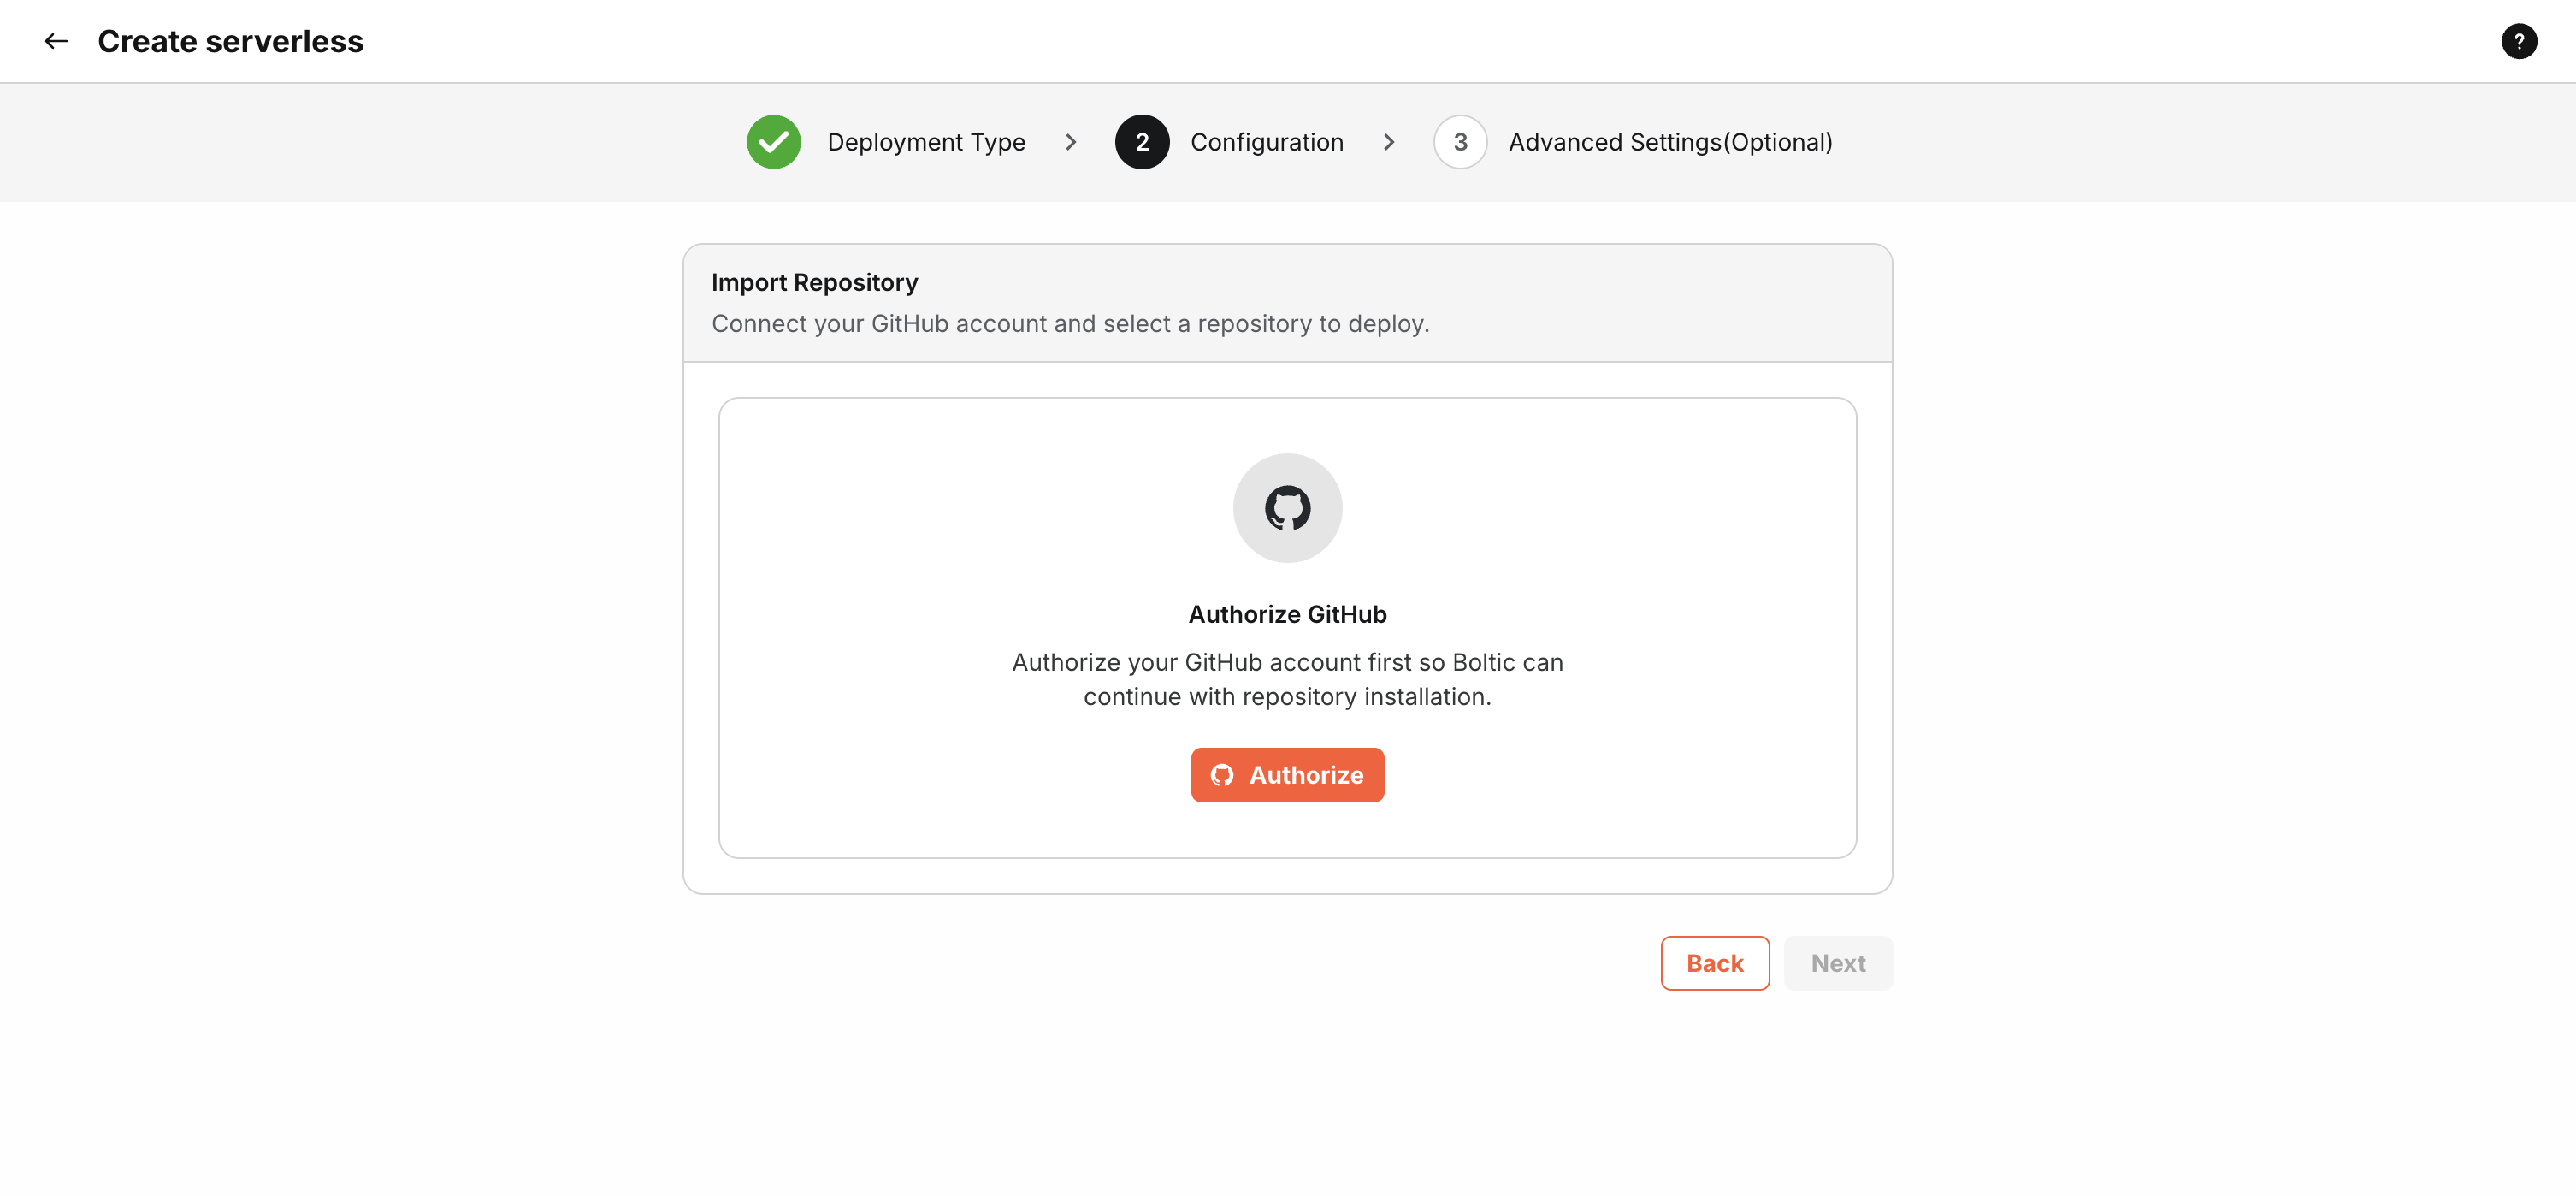
Step 2 — Authorize your GitHub account
The Import Repository panel appears after you pick the GitHub runtime. For many users, the first action is Authorize GitHub:
-
Click Authorize GitHub.
-
A popup opens on GitHub so you can authorize your user account with Boltic (OAuth).
-
Finish the prompts on GitHub, then return to the console. The popup closes when authorization succeeds.
Authorization must open in a popup. If nothing happens, allow popups for the Boltic console site and try Authorize GitHub again.
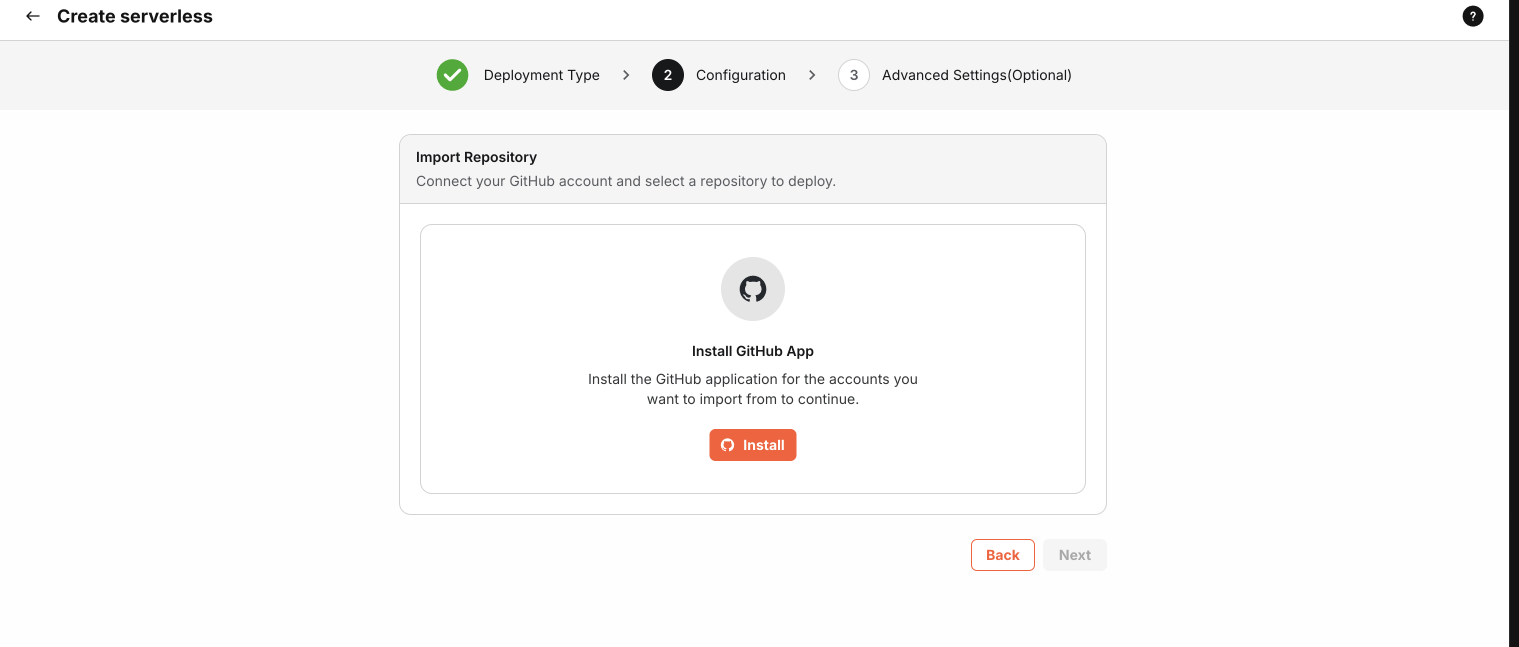
Step 3 — Install the Boltic GitHub App
After your account is authorized, Boltic shows Install GitHub App when the app still needs to be installed for the organizations or accounts you use:
-
Click Install GitHub App (or the equivalent primary button shown in the panel).
-
A popup opens on GitHub so you can install the Boltic GitHub App for your user or for specific organizations.
-
Choose where to install, approve access, then return to the console. The popup closes when installation succeeds.
If you already completed both steps in a previous session, the panel may skip straight to account and repository selection.
Install flows must open in a popup. Allow popups for the Boltic console site if the window does not appear.
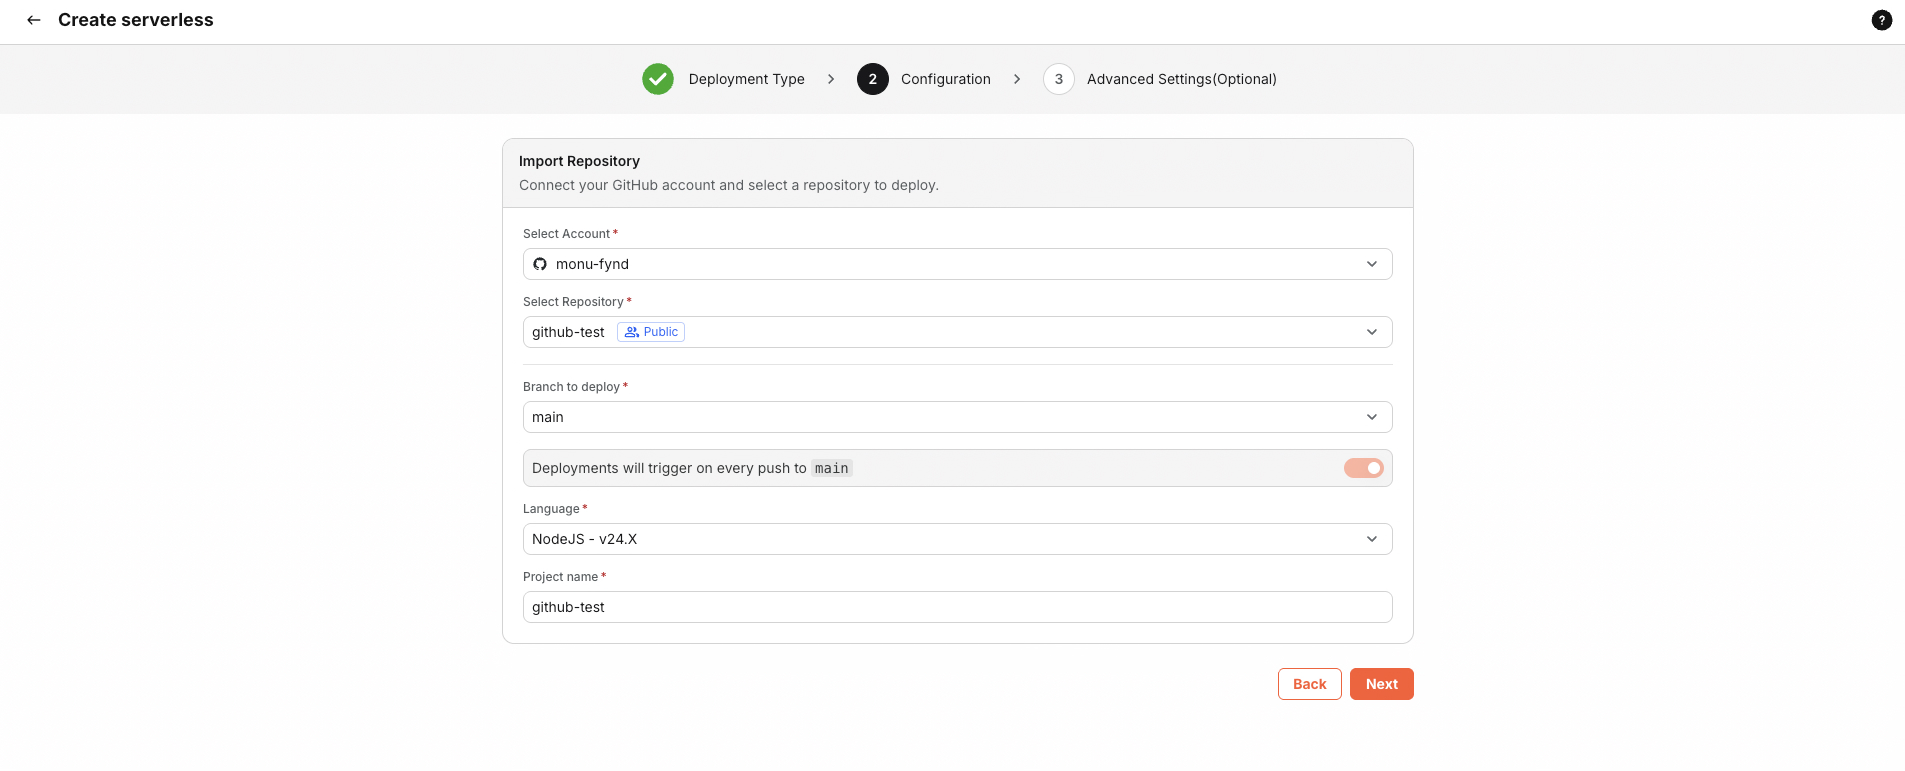
Step 4 — Select account, repository, and search
After GitHub is connected, the same Import Repository area shows:
-
Select account — Pick the GitHub user or organization whose repositories you want to use. Choose Add GitHub Account in this dropdown to link another login; a popup opens on GitHub to authorize or install as needed.
-
Select repository — Search with the field above the list (search runs after you pause typing). Pick a repository from the dropdown.
Only repositories the GitHub App can access appear. If a repo is missing, use Adjust GitHub App permissions at the bottom of the repository panel (opens GitHub) to grant access to more repositories or organizations.
 |
|---|
Step 5 — Branch, language, project name, and deployments
After you choose a repository, configure:
- Branch to deploy — The branch Boltic builds and deploys from (for example
mainordevelop). - Deployments will trigger on every push to … — A toggle controls whether deployments run on pushes to that branch (you can adjust this during create or later in settings where supported).
- Language — Runtime language for your project (drives build and resource defaults), when shown.
- Project name — The serverless app name in Boltic (often prefilled from the repository name; you can change it).
Complete the remaining steps in the create wizard to submit and create the application.
 |
|---|
Organizations and admin approval
Some GitHub organizations restrict which apps members can install. If GitHub returns admin approval required, an organization admin must approve the Boltic GitHub App before you can connect. After approval, try Authorize GitHub or Add GitHub Account again.
You can also manage linked GitHub accounts from Settings (for example Git accounts) when you need to reconnect or review installations.
Troubleshooting
| Issue | What to try |
|---|---|
| No repositories listed | Use Adjust GitHub App permissions and grant access to the right repos or orgs on GitHub. |
| Repository still missing | Confirm you picked the correct GitHub account in Select account; use Add GitHub Account if the repo lives under a different login. |
| Popup blocked | Allow popups for the console origin and retry authorization or install. |
| Wrong branch | Open Branch to deploy and choose the branch you want Boltic to build from. |
| Only “Authorize” or only “Install” appears | That is expected: Boltic shows the next required step for your account (user authorization vs. app install). You may need Authorize first, then Install, in separate steps. |
What’s next?
- Create an app (console) — Full walkthrough of builds, URL, monitoring, and testing.
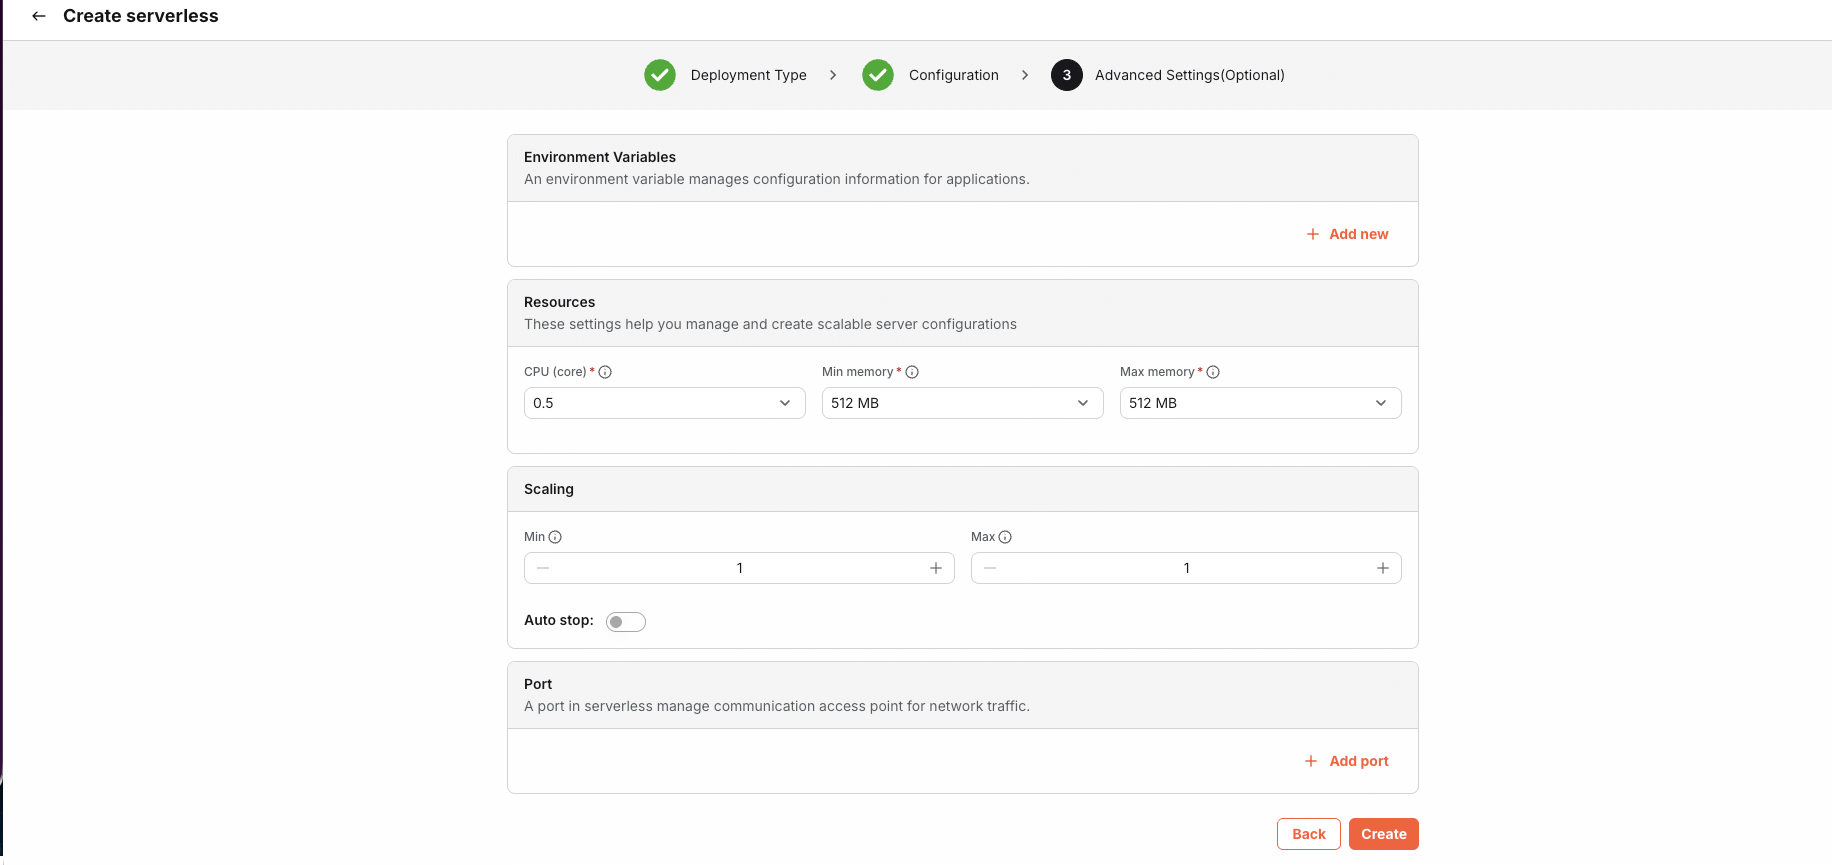
- Application configuration — Ports, scaling, and environment variables.