Create an app
Learn how to create an app using the all new Fynd Boltic console.
Before you begin, make sure you have a Fynd Boltic account. If you don't have one, you can sign up for a free account on Fynd Boltic.
-
Log in to the Fynd Boltic console.
-
Select the appropriate organization to which you want to add the app. If you don't have an organization, you will be prompted to create one.
-
Head to the
Computesection in the sidebar. -
Click on the
Serverlesstab.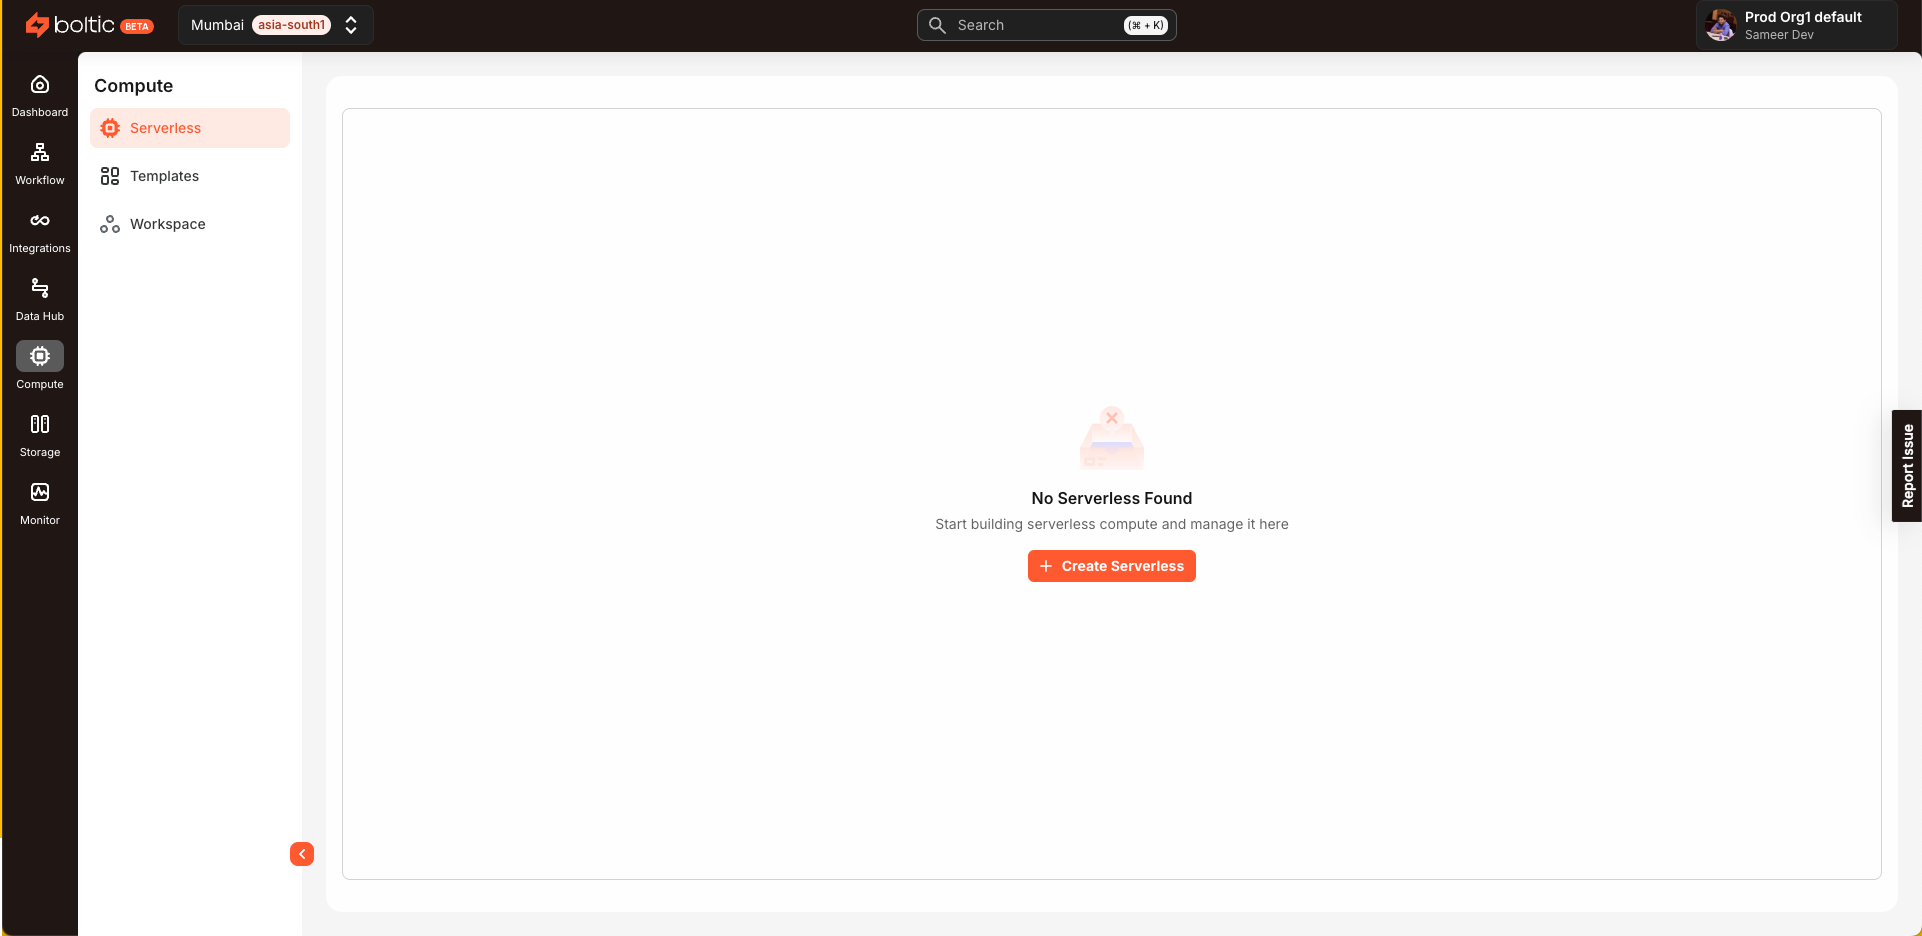
-
Click
Create serverless. -
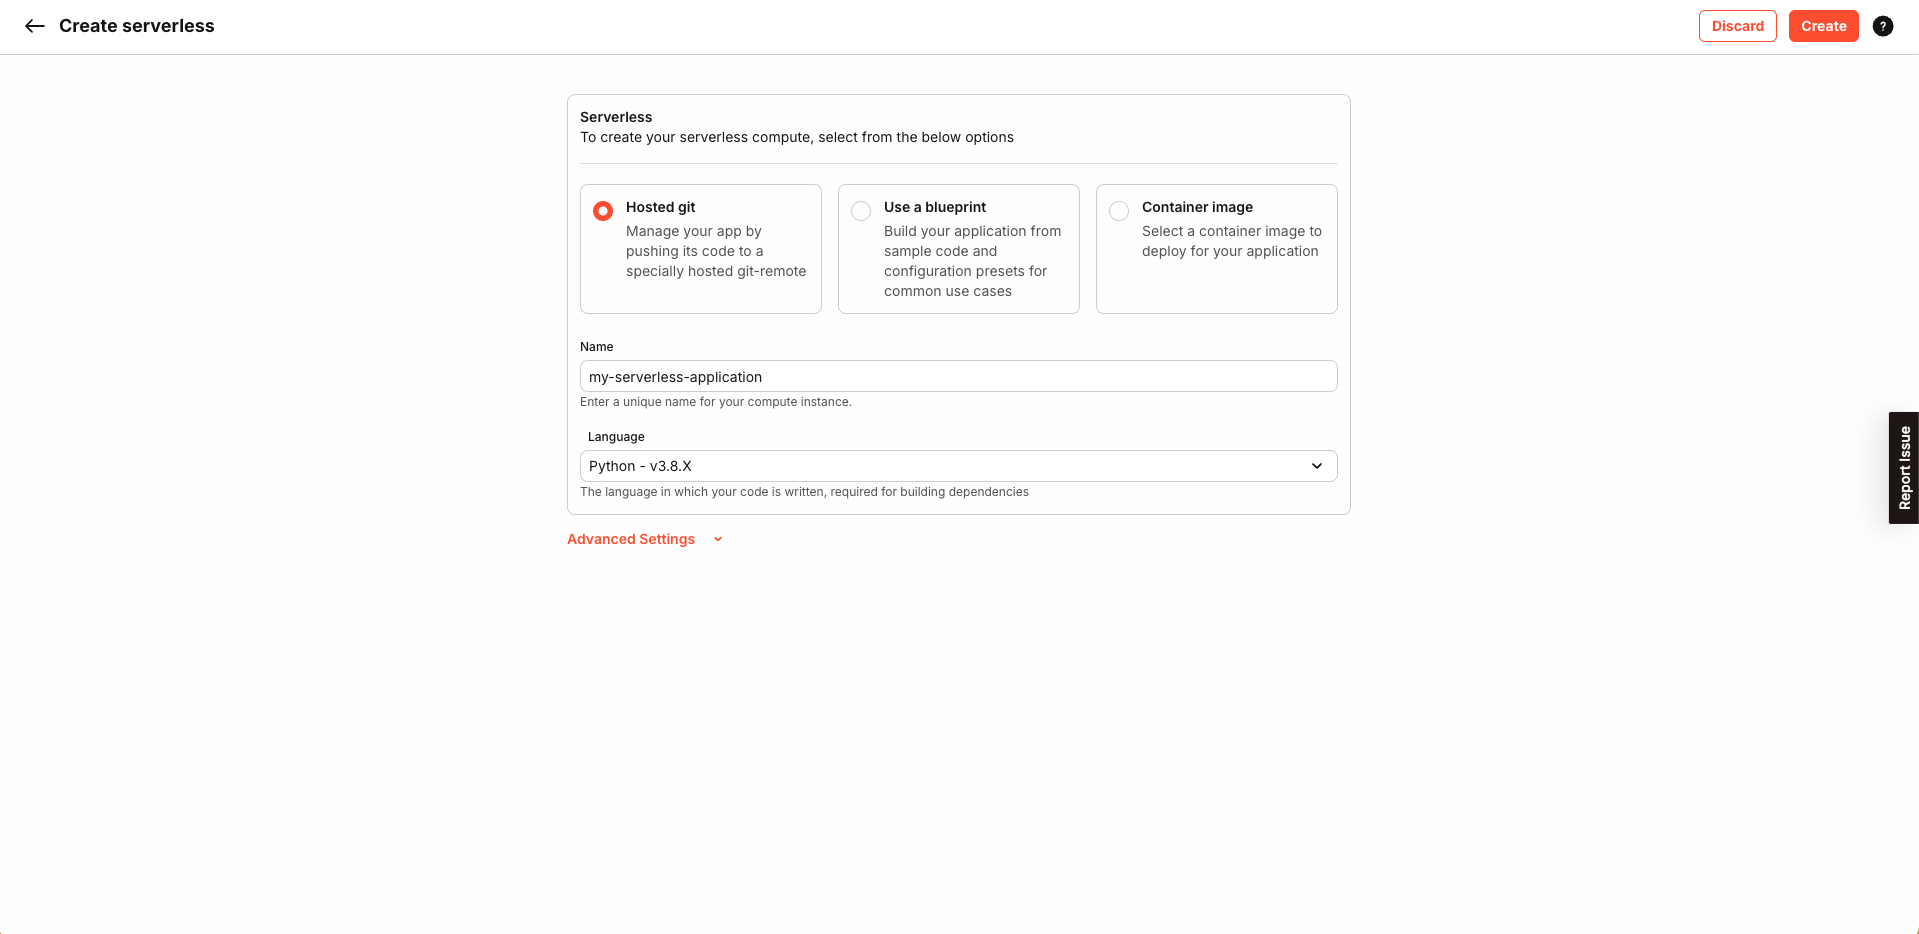
There are multiple ways to create a serverless application as shown below.
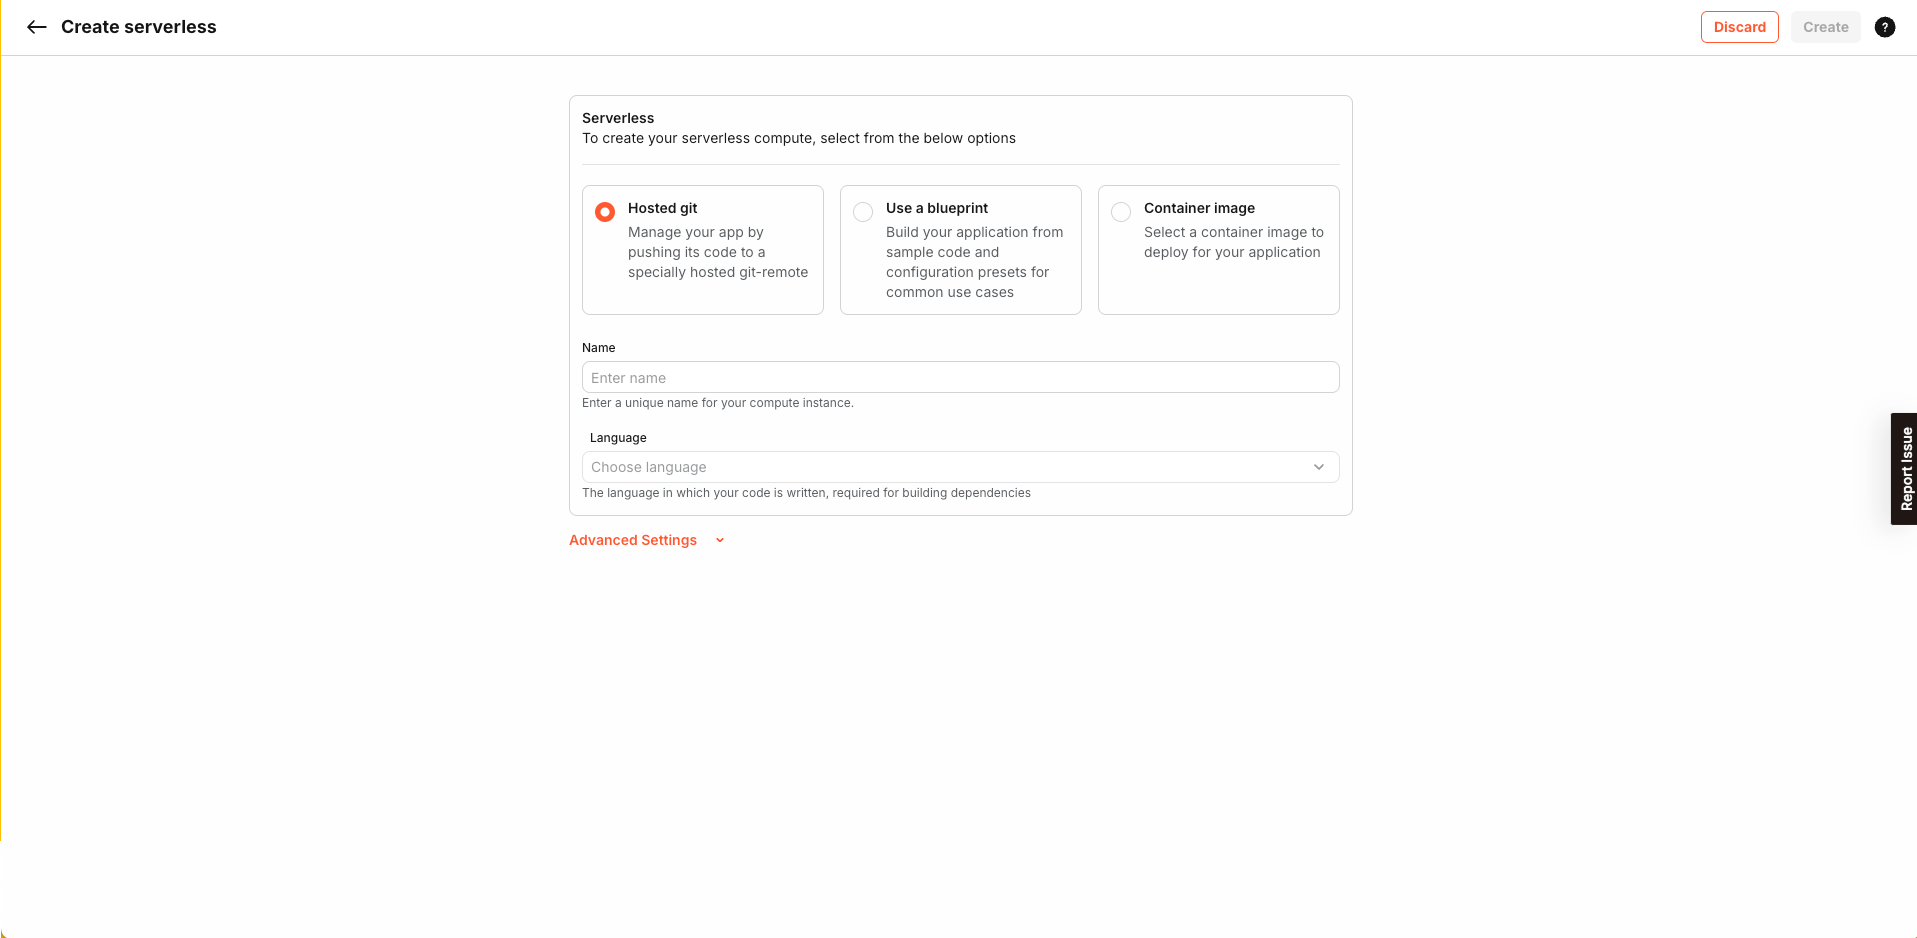
Hosted Git
-
This section allows you to create a serverless application by hosting it on a Git repository provided by Fynd Boltic.
-
You can connect any of your existing repositories to Fynd Boltic by adding a new origin of the hosted repository to it. The instructions to add a new origin are provided in the console.
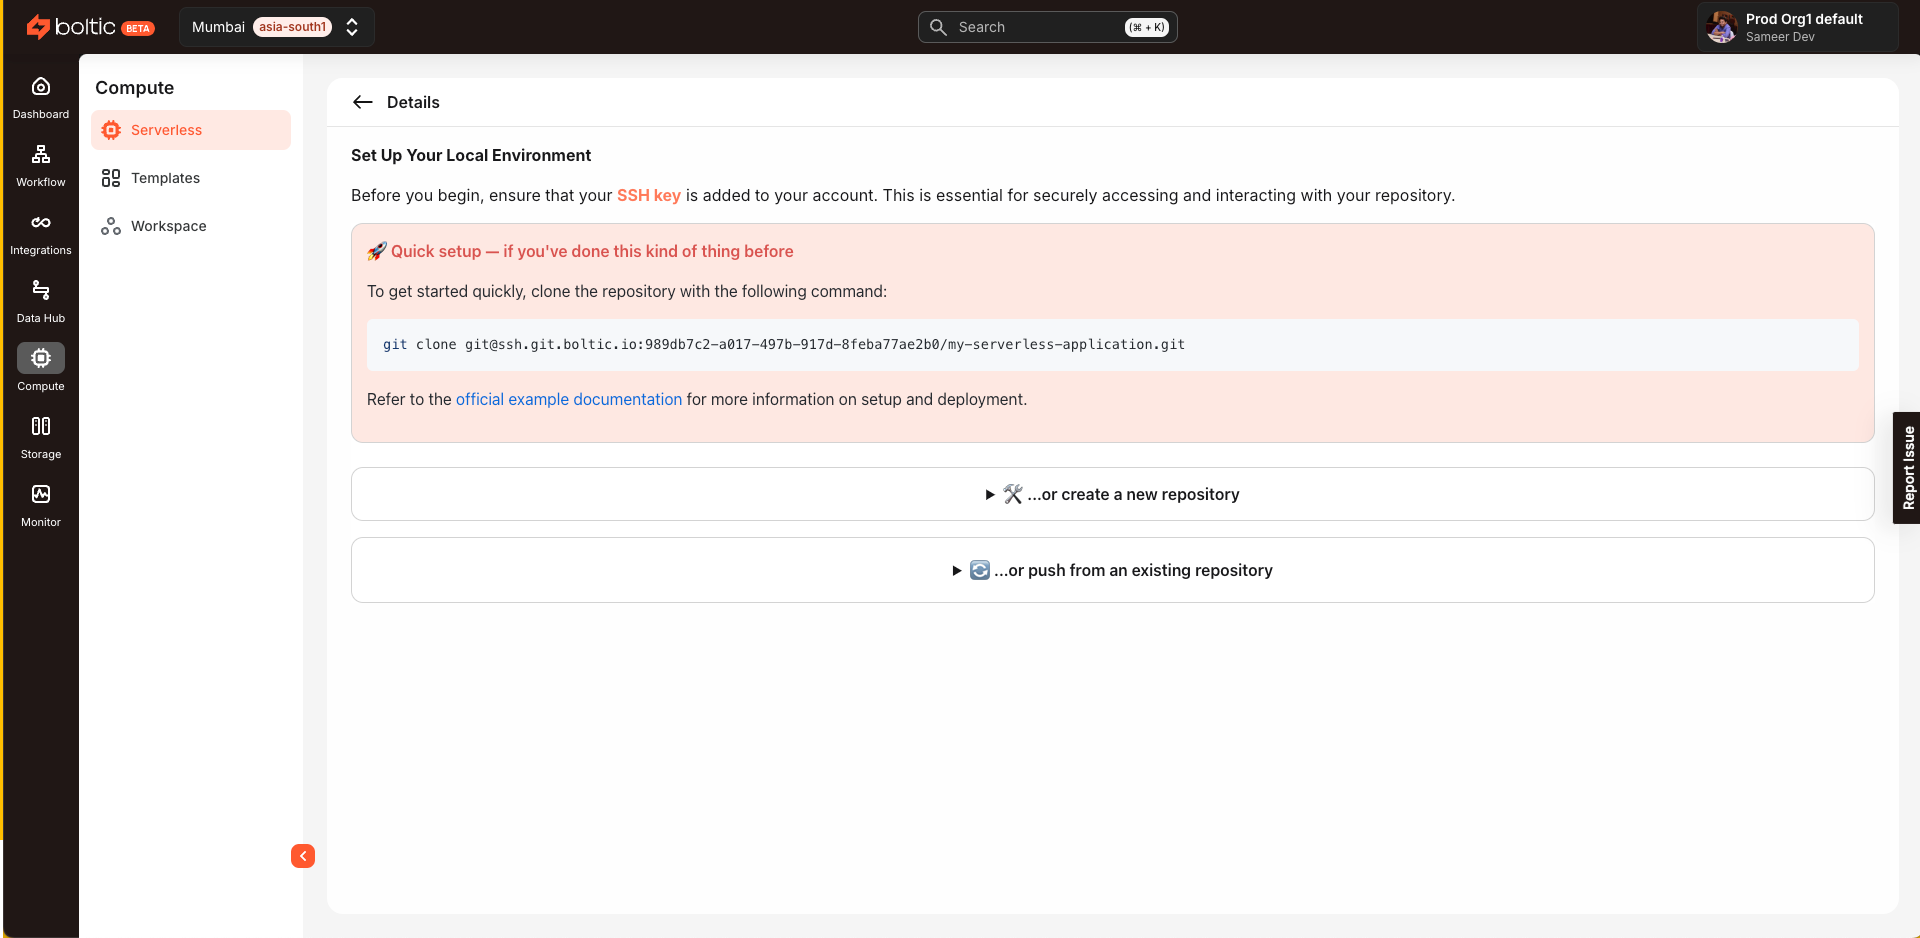
-
Builds are triggered automatically when you push code to the hosted repository
:::info[Note] - The application will be in Draft state until you have pushed your code to the hosted repository powering the application - Make sure you have added an SSH key to your Fynd Boltic account. You can find the instructions on how to manage keys in the SSH Keys section. :::
- Hosted Git is the recommended way to create a serverless application as it provides a seamless experience.
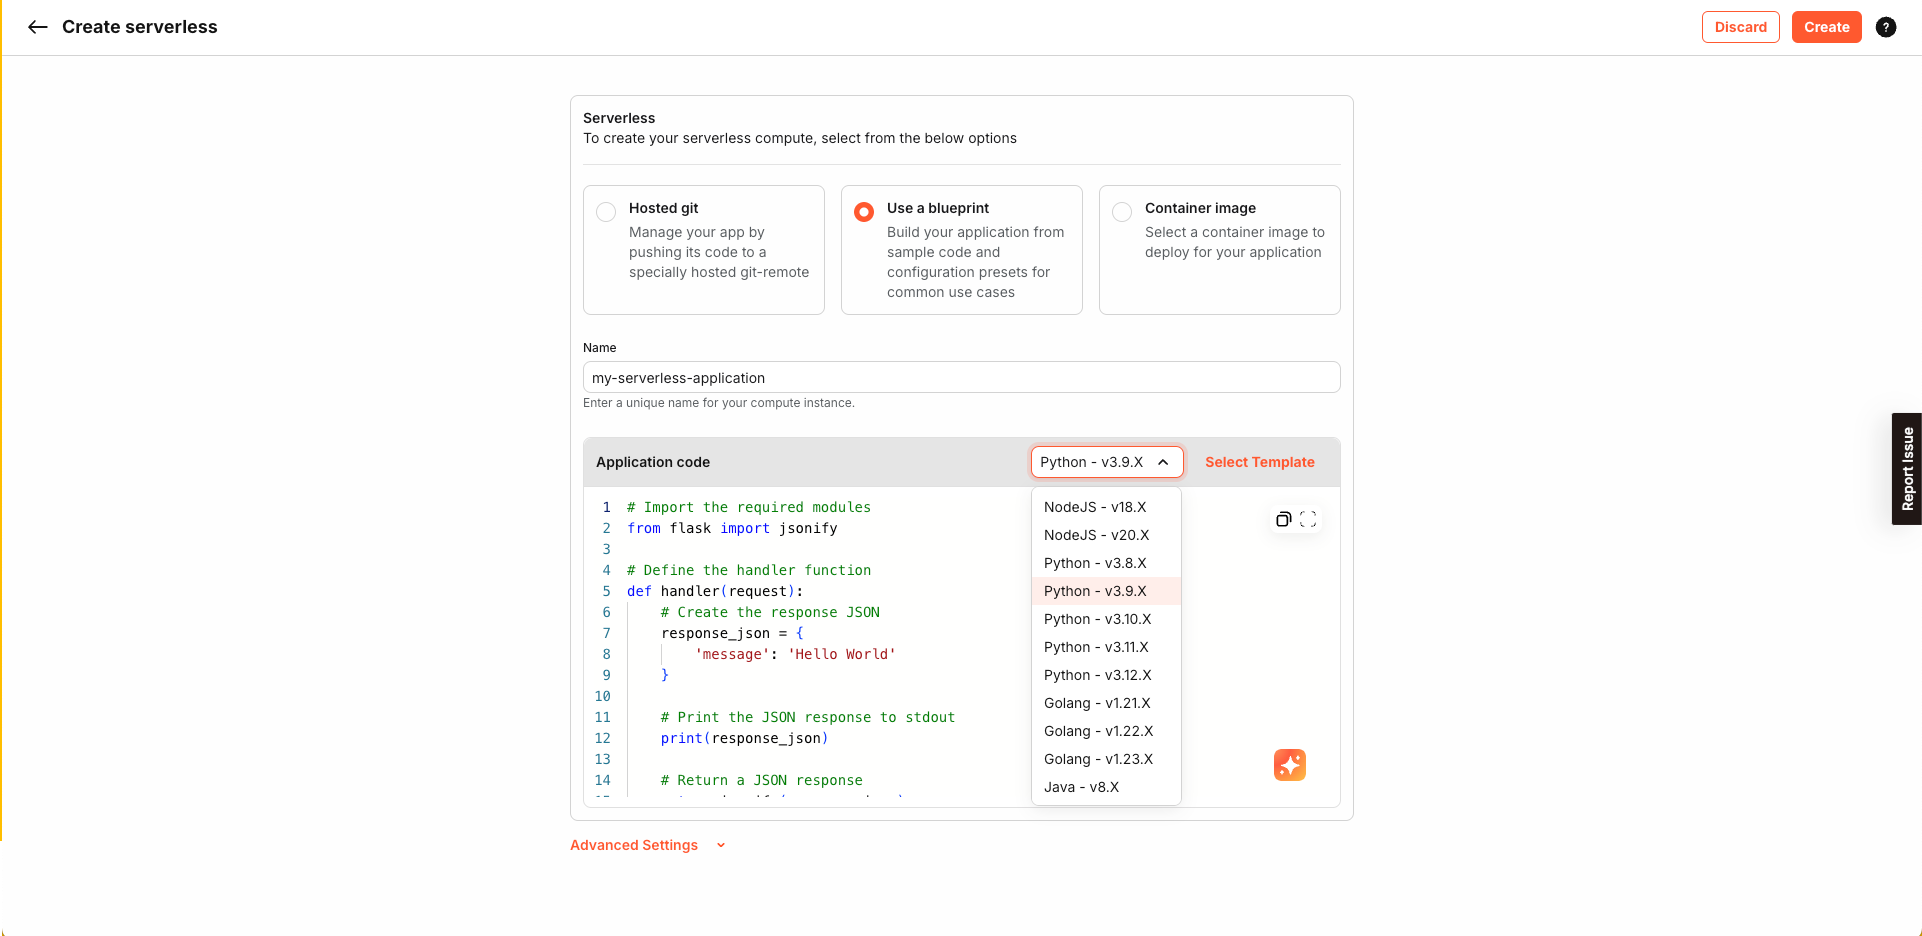
Use a blueprint
-
Blueprints are pre-configured templates that you can use to create your serverless application. You can choose from a variety of blueprints based on your requirements.
-
Once selected, you can modify the code as per your requirements.
-
This method is useful when you want to deploy small functions without much hassle and development overhead.
-
Builds are triggered automatically when you update the code in the console
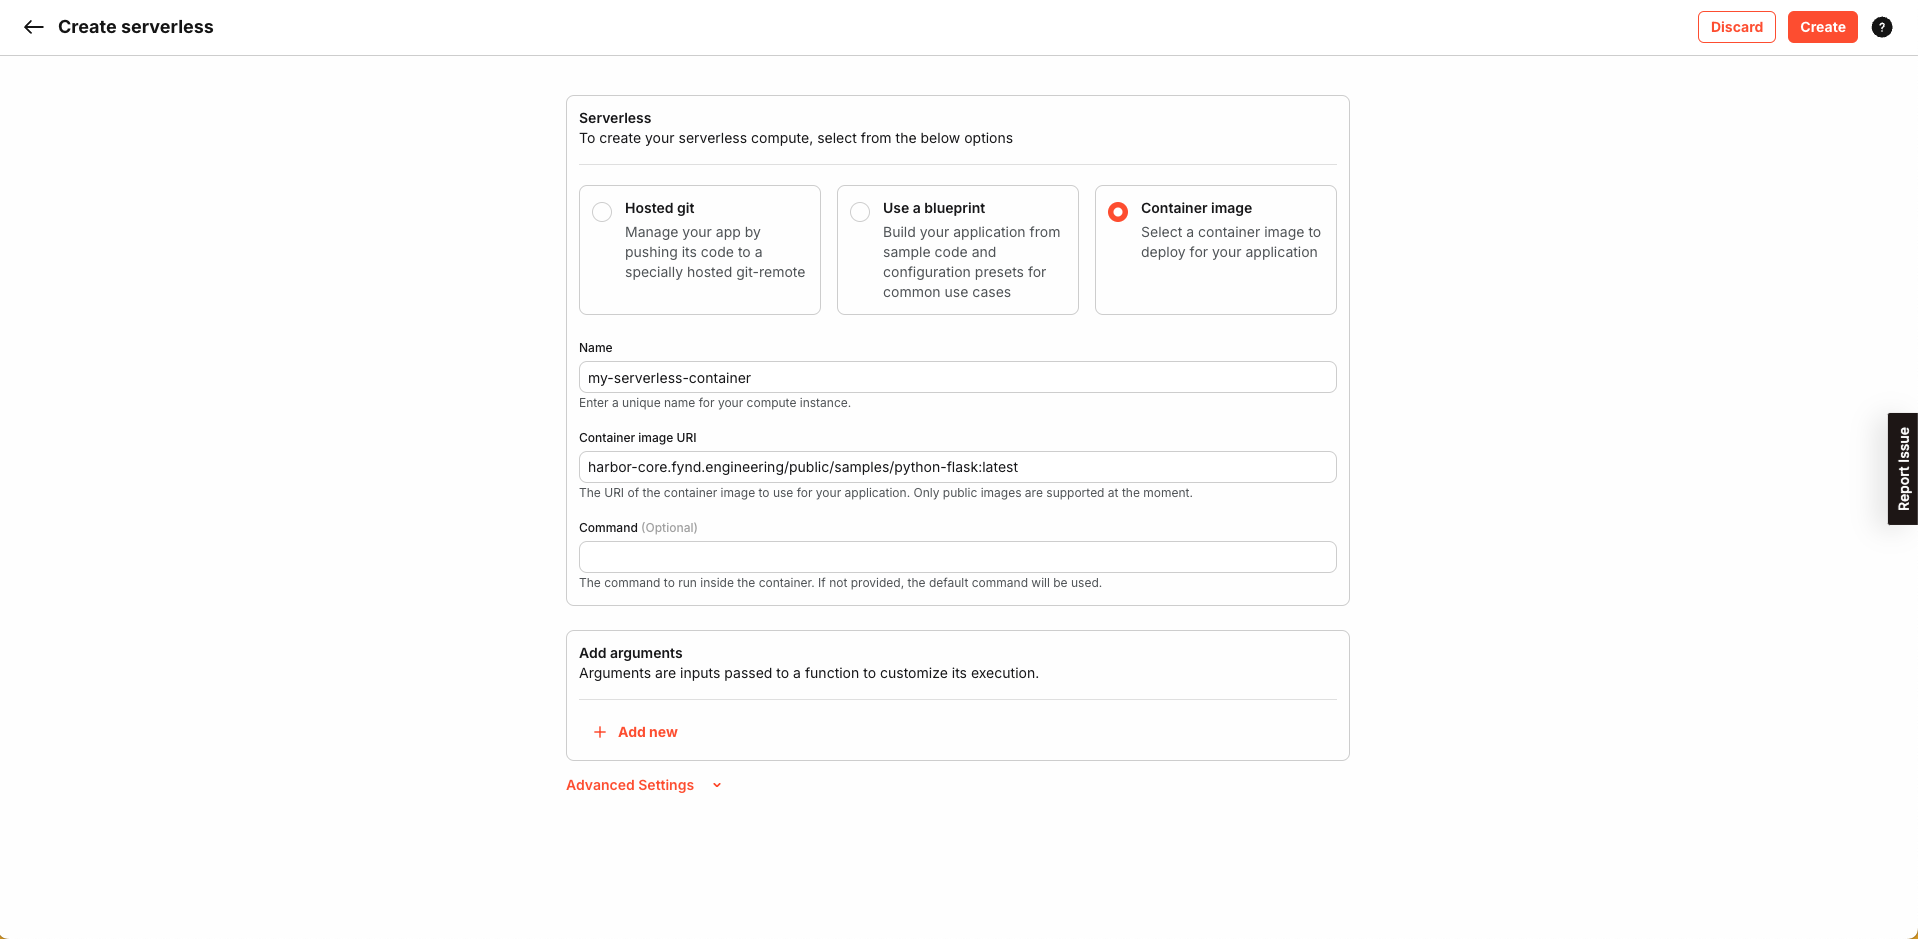
Container image
:::warning[Note] - Container image currently supports only public repositories and images. - Support for private repositories and images will be added soon. :::
-
If you already have a Docker image in a repository and just want to deploy that, you can skip the building process and go straight to the container image option.
Connect your GitHub
- Deploy from a repository in your GitHub account or organization using the Boltic GitHub App.
- On Create serverless, choose Connect your GitHub, then use the Import Repository section to authorize or install the app, pick Select account and Select repository, and set branch, language, and project name.
- For a full step-by-step that matches the current console (including popups, Add GitHub Account, and permissions), see Connect your GitHub for serverless.
-
-
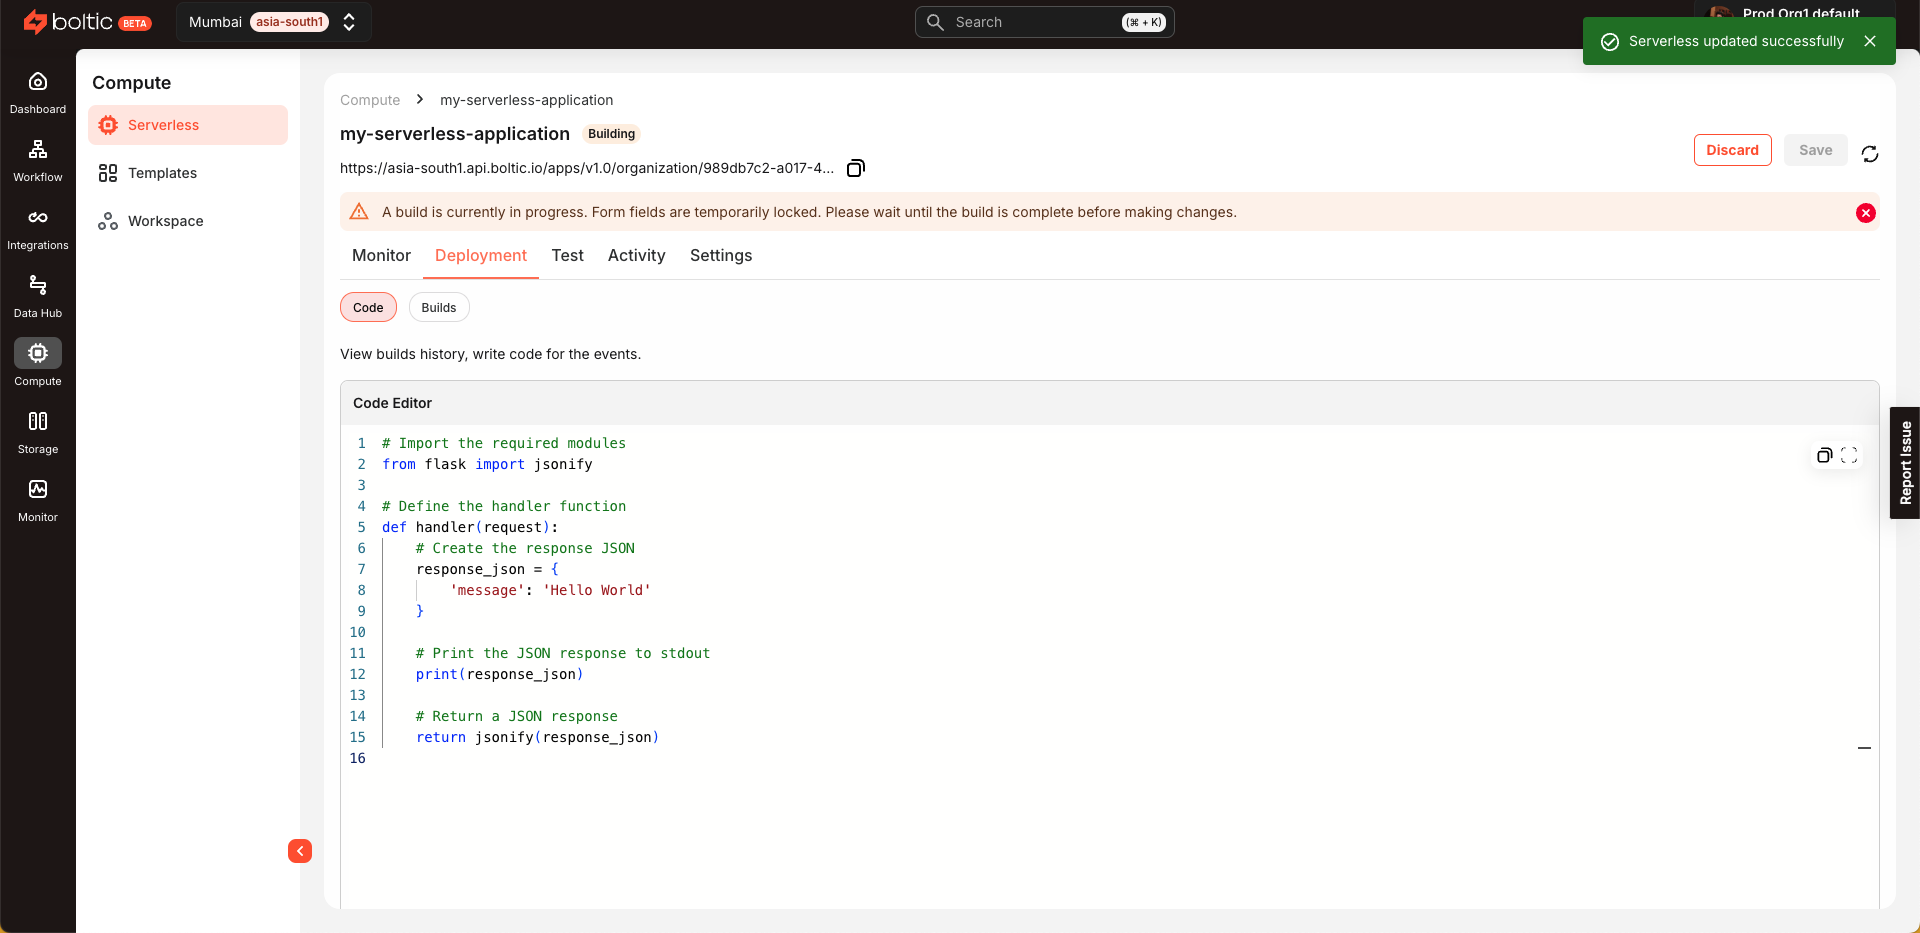
Once you have created the application with all the required details, the status will change to
Building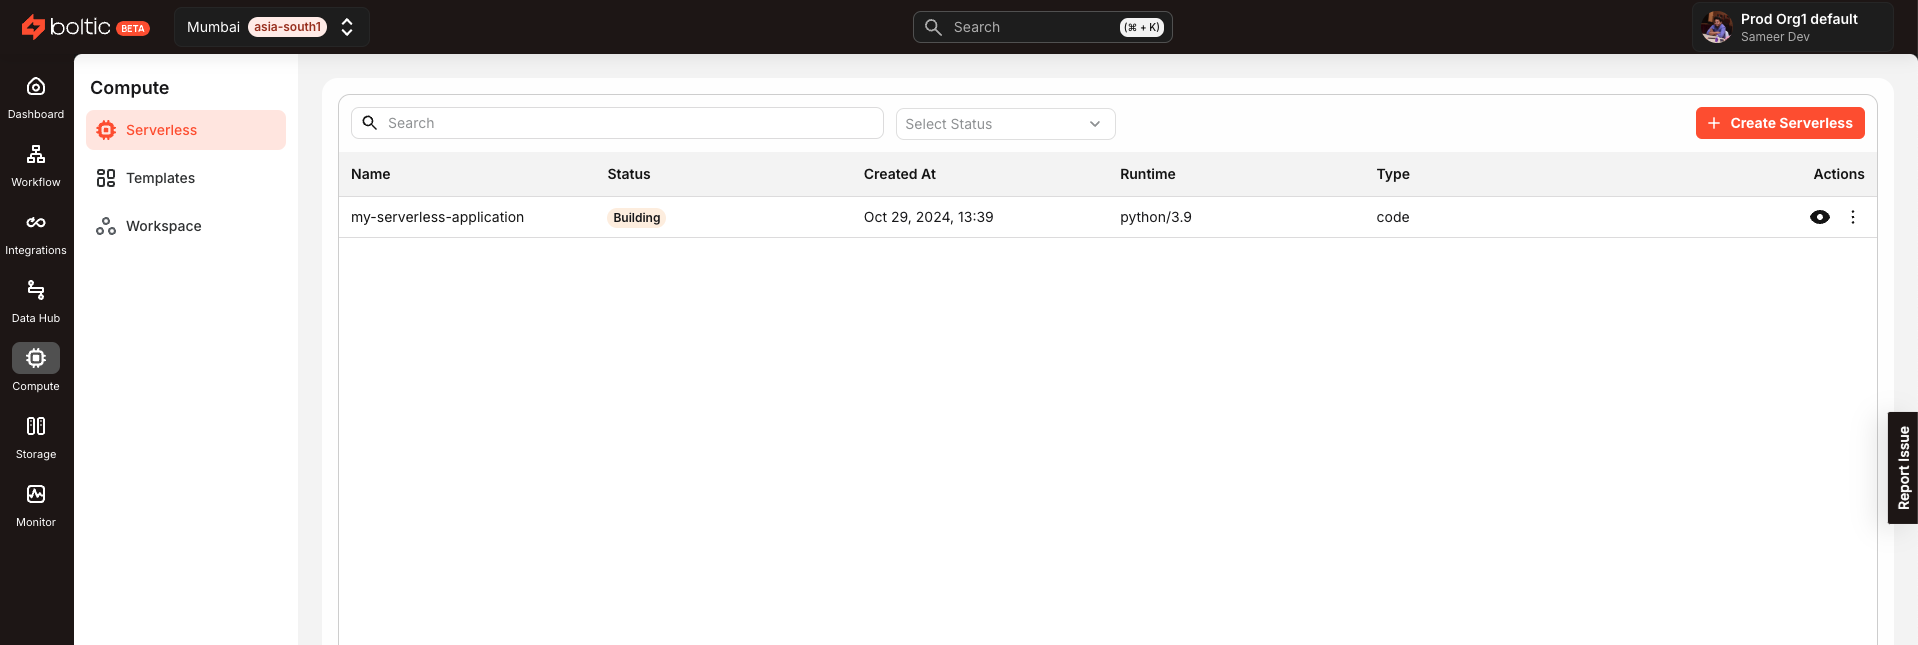
Builds
-
You can click on any application and go to the
Buildssection to see the build details and logs.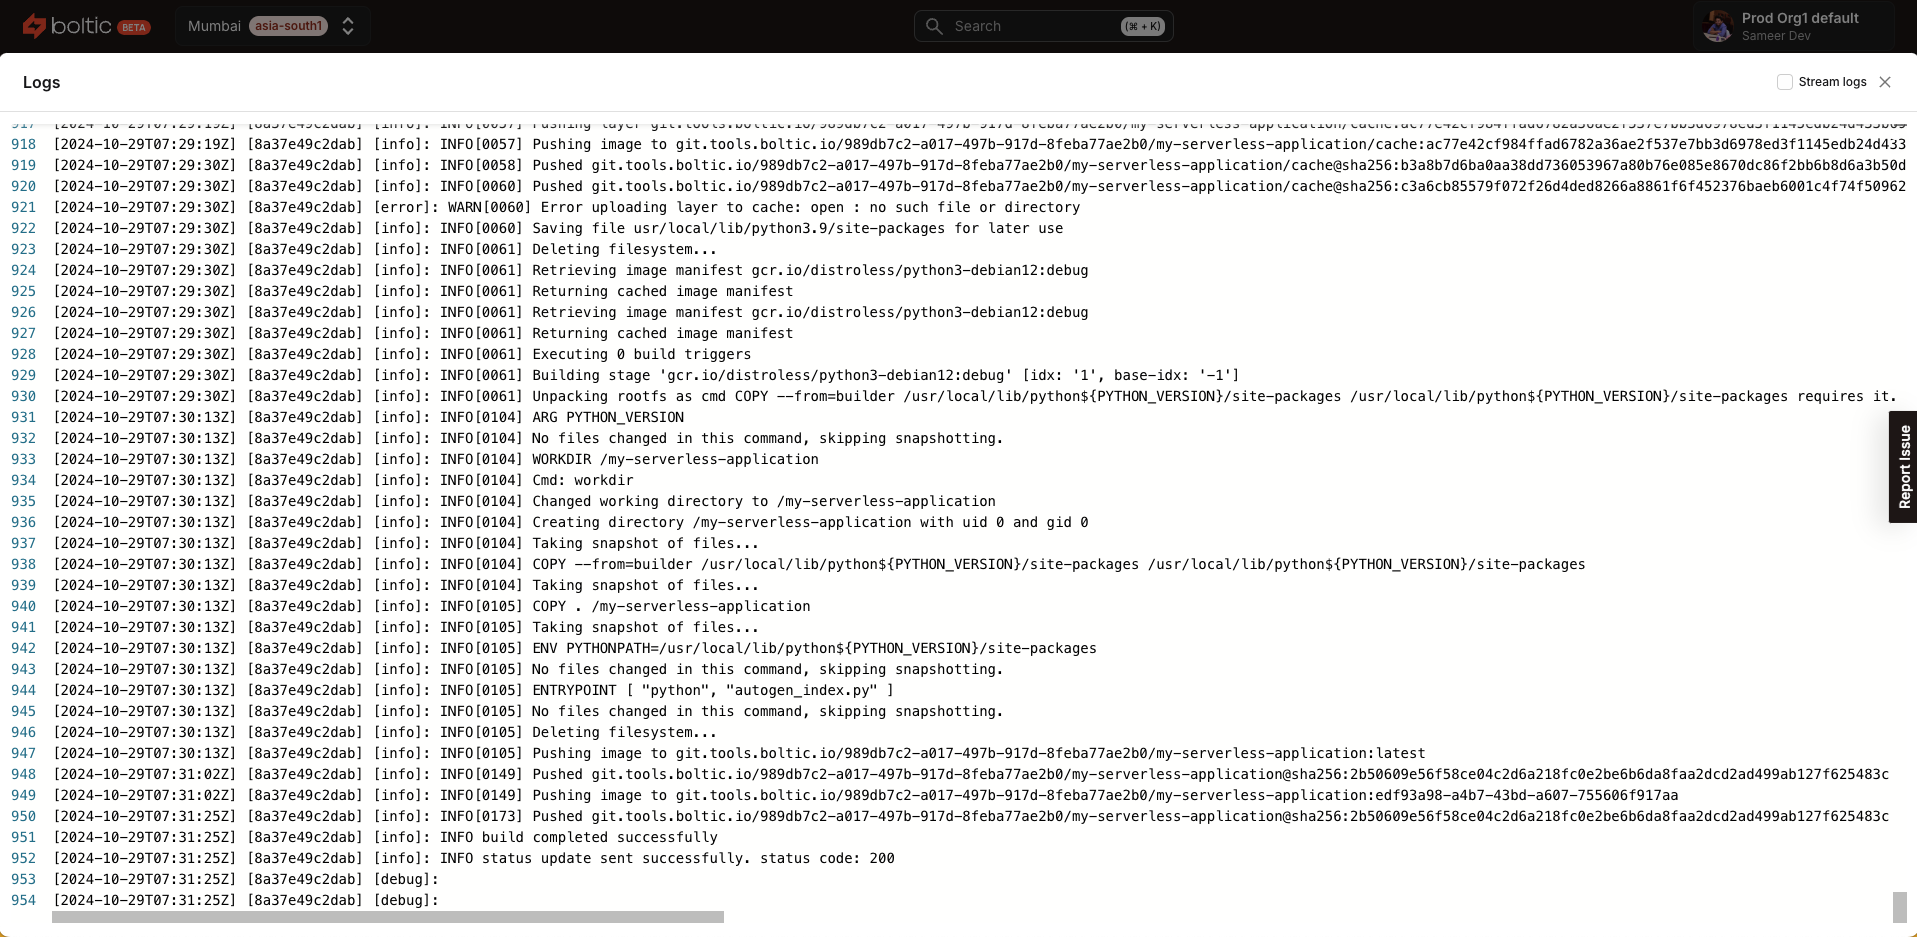
-
Once the build is successful, the status will change to
Running.
Public URL
-
The created application will be accessible through the provided URL in the Fynd Boltic console. You can copy the URL by clicking on the
Copy URLbutton.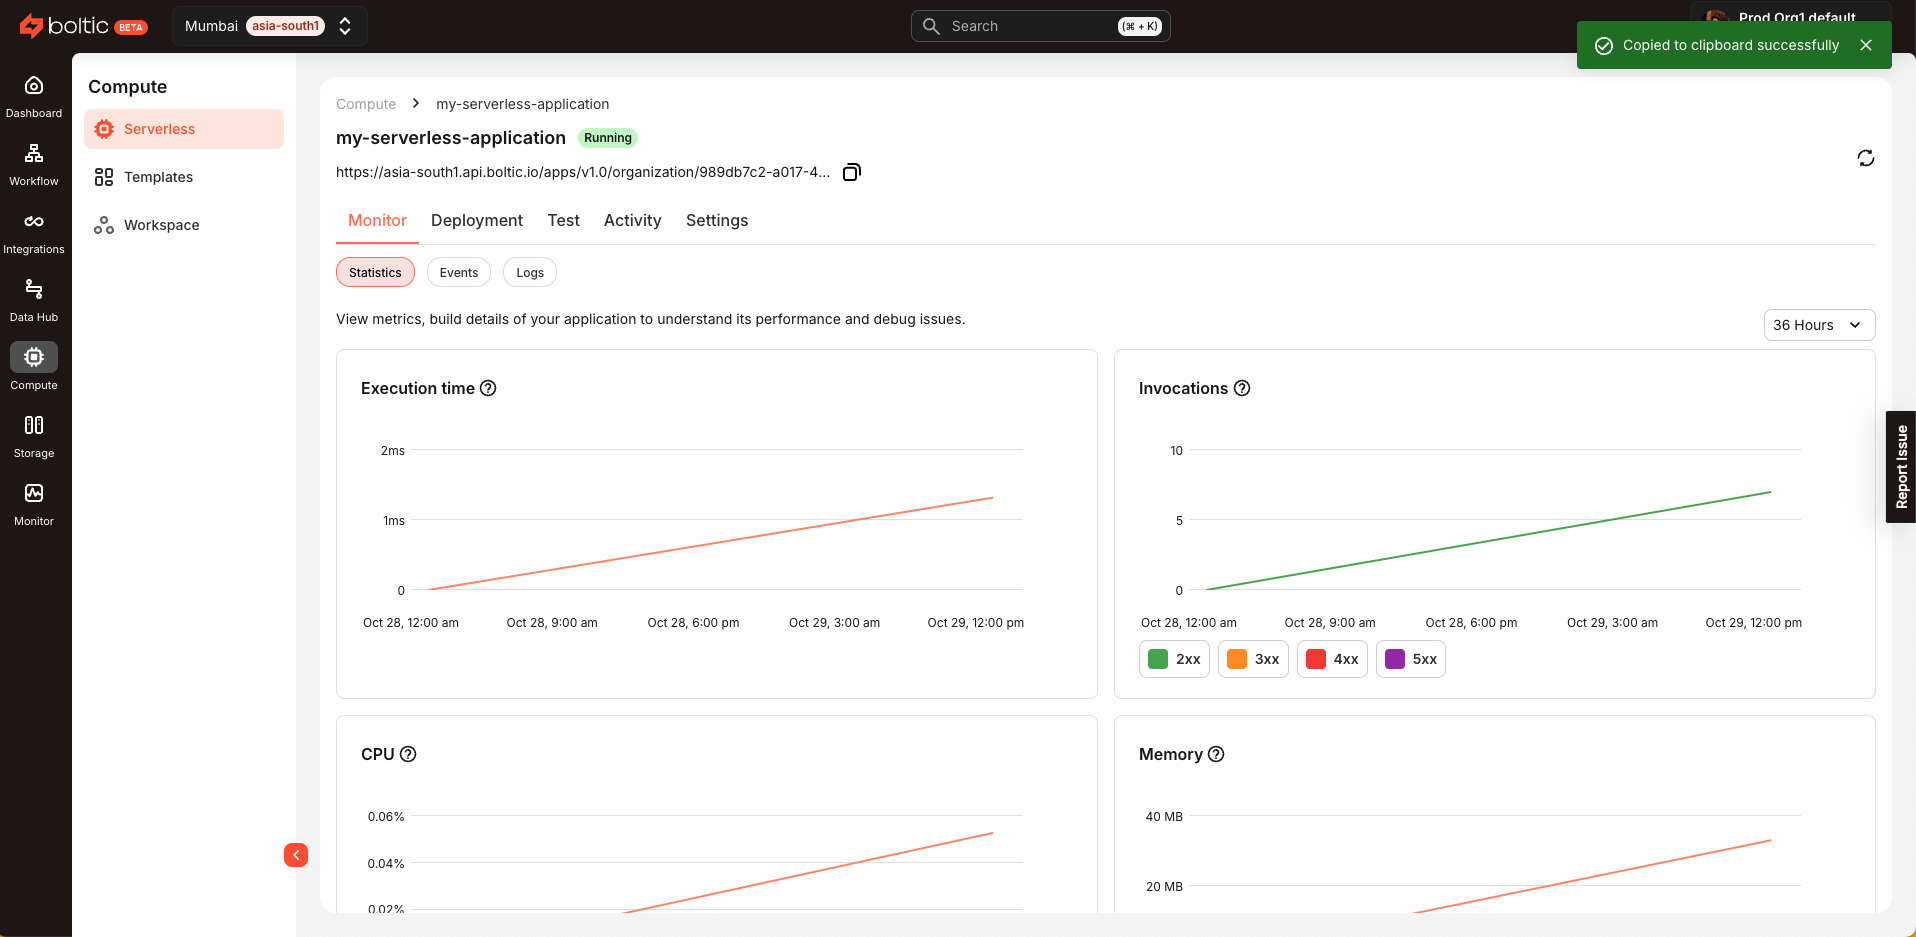
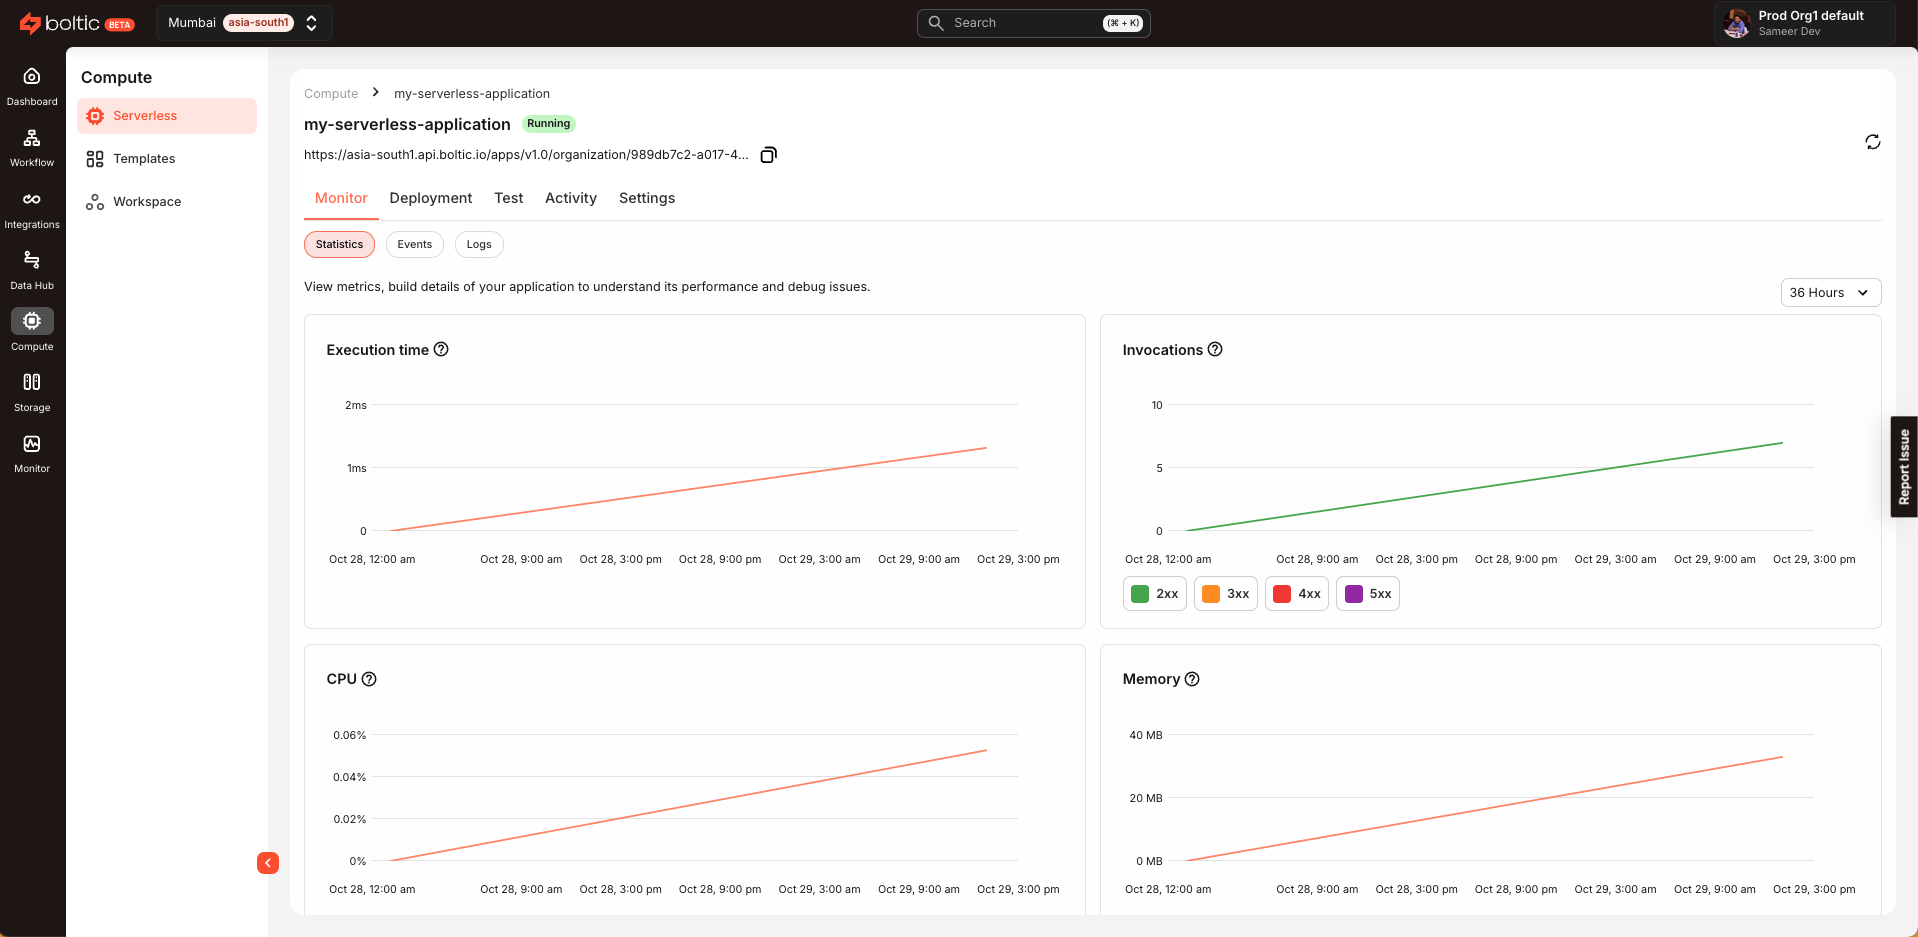
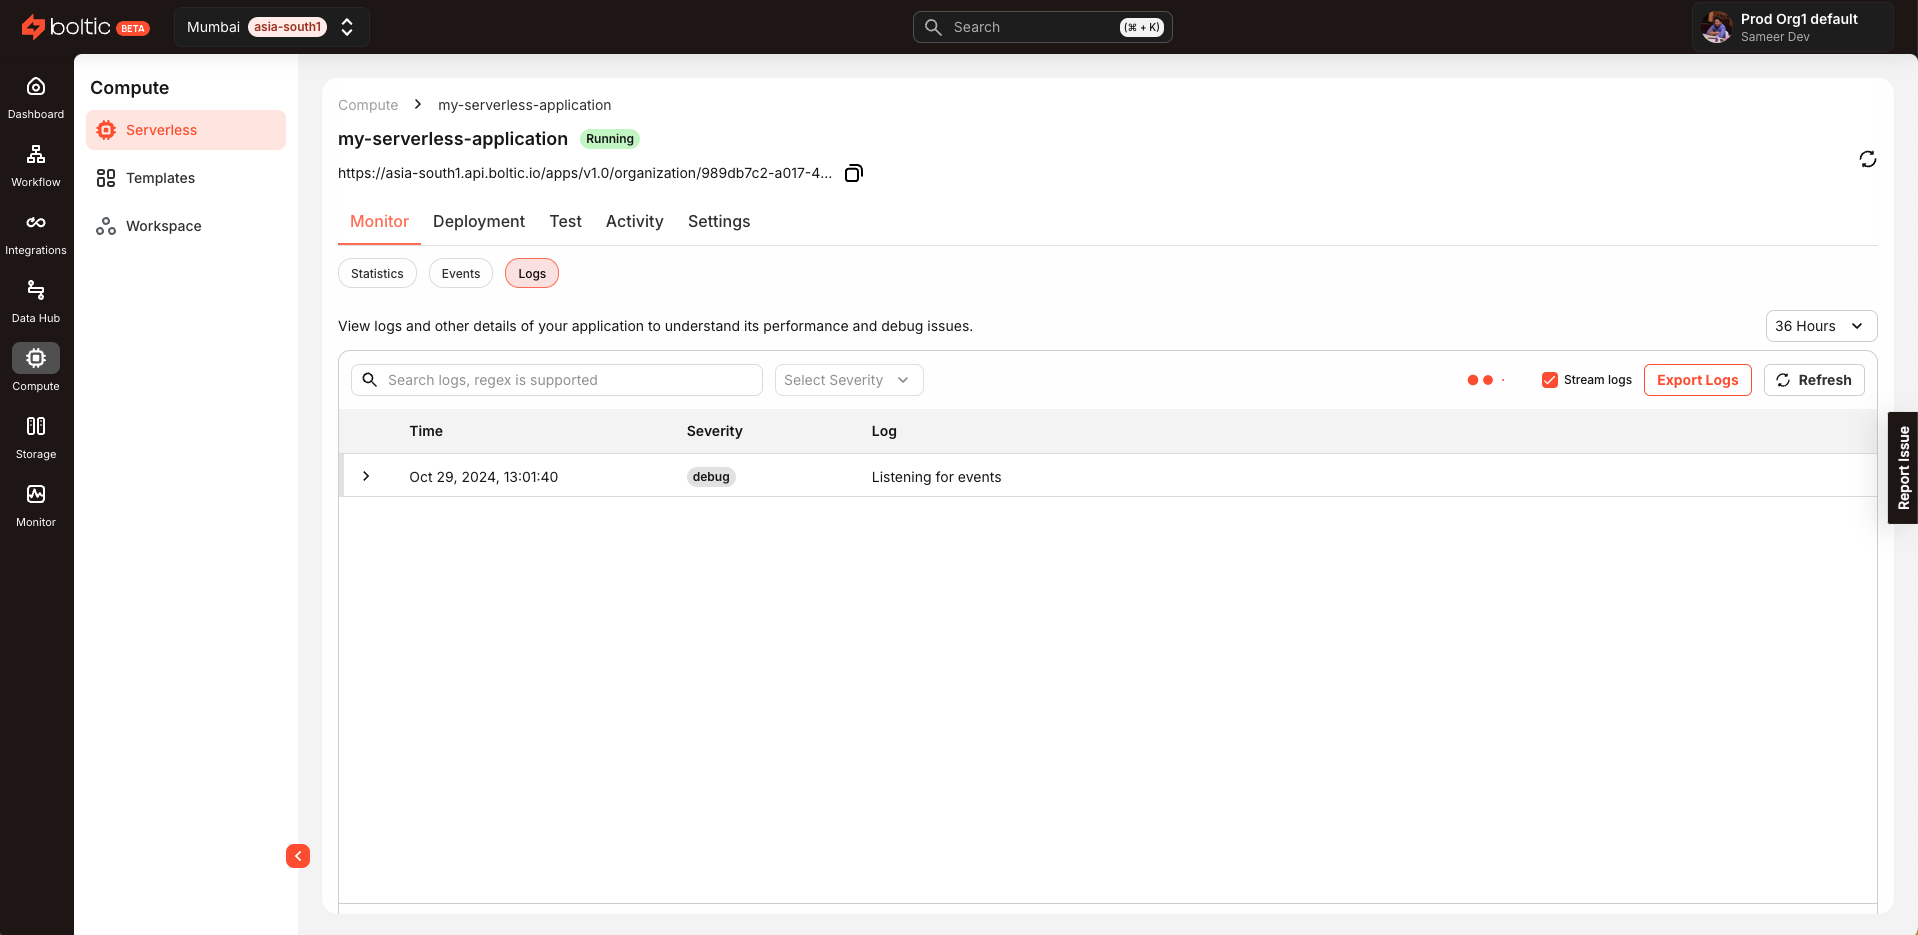
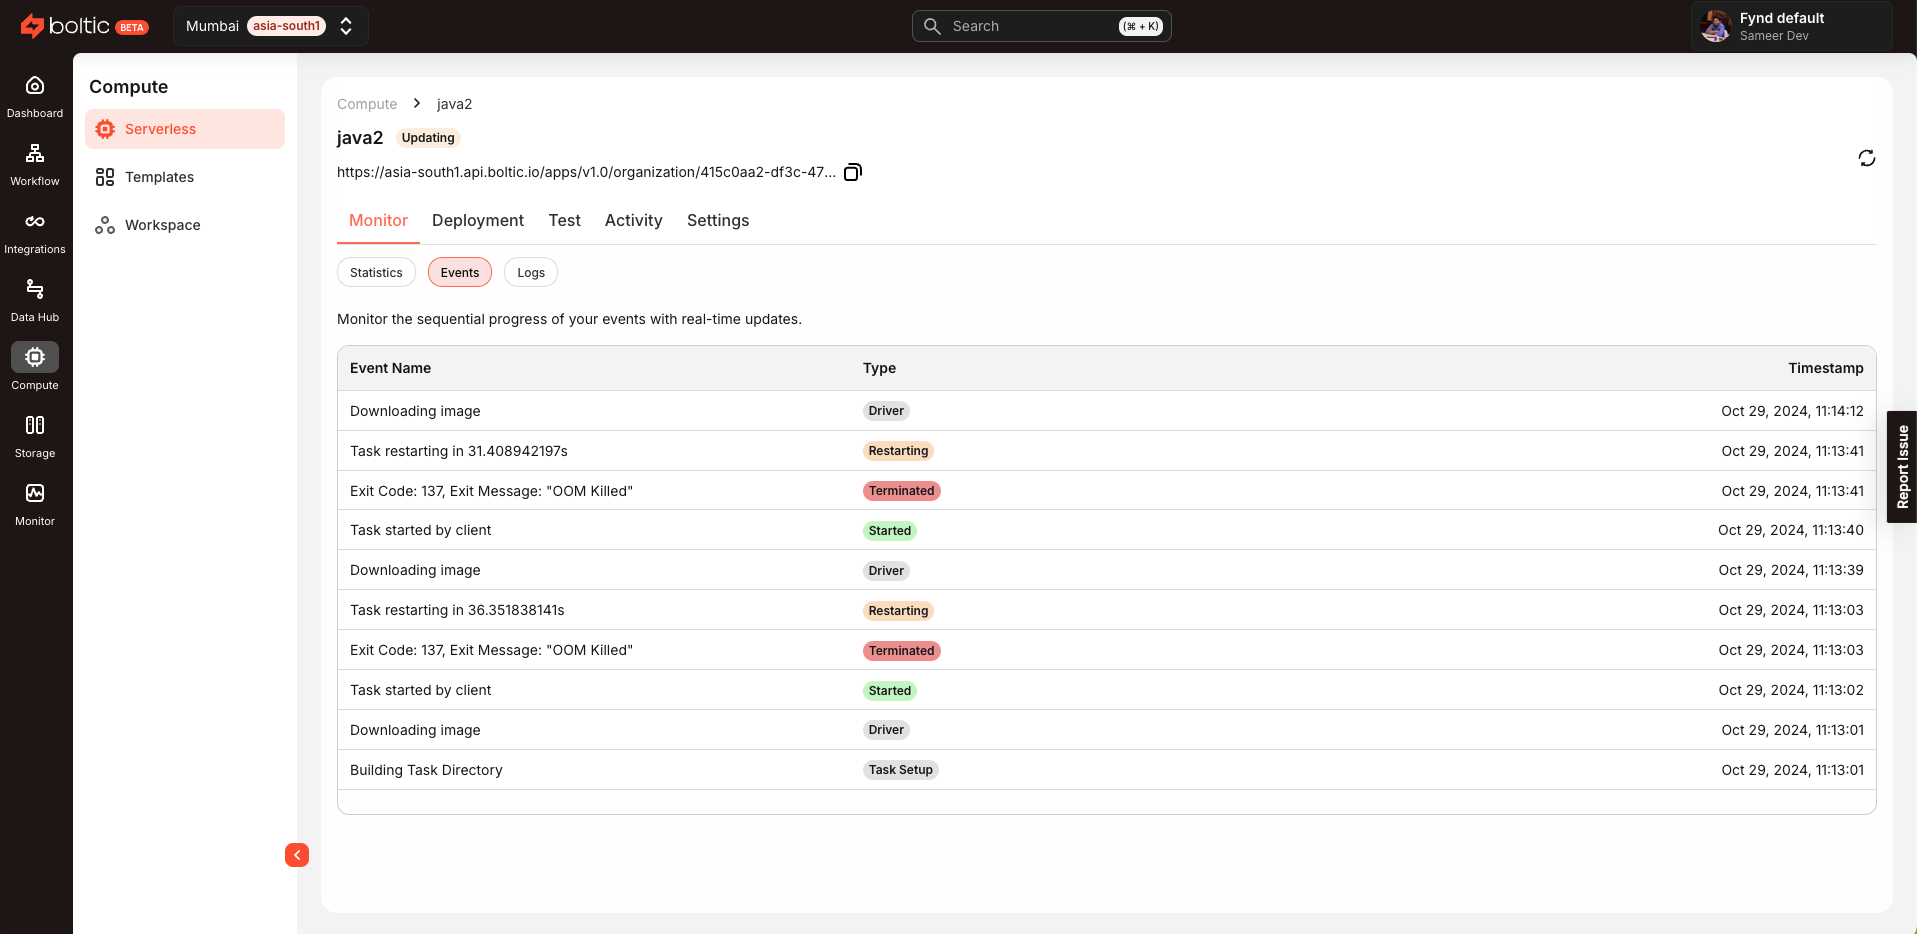
Monitoring
-
You can monitor the application in real-time by going to the Monitor section. Here you can view the application logs, events, and statistics in real-time. This provides valuable insights into your application's performance and behavior.
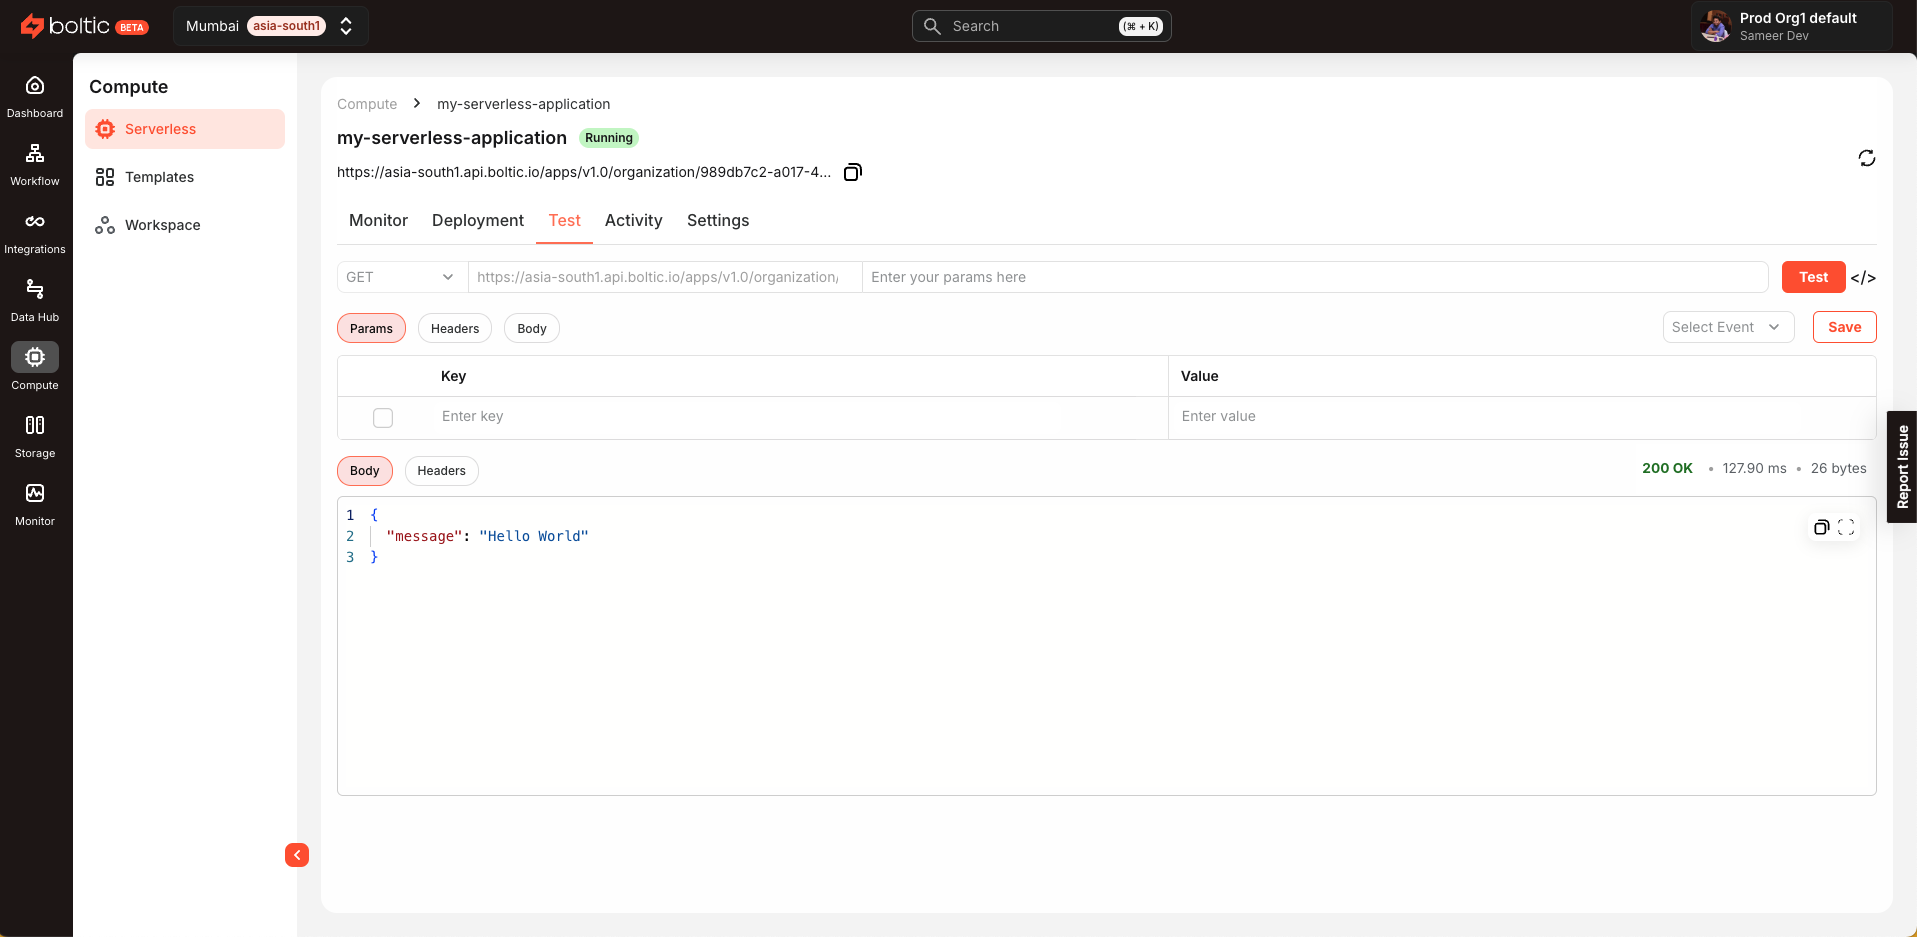
Test
-
The console also provides a Test section where you can test your application by providing the required input.
Congratulations! You have successfully created and deployed your first serverless application using the Fynd Boltic console. 🚀