Fynd Commerce Extension
Overview
The Fynd Commerce Extension plugin enables seamless integration between your Gateway and the Fynd Commerce platform. This plugin allows you to:
- 🔐 Authenticate with Fynd Commerce using OAuth 2.0
- 🔄 Subscribe to webhooks for real-time event notifications
- 📦 Access product data and other commerce APIs
- 🚀 Build custom extensions that enhance the Fynd Commerce ecosystem
Prerequisites
Before setting up the Fynd Commerce Extension plugin, ensure you have:
-
Fynd Partner Account
- Access to Fynd Partner Panel
- Extension credentials (API Key, API Secret)
- Extension configured in the Partner Panel
-
Gateway Access
- Admin access to your Gateway instance
- A deployed domain for your Gateway
-
Fynd Commerce Account
- Access to Fynd Commerce
- Company ID where you'll install/test the extension
Integration Guide
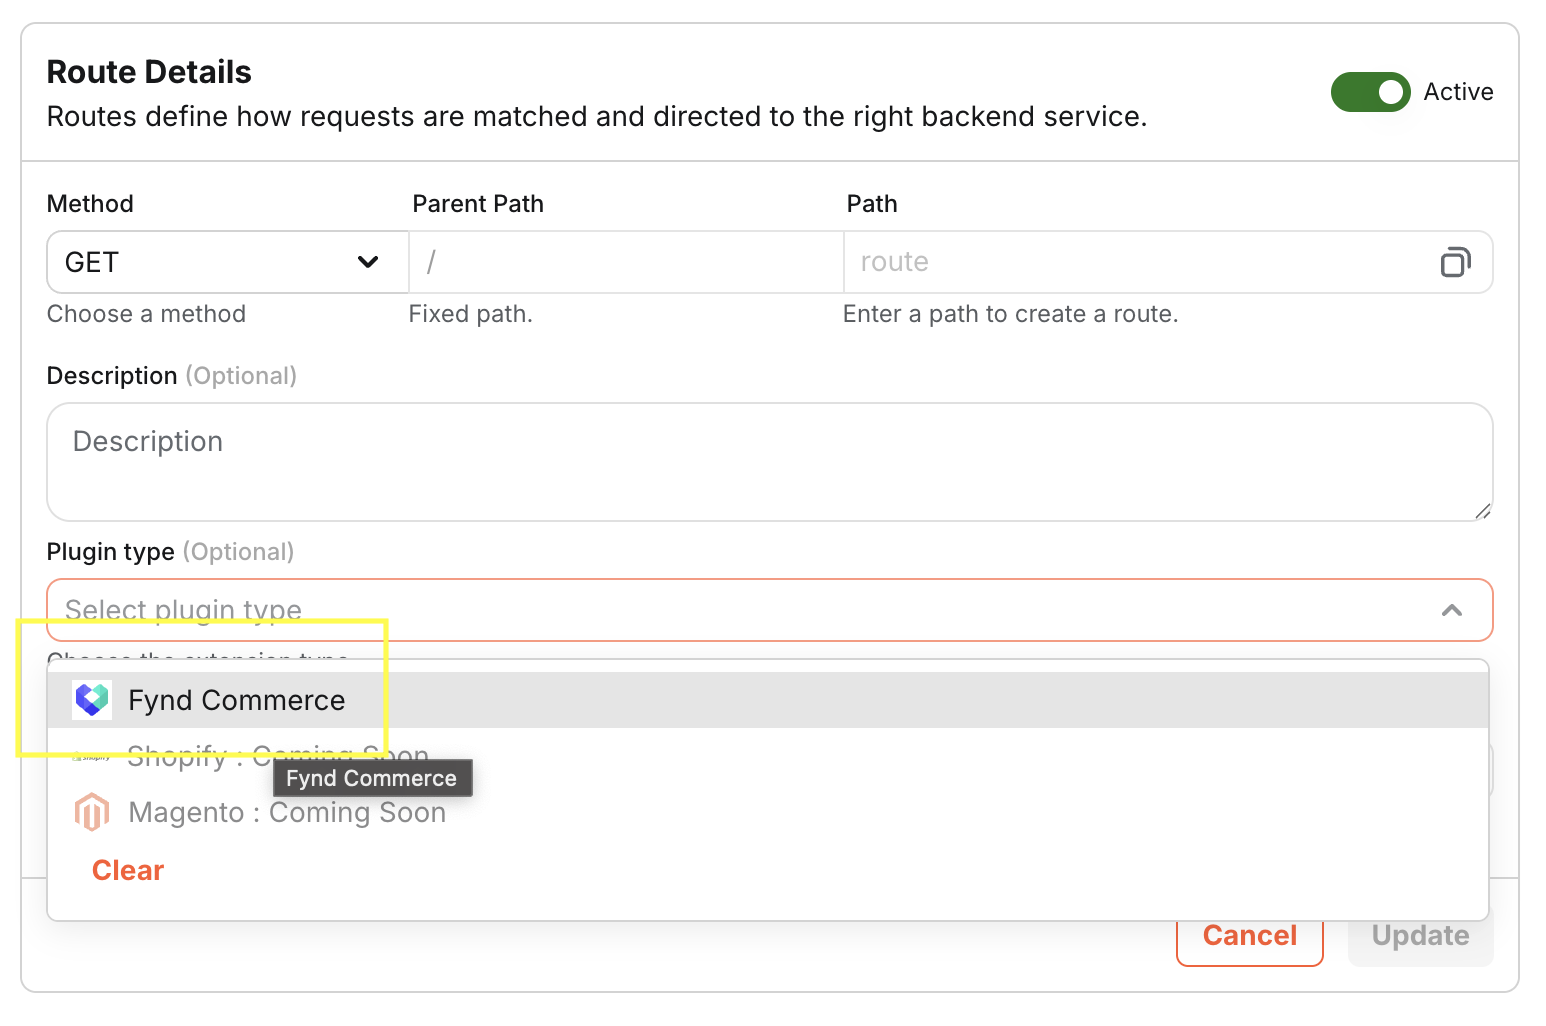
Step 1: Create a New Plugin
-
Navigate to your Gateway dashboard and click on "Select Plugin Type"
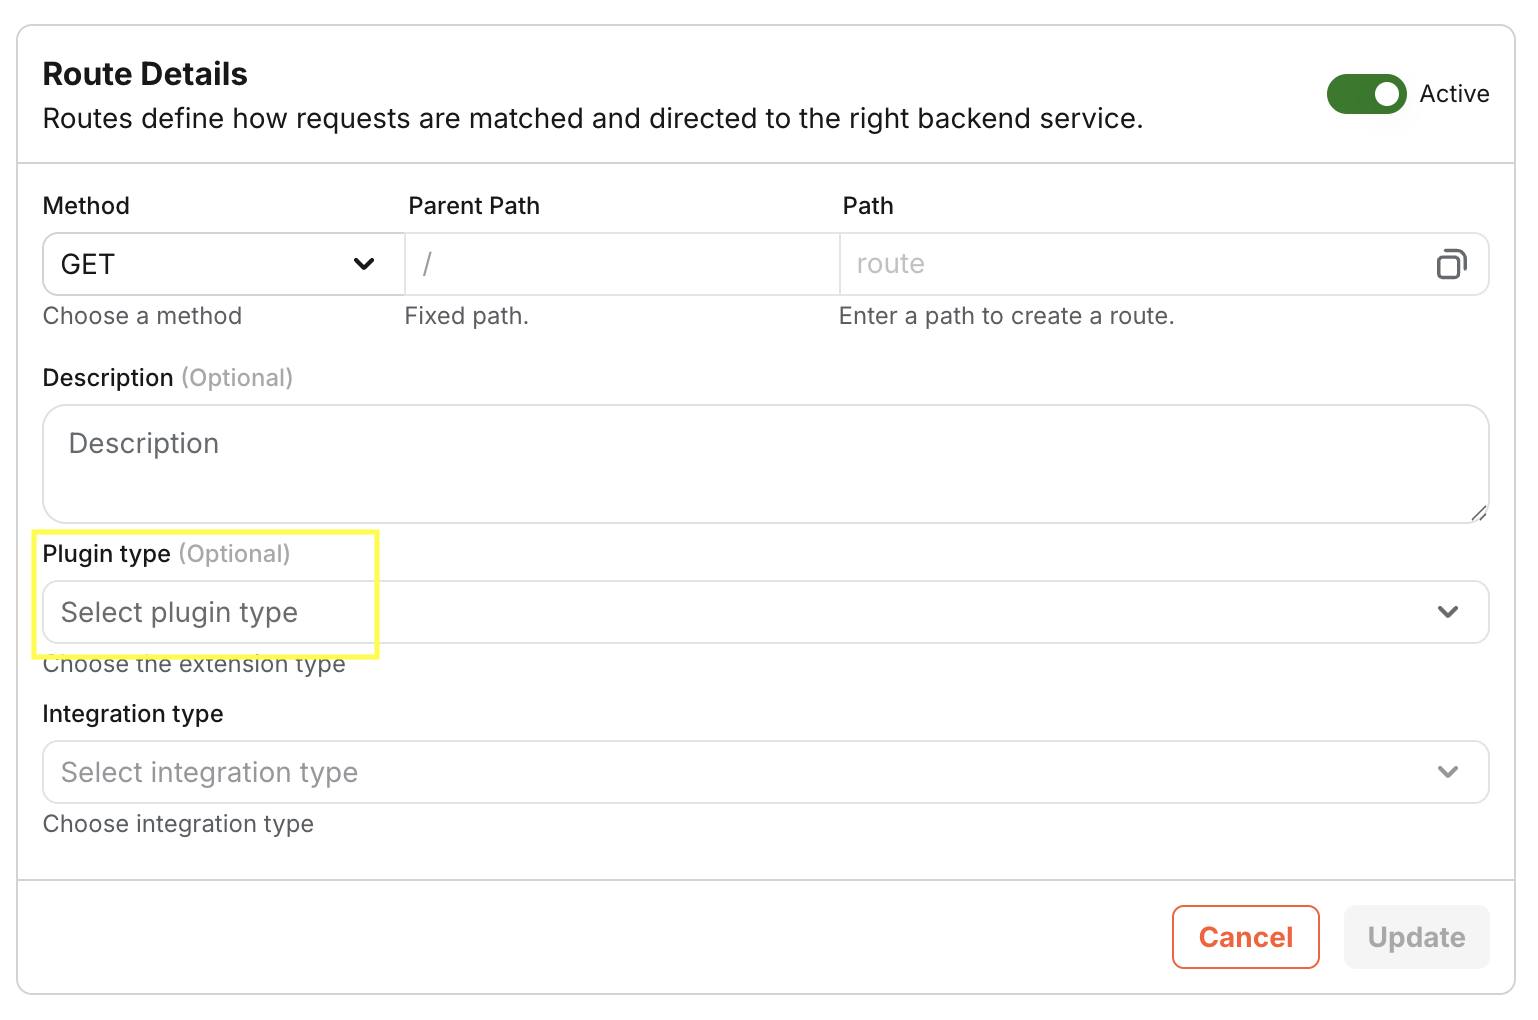
-
Choose "Fynd Commerce Extension" from the available plugin options
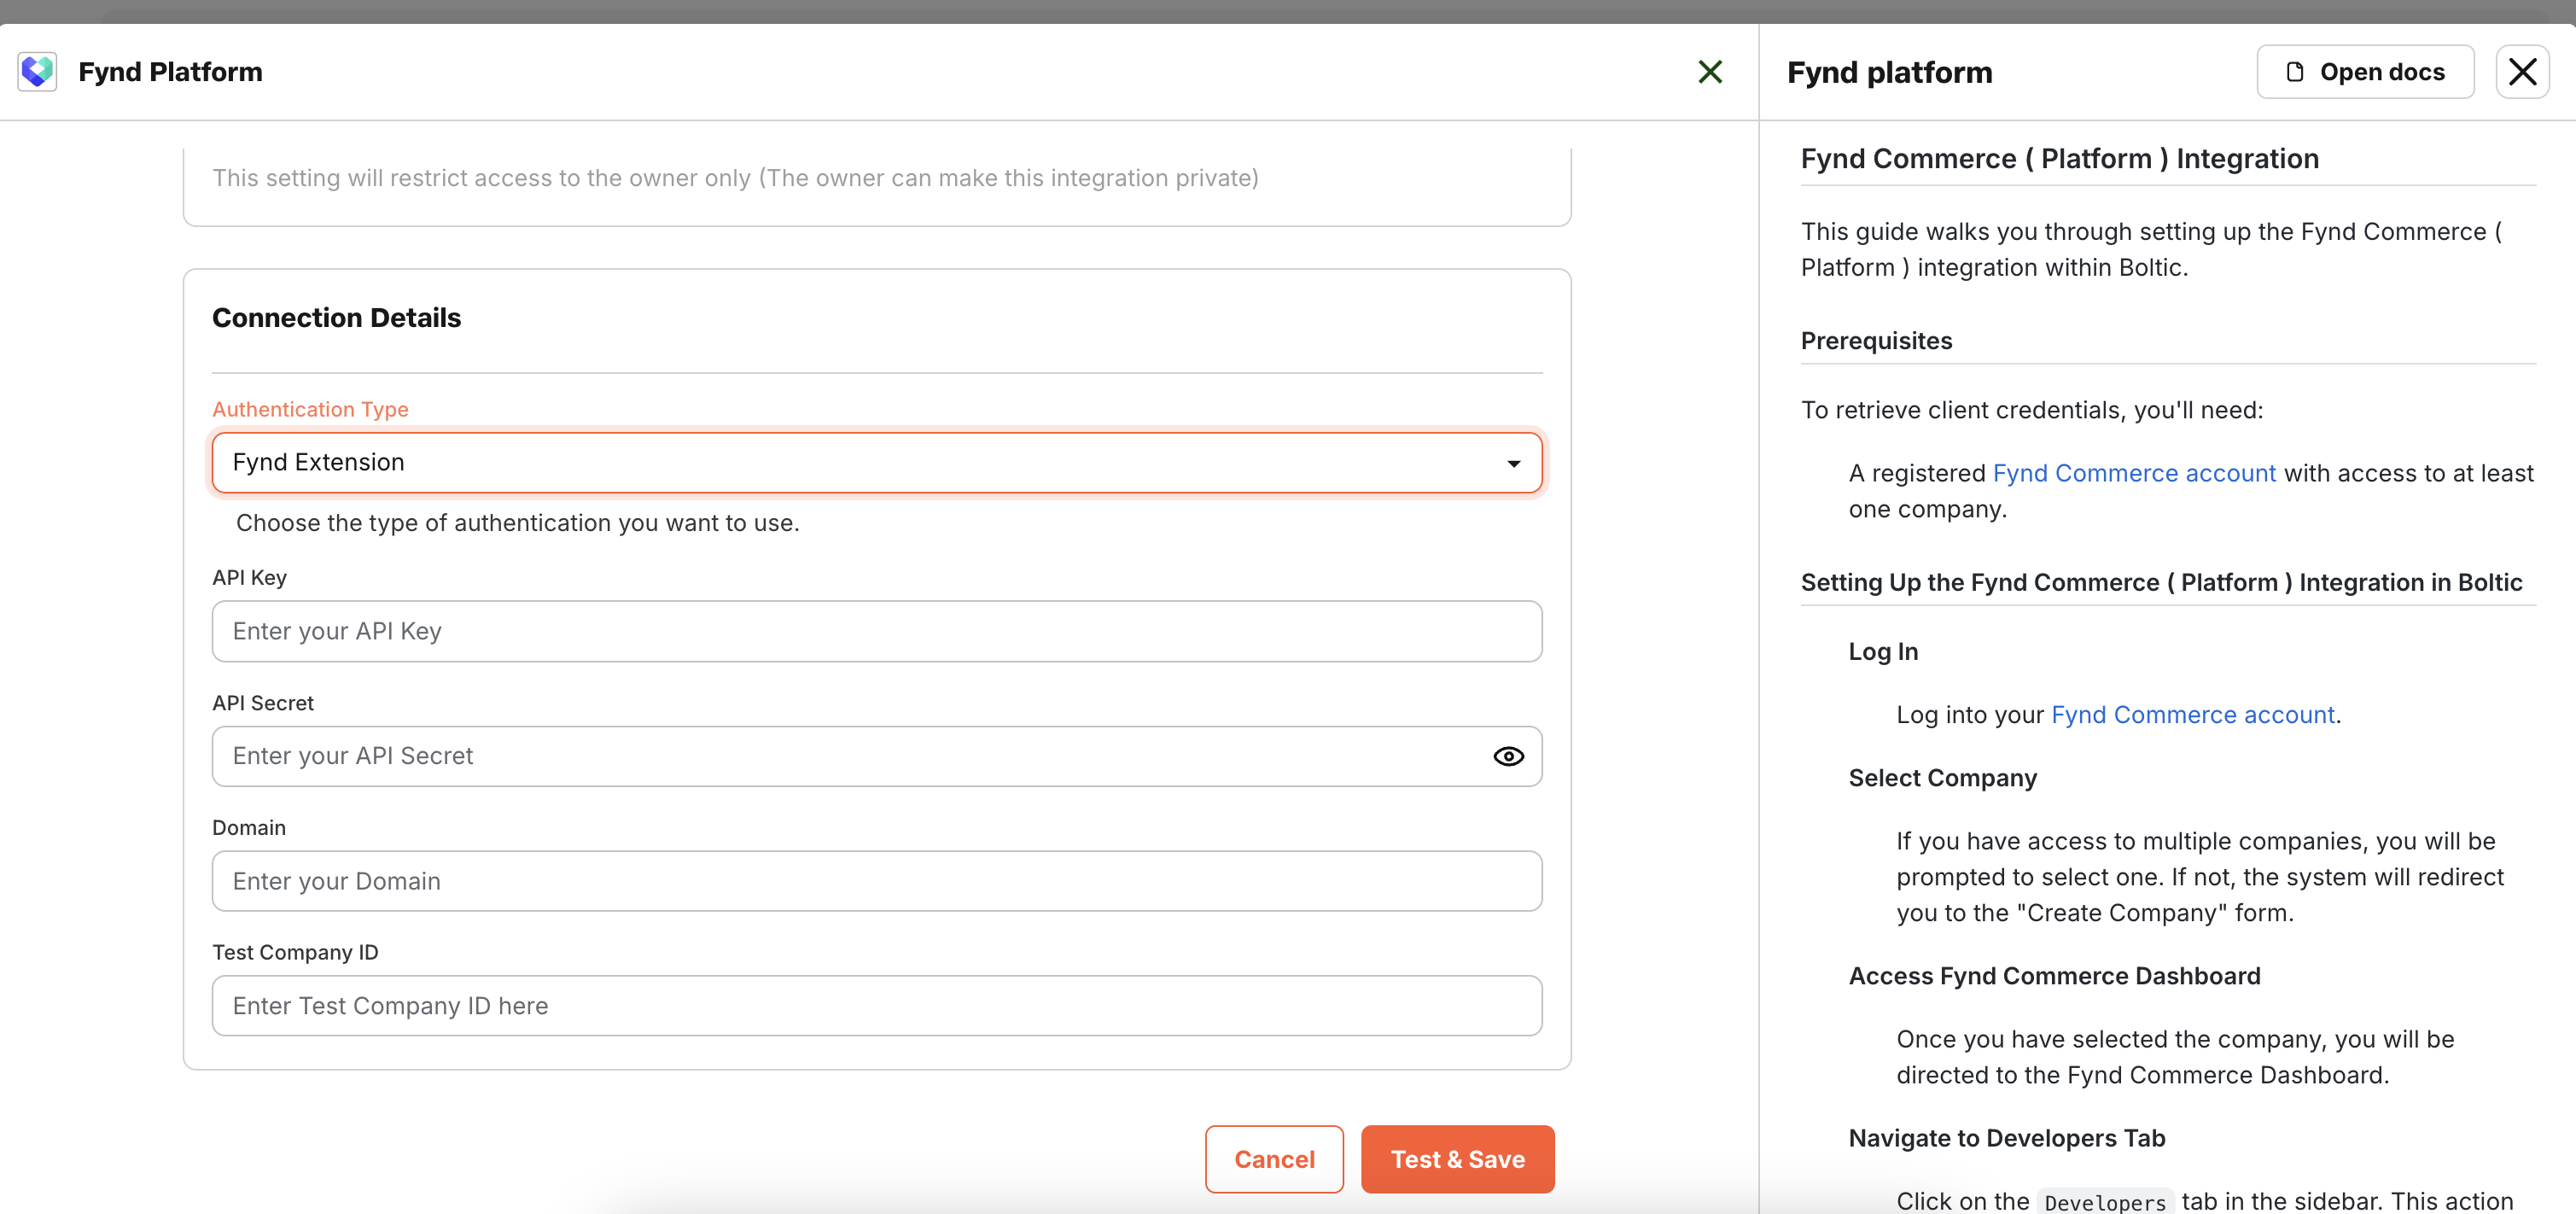
Step 2: Configure Extension Credentials
-
Click on "Add New" to create a new Fynd Commerce integration (or select an existing one)
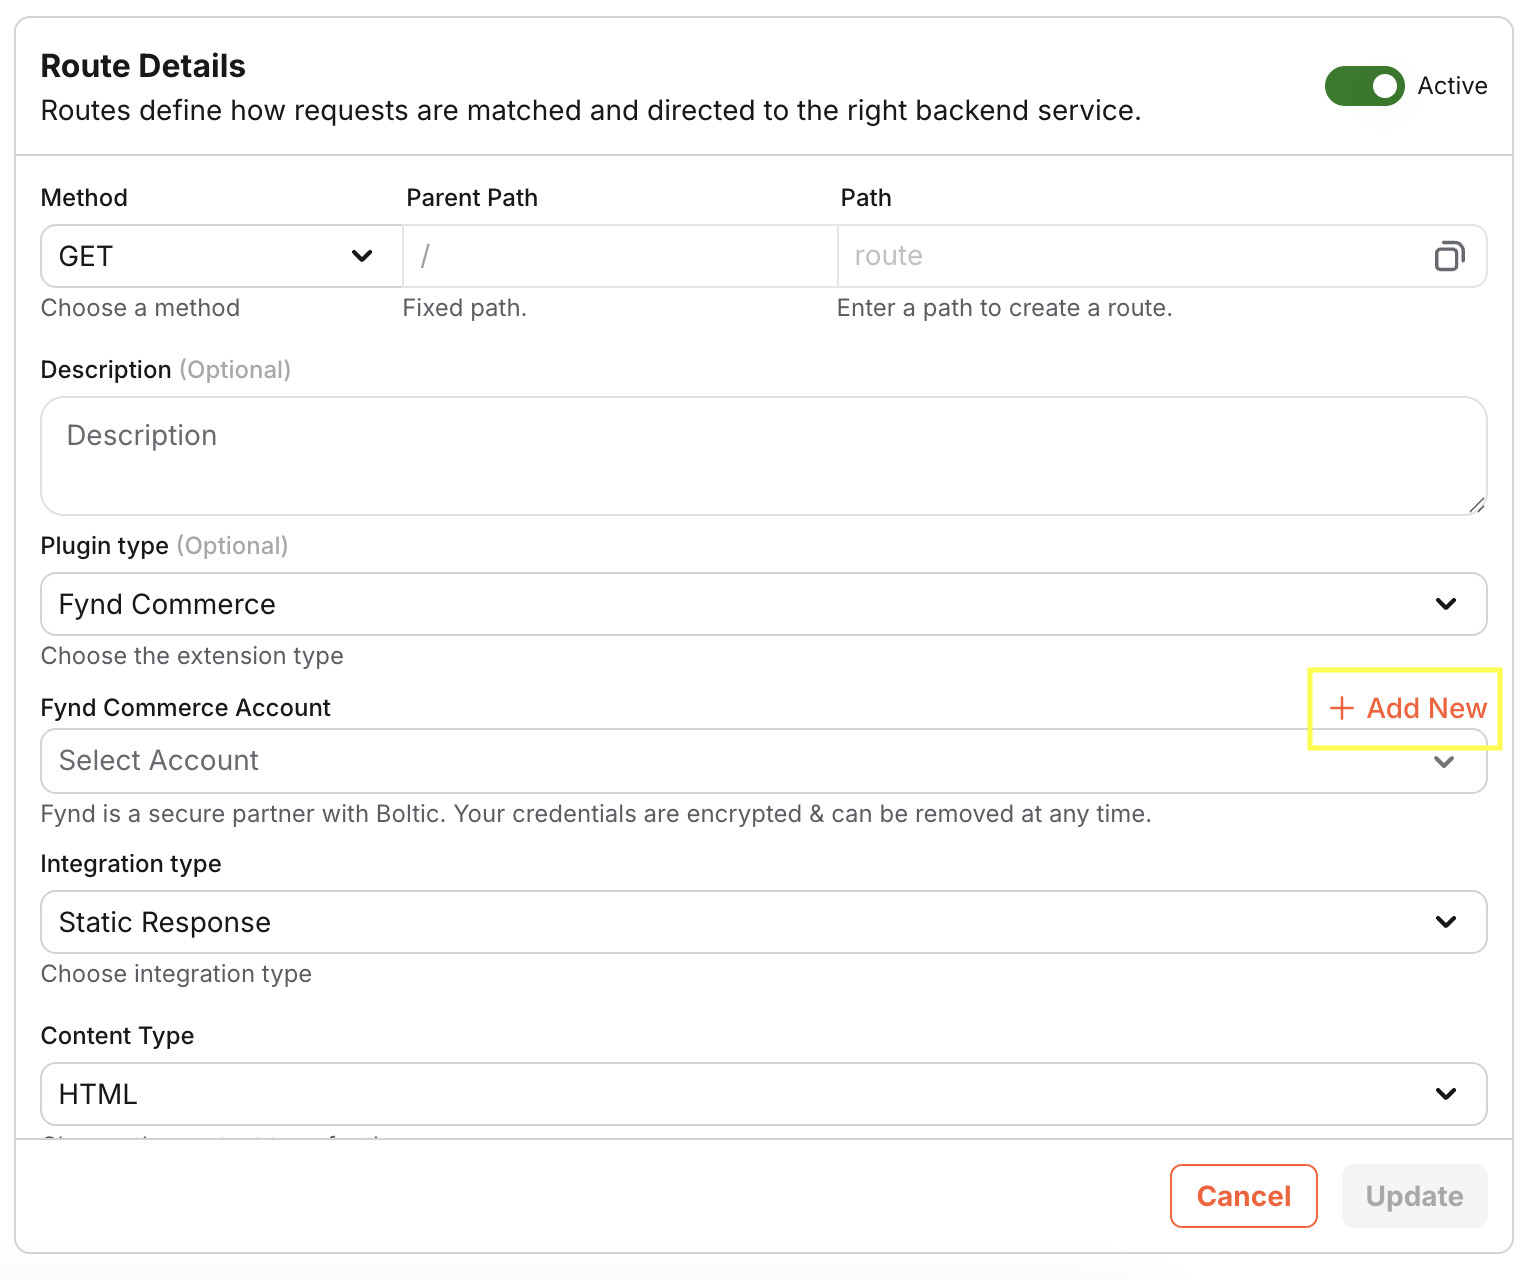
-
Enter your extension credentials from the Fynd Commerce Partner Panel:
- API Key: Your extension's unique identifier
- API Secret: Your extension's secret key
- Extension Name: A descriptive name for your integration
Click "Save" to store the credentials securely
Step 3: Configure Webhooks (Optional)
- To understand how to configure webhooks, please refer to the Webhook Integration section.
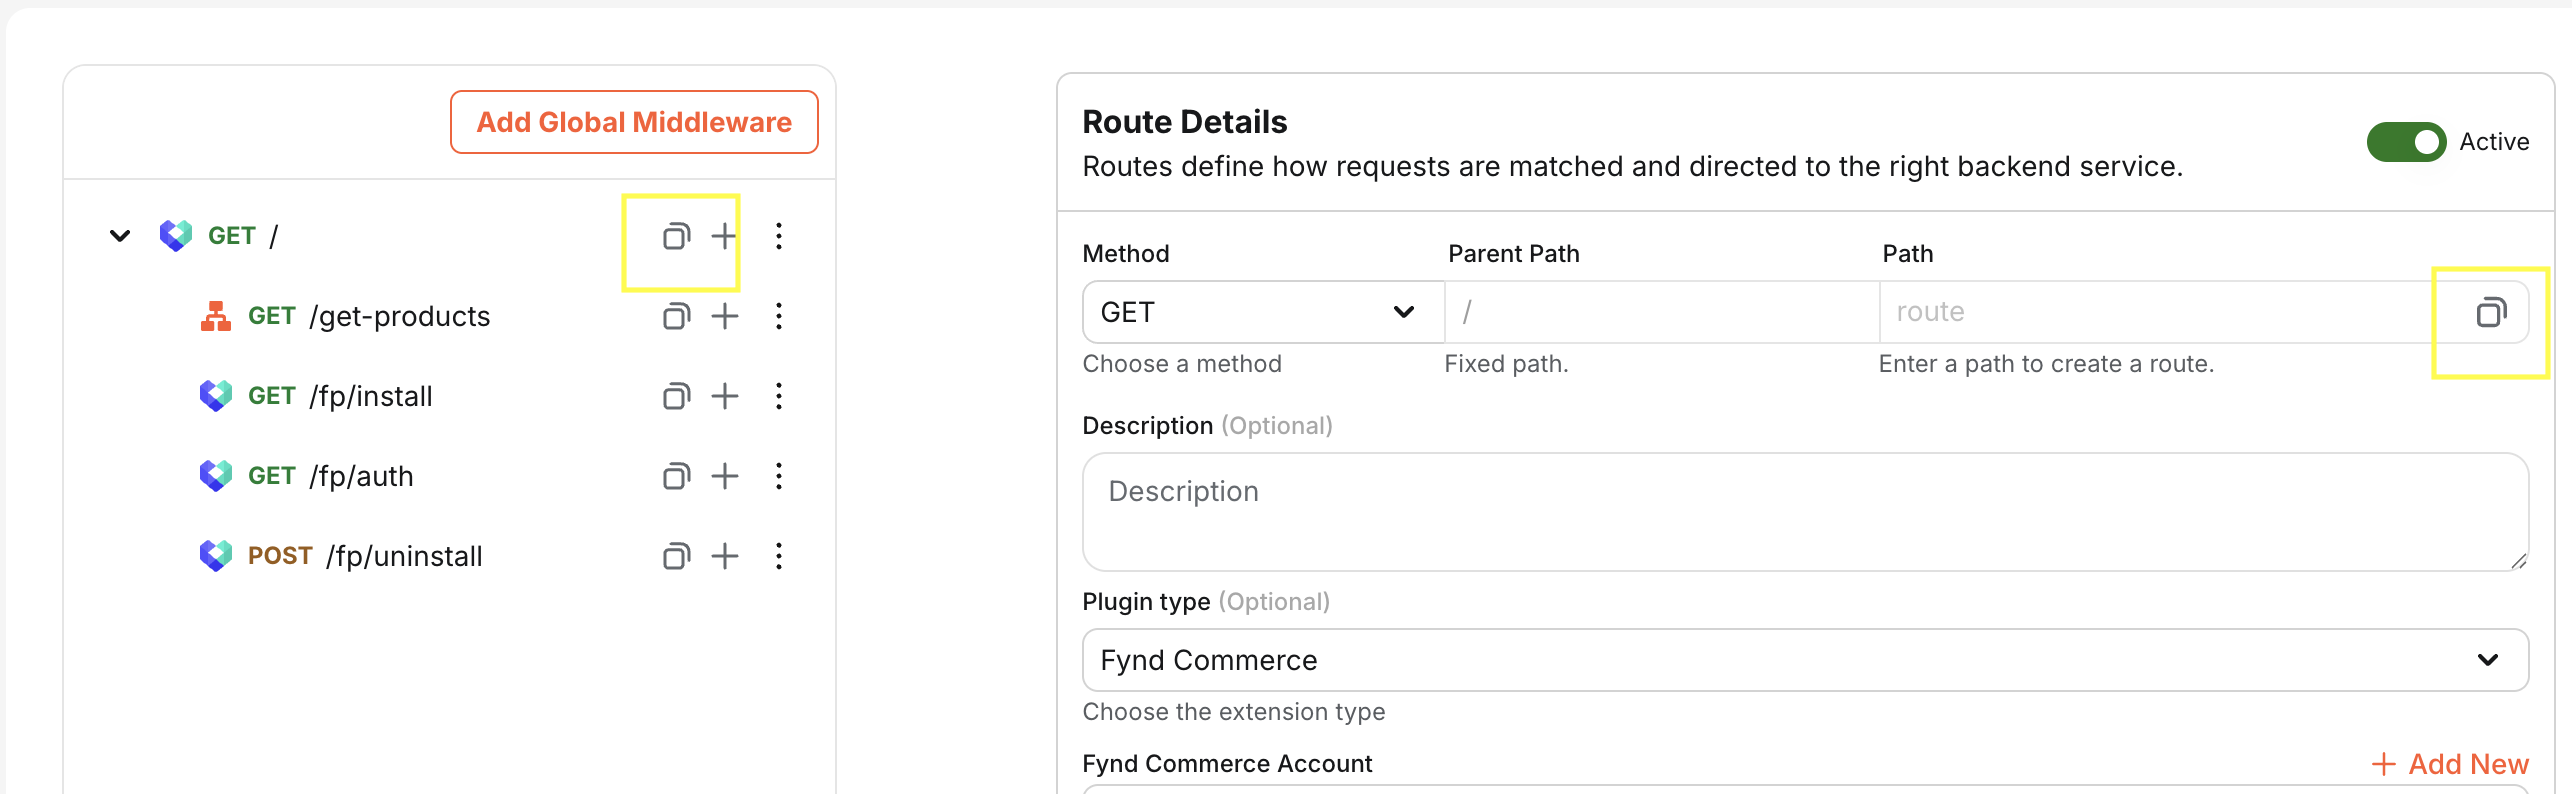
Step 4: Save and Review Routes
-
Click "Save/Update Route" to finalize the plugin configuration
The system will automatically generate several routes:
- Authentication routes: Handle OAuth flow
- Product listing page: A sample page to list all the products in which the company is installed
- API routes: Including
/get-productsfor product data access
Step 5: Deploy Your Changes
- Deploy the changes to your Gateway domain to make the plugin live
Step 6: Configure Extension in Fynd Partner Panel
-
Copy the plugin path from your Gateway dashboard
-
In the Fynd Commerce Partner Panel:
- Navigate to your extension settings
- Paste the Gateway URL in the appropriate field
- Save the configuration

Step 7: Install Extension in Fynd Commerce Platform
- Your extension is now ready! To use it:
- Subscribe the extension to your target company in the Partner Panel
- Go to Fynd Commerce Platform
- Install the extension from the Extension Marketplace
Authentication Flow
The Fynd Commerce Extension plugin implements OAuth 2.0 authentication:
- Authorization: Users are redirected to Fynd for consent
- Token Exchange: Gateway exchanges authorization code for access tokens
- Token Storage: Tokens are securely stored and refreshed automatically
- API Access: Use stored tokens to make authenticated API calls
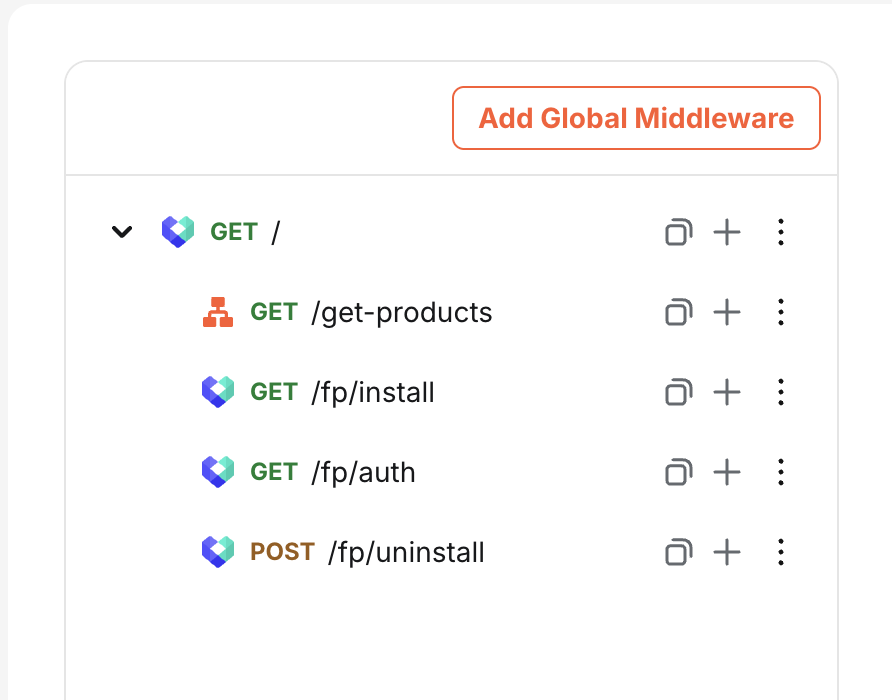
Available Routes
System Routes (Auto-generated)
These routes are auto-generated when you configure the Fynd Commerce Extension plugin.
| Route | Method | Description |
|---|---|---|
/ | GET | Default route with a landing page that shows product listing |
/fp/install | GET | Initiates OAuth flow. Called by the Fynd Commerce Platform when a merchant starts installing the extension. |
/fp/auth | GET | Handles the OAuth authentication callback and finalizes app authorization. |
/fp/uninstall | POST | Called when the extension is uninstalled by a merchant. Used to clean up resources or tokens. |
/get-products | GET | Fetches product list for a company. |
Webhook Integration
You can subscribe to webhooks from Fynd Commerce Platform to receive real-time events. Here's how you can do it:
-
In your gateway dashboard, select the route on which you have configured the Fynd Commerce Extension plugin.
-
Click on "Attach Webhook"
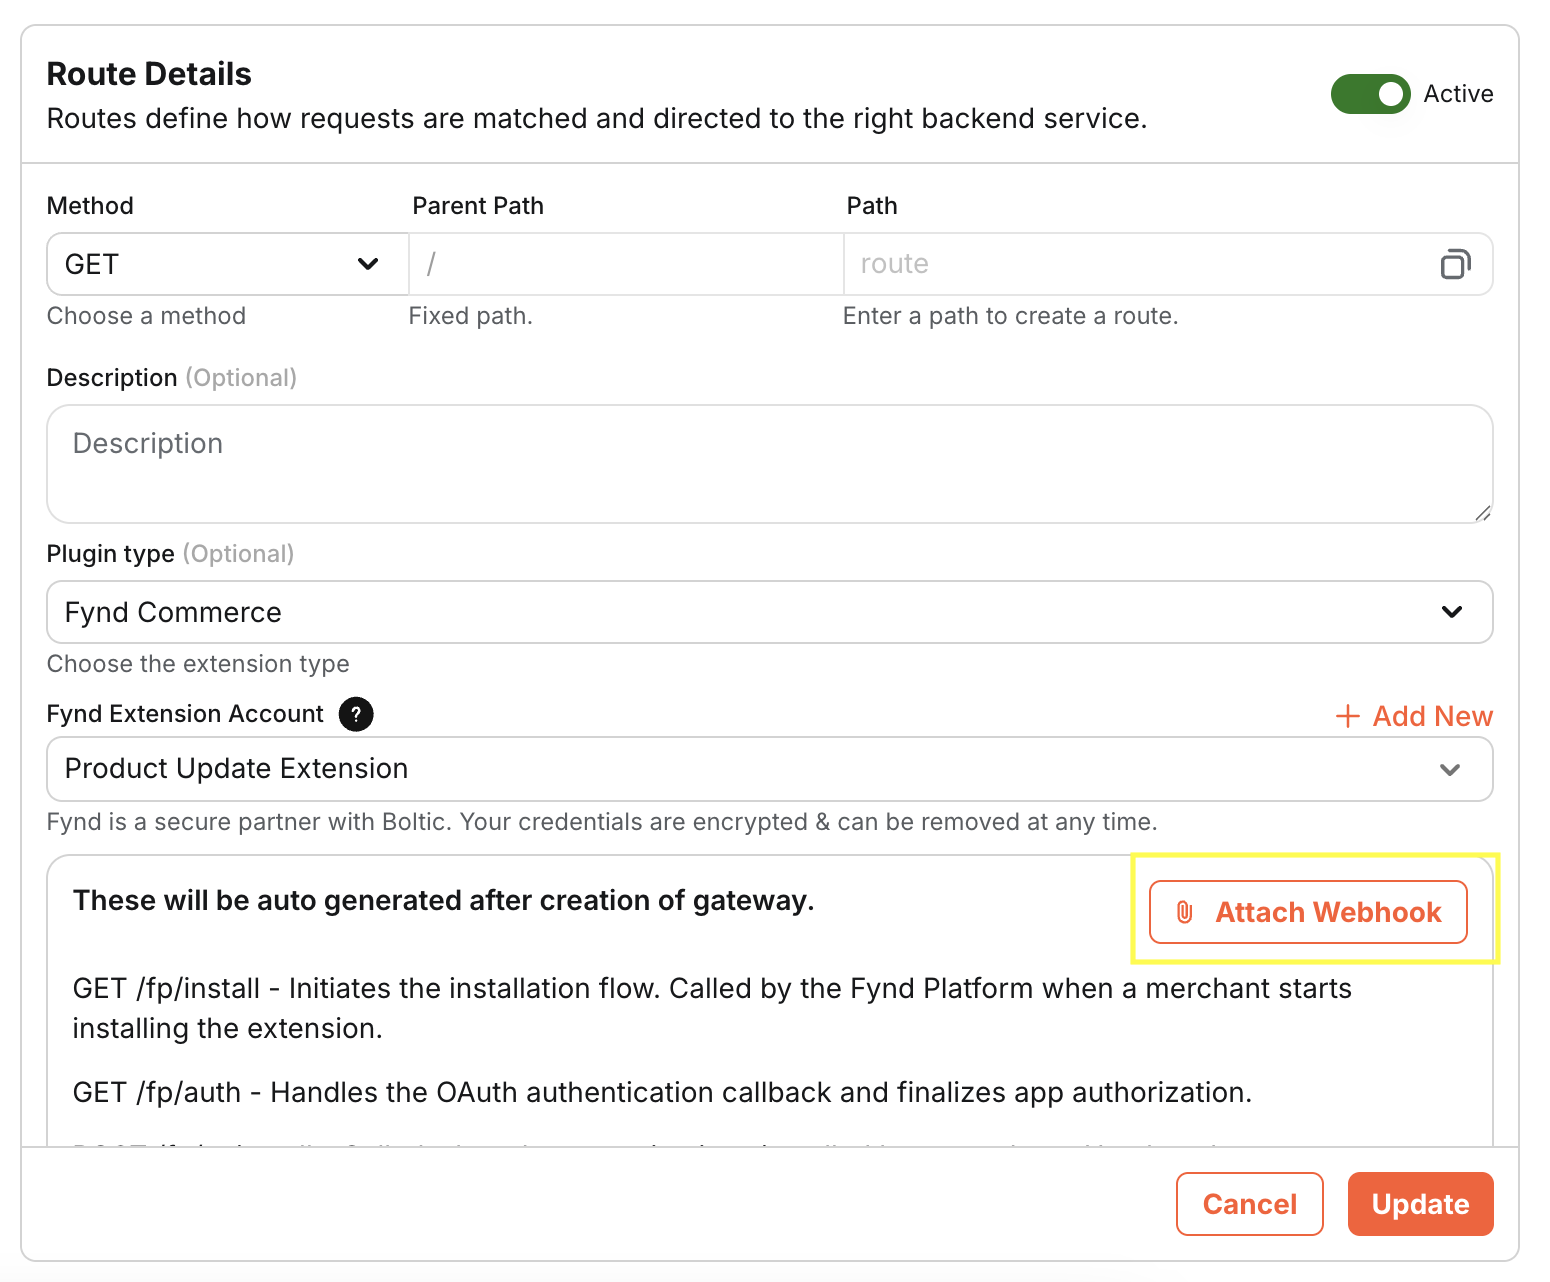
-
Select the Boltic Workflow you want to trigger when the webhook is received on the gateway or create a new one. You can also select multiple webhooks to recieve events
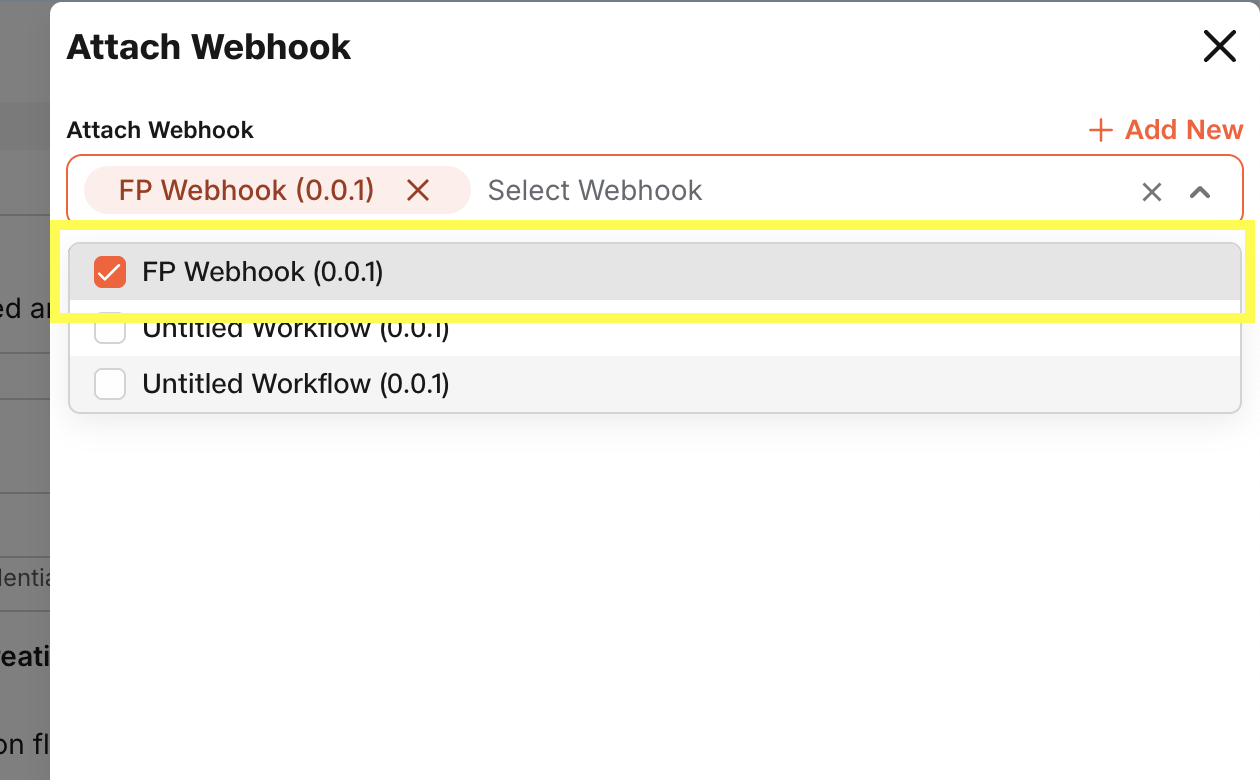
NoteMake sure that the workflow you have selected is configured with the Fynd Commerce Platform Webhook Trigger else the webhook will not be received on the gateway.
-
Here is a what a sample Fynd Commerce Platform Webhook workflow would look like. You can configure which events you want to listen to from here:
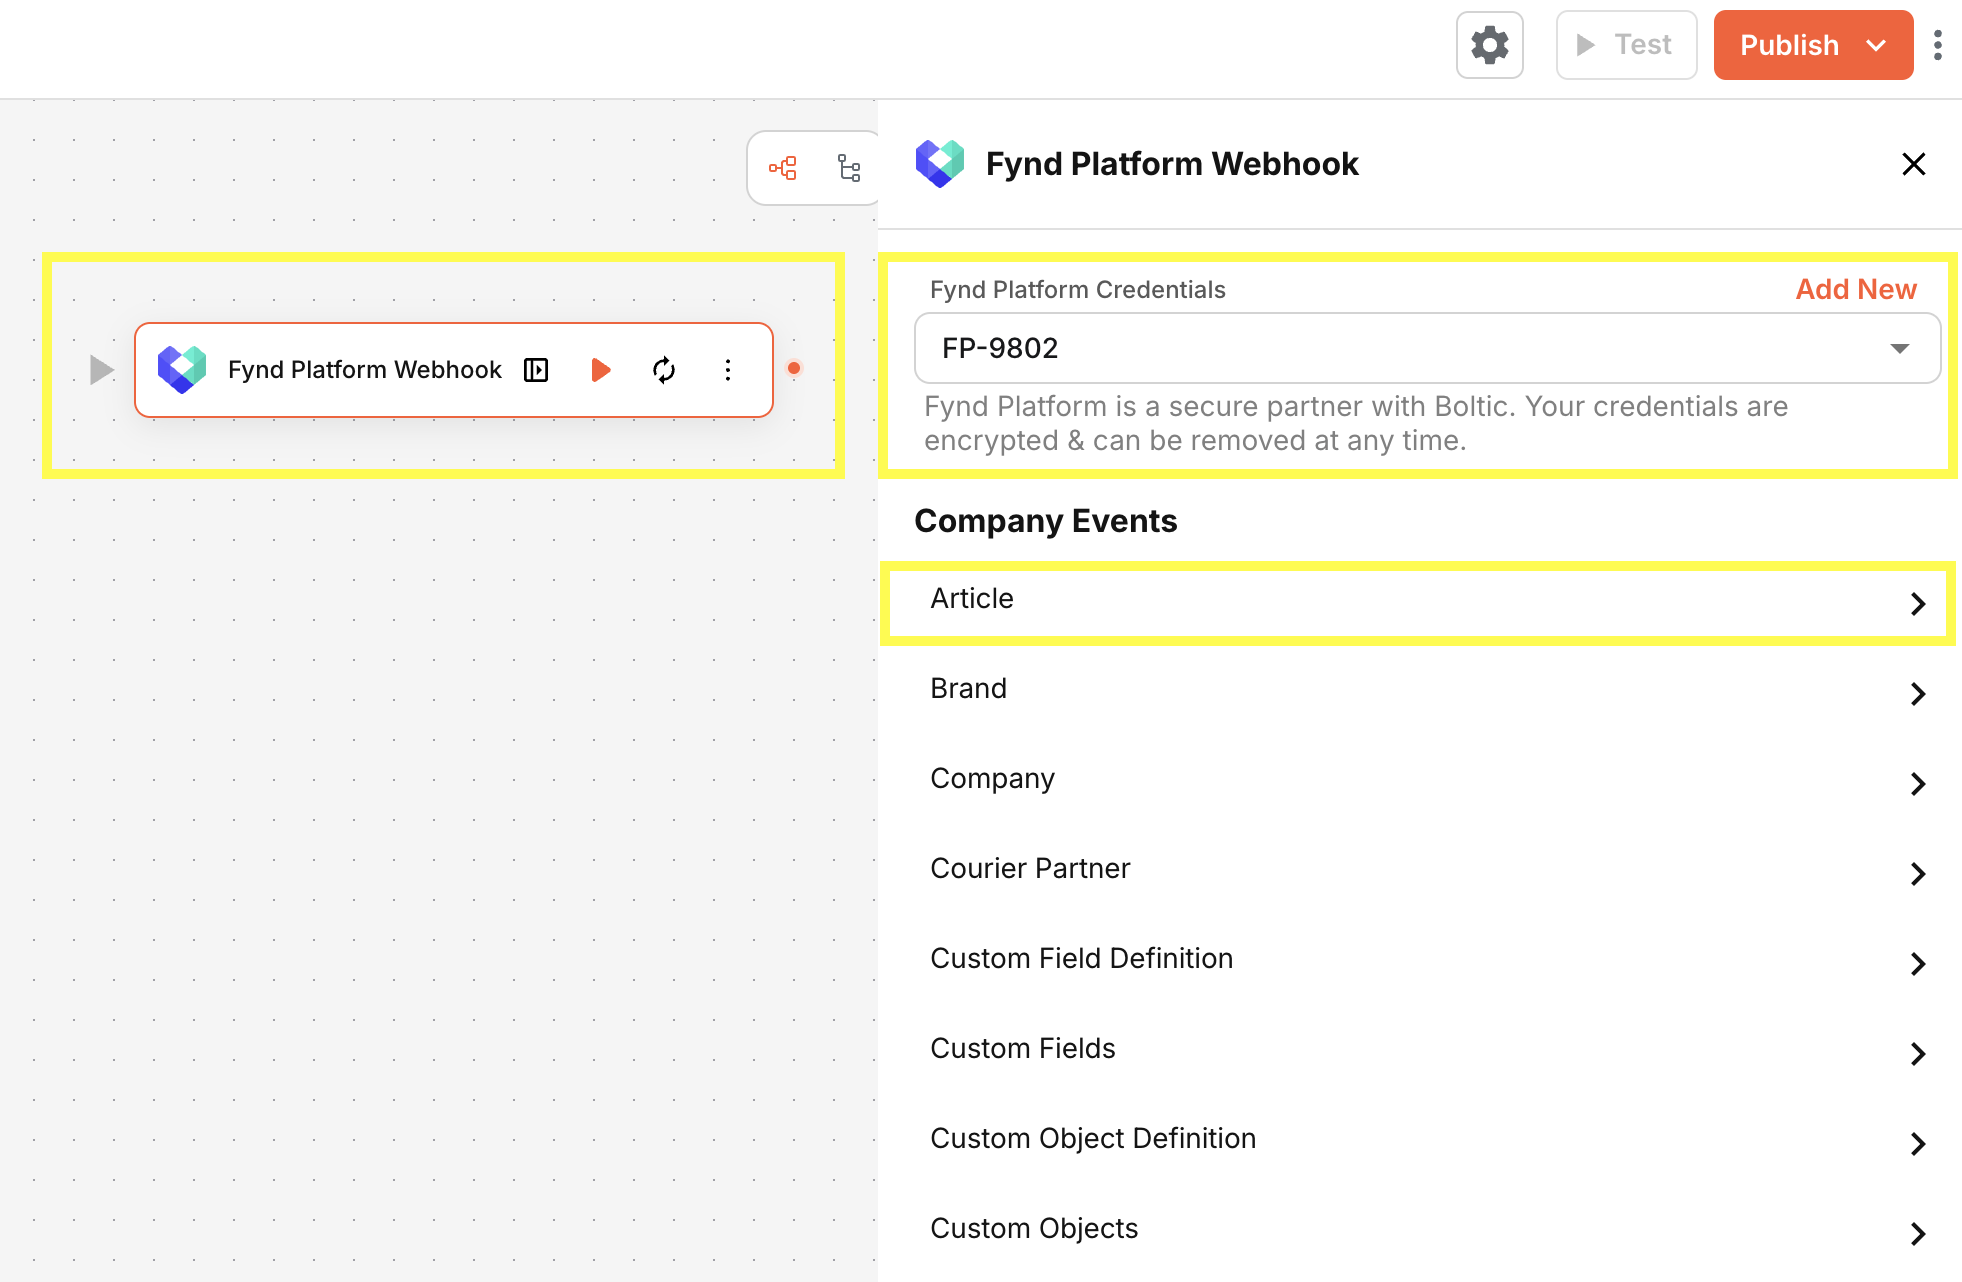
-
Click on "Update"
-
Once the webhook is attached, you can deploy the changes to your Gateway domain to make the plugin live.
Boltic Gateway will automatically add the webhook subscription to the Fynd Commerce Platform only when you Deploy the changes to your Gateway.
Troubleshooting
Common Issues
Authentication Failures
Problem: OAuth flow fails or tokens expire unexpectedly
Solution:
- Verify credentials in Partner Panel match Gateway configuration
- Check redirect URLs are correctly configured
- Ensure system time is synchronized (for token validation)
Webhook Delivery Issues
Problem: Webhooks not being received
Solution:
- Verify webhook URL is publicly accessible
- Review webhook logs in Partner Panel
- Test with webhook debugging tools
Related Resources
- 📚 Fynd Partners API Documentation
- 🛠️ Extension Development Guide
- 💬 Fynd Developer Community
- 🎓 Video Tutorials
💡 Need Help? Contact Boltic support at [email protected] or Fynd support at [email protected] or visit the Developer Community.