Authentication
This document explains how to configure the Authentication file for integrations. There are several methods available to authenticate, such as using API keys or credentials. You will define UI parameters (e.g., API Key, credentials), validate credentials against an endpoint, and fetch tokens dynamically. Later in this section, we will show a use case for dynamic token fetching. Clear, correct configuration ensures only authorized access to external services.
When a user clicks Add New to connect an account, the fields defined in this file, such as API Key, Client ID, Client Secret, Company ID, or API URL, appear in the UI.
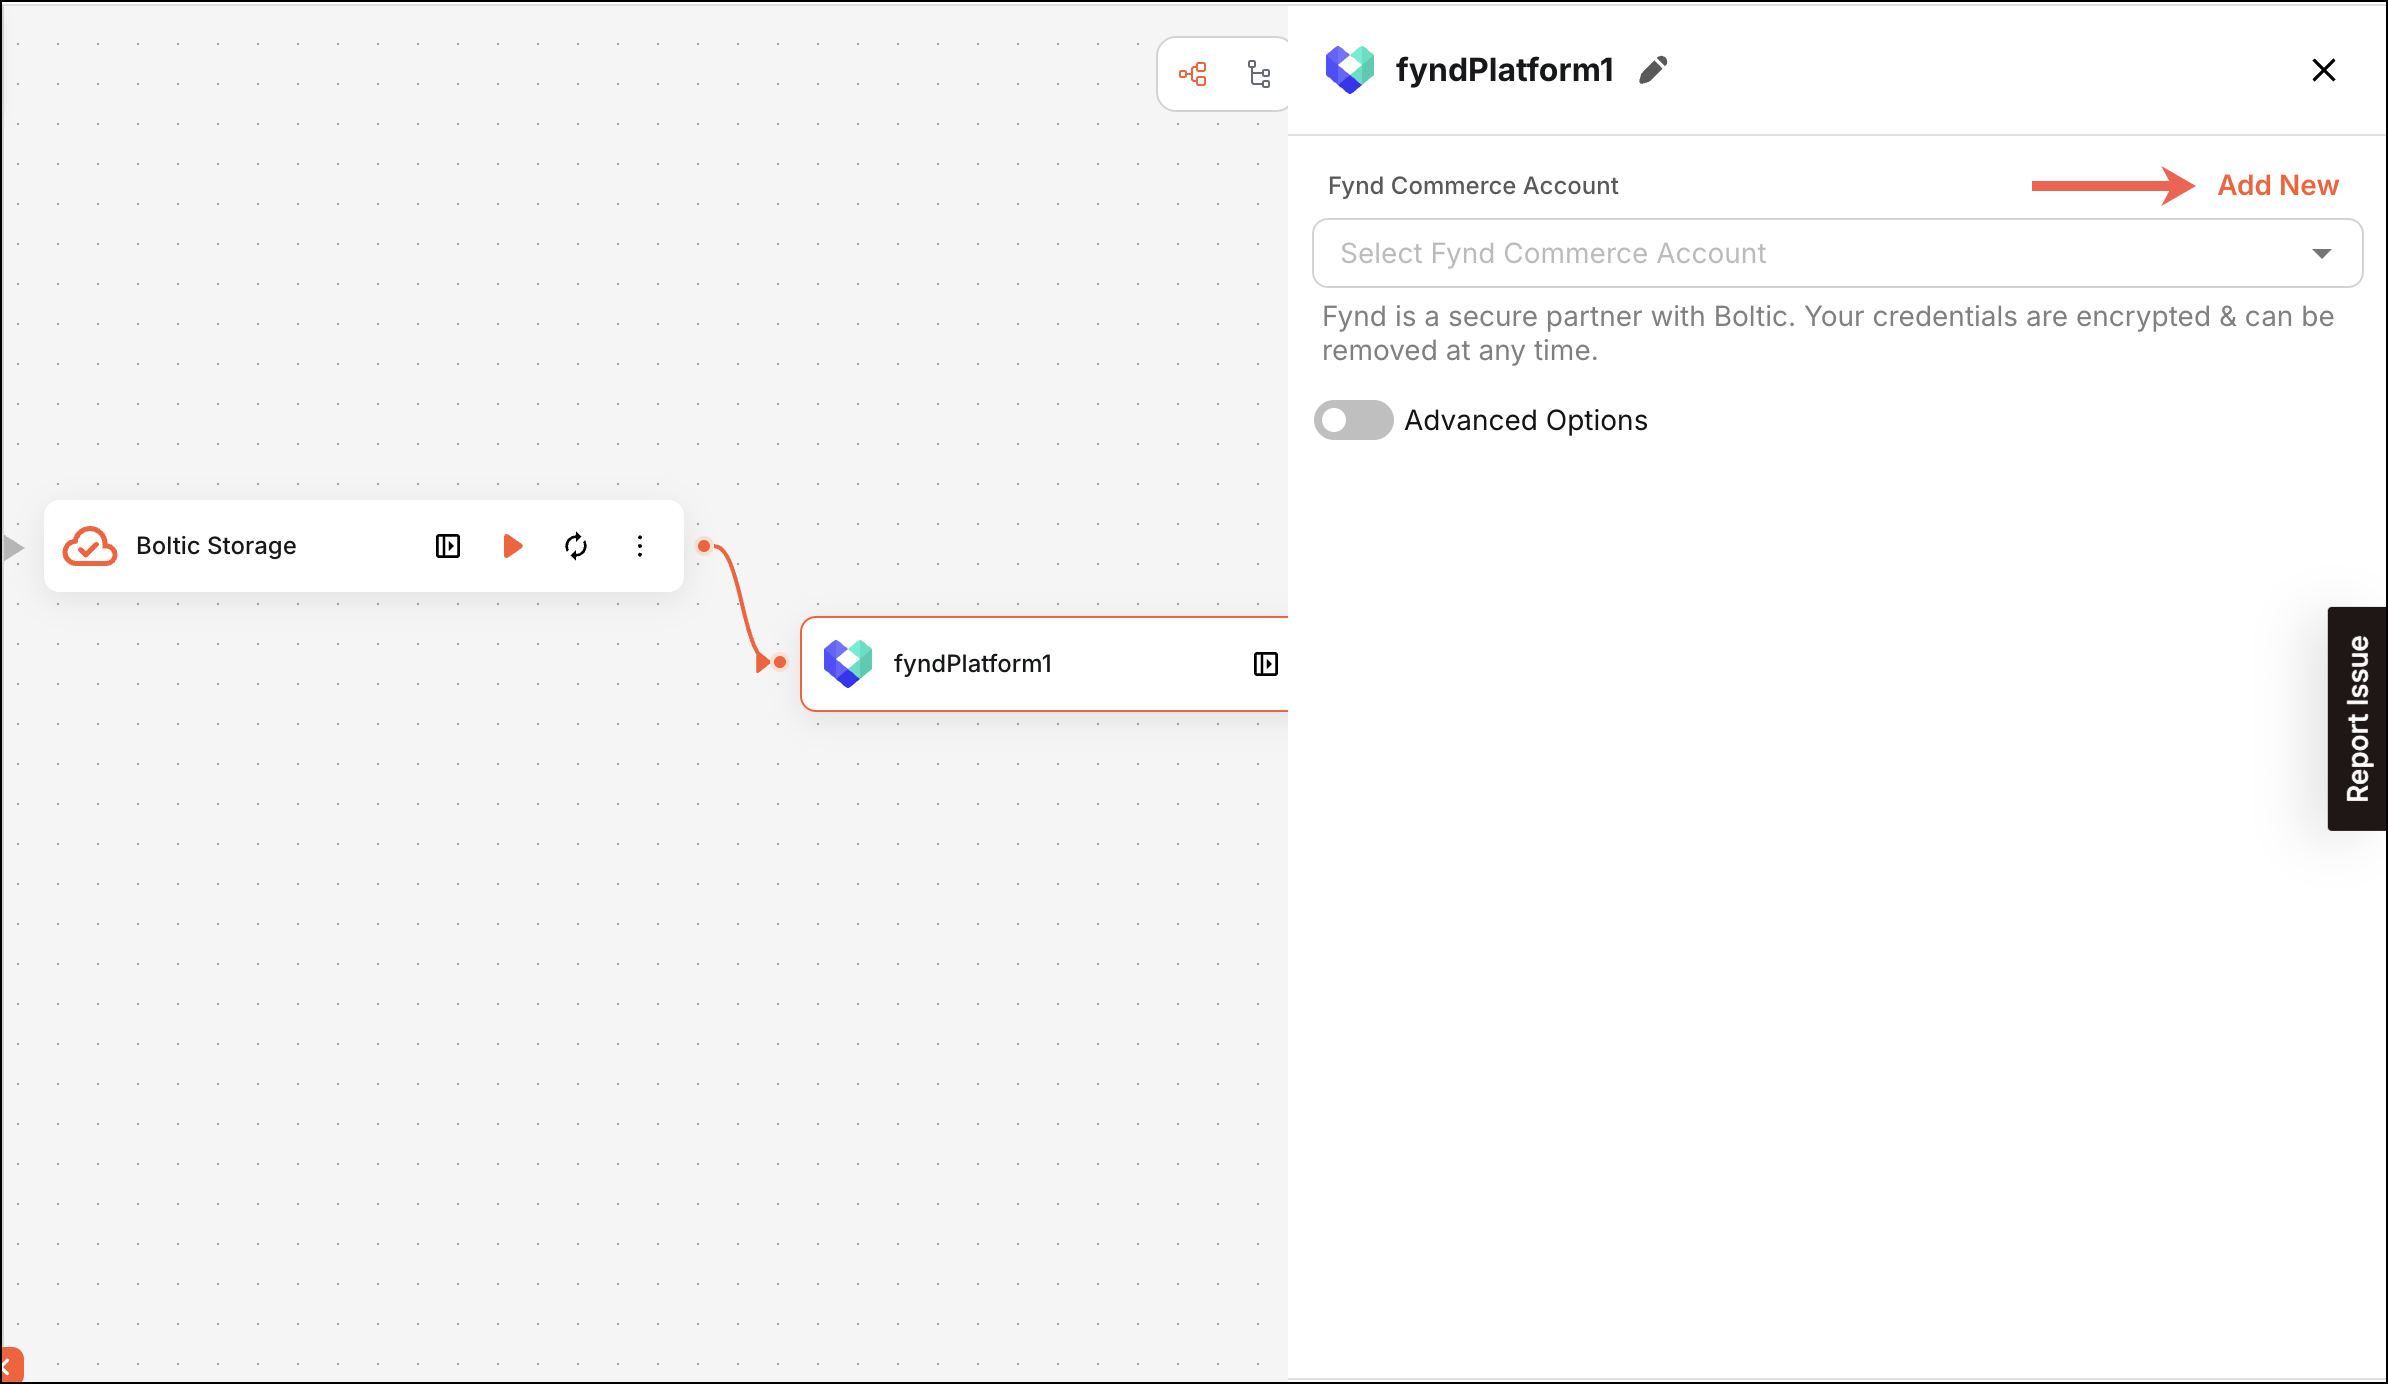 Figure 1: Option to Add Credential for Authentication
Typical Structure of Authentication File
{
    "parameters": [],
    "auth_type_key": {
        "parameters": [],
        "validate": {} //optional
    }
}
Steps
The typical structure of the Authentication file is:
Parameters
Parameters define the UI fields shown after clicking Add New (refer to Figure 1) in the Activity Config form.
Example Code
"parameters": [
    {
        "name": "type",
        "meta": {
            "displayName": "Authentication Type",
            "displayType": "select",
            "placeholder": "Select an authentication type",
            "description": "Choose the type of authentication you want to use.",
            "options": [
                {
                    "label": "Integration ID & Token",
                    "value": "access_token"
                }
            ],
            "value": "access_token",
            "validation": {
                "required": true,
                "requiredDetail": {
                    "errorMsg": "Please select an authentication type from the list"
                }
            }
        }
    }
],
Output
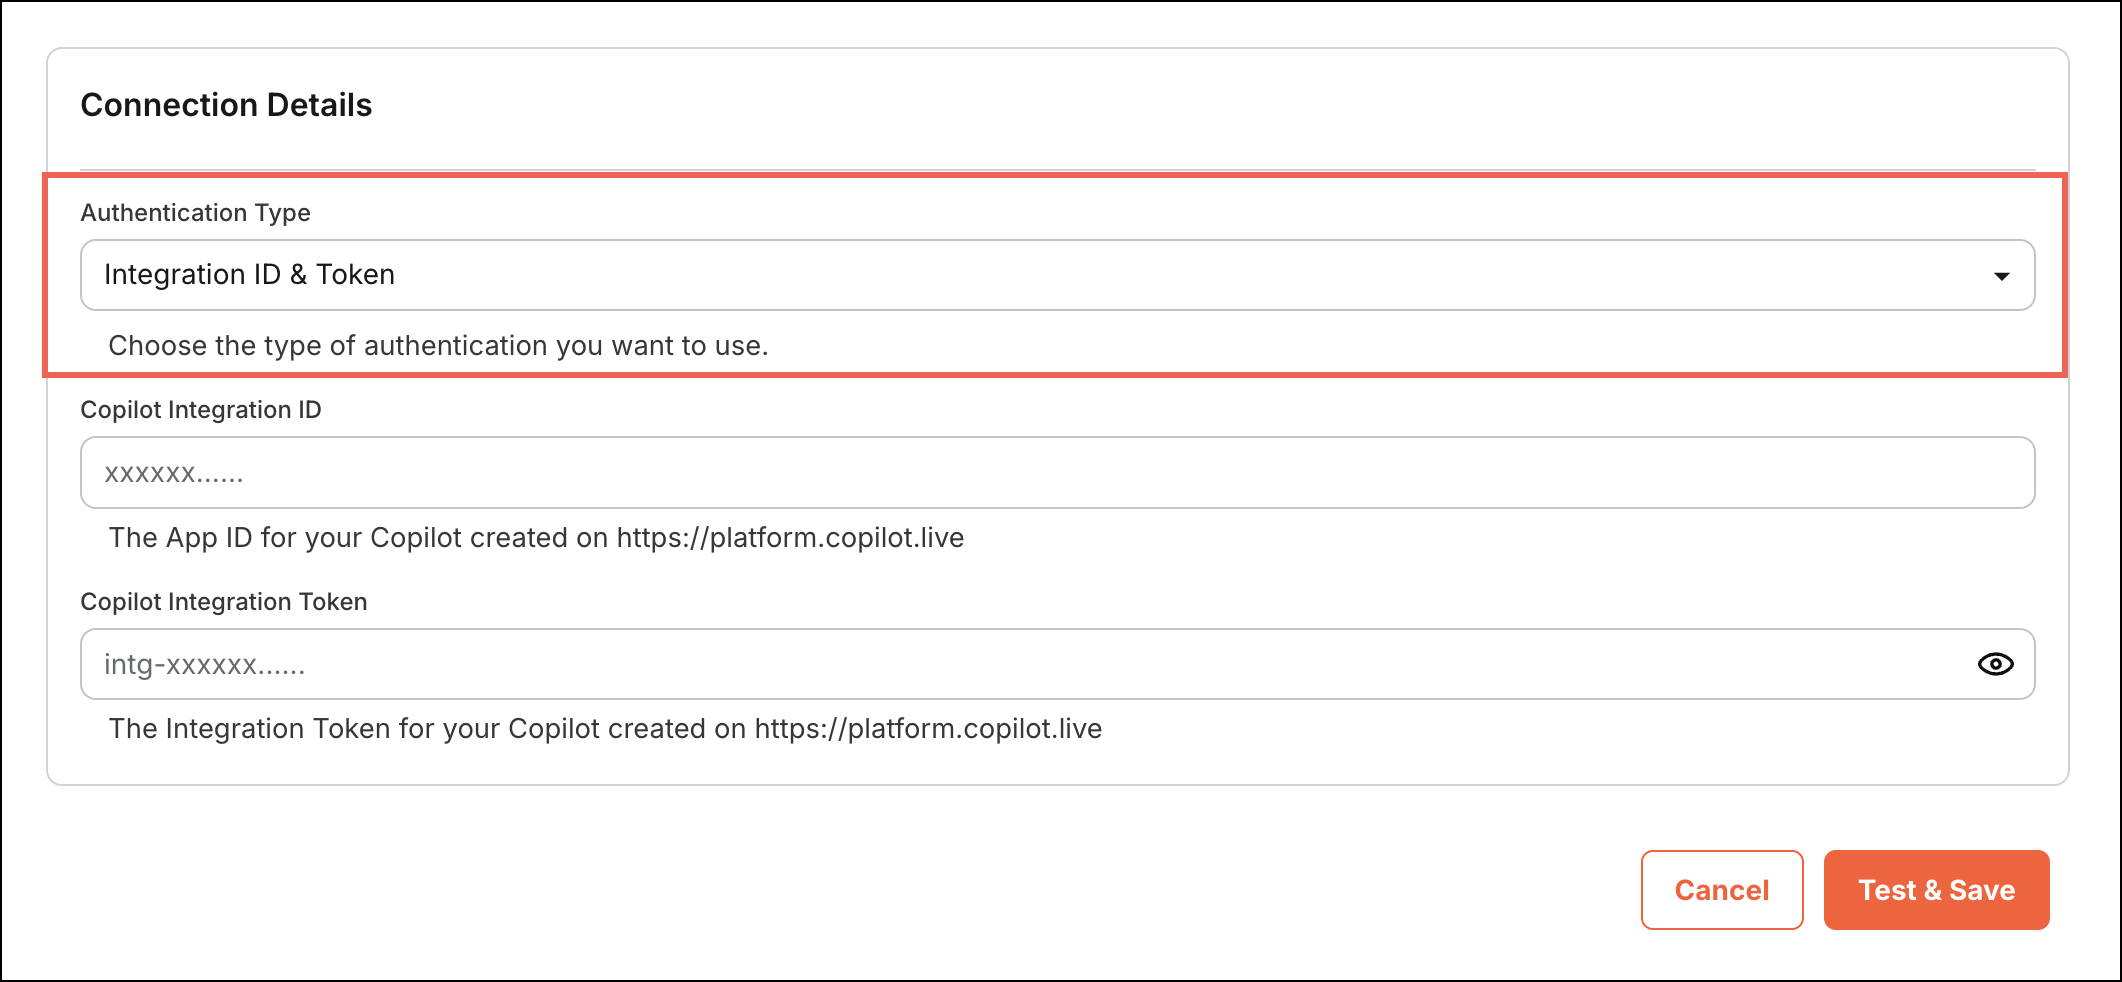 Figure 2: Authentication Parameters
Define Credential Fields
The following code snippet shows how to configure credential parameters for a specific authentication method in your integration. Here, the key "access_token" defines a set of parameters required for authentication using an integration ID and token. The "access_token" key should match the value specified in the "parameters" section ("value": "access_token"). This structure allows you to conditionally show relevant input fields based on the selected authentication type.
Example Code
    "access_token": {
        "parameters": [
            {
                "name": "integration_id",
                "meta": {
                    "displayName": "Copilot Integration ID",
                    "displayType": "text",
                    "placeholder": "xxxxxx......",
                    "description": "The App ID for your Copilot created on <a href='https://platform.copilotz0.de'>https://platform.copilotz0.de</a>",
                    "validation": {
                        "required": true,
                        "requiredDetail": {
                            "errorMsg": "Integration ID is required"
                        }
                    },
                    "dependencies": {
                        "conditions": [
                            {
                                "field": "type",
                                "operator": "EQUALS",
                                "value": "access_token"
                            }
                        ]
                    }
                }
            },
            {
                "name": "integration_token",
                "meta": {
                    "displayName": "Copilot Integration Token",
                    "displayType": "password",
                    "placeholder": "intg-xxxxxx......",
                    "description": "The Integration Token for your Copilot created on <a href='https://platform.copilotz0.de'>https://platform.copilotz0.de</a>",
                    "validation": {
                        "required": true,
                        "requiredDetail": {
                            "errorMsg": "Integration Token is required"
                        }
                    },
                    "dependencies": {
                        "conditions": [
                            {
                                "field": "type",
                                "operator": "EQUALS",
                                "value": "access_token"
                            }
                        ]
                    }
                }
            }
        ],
    }
Output
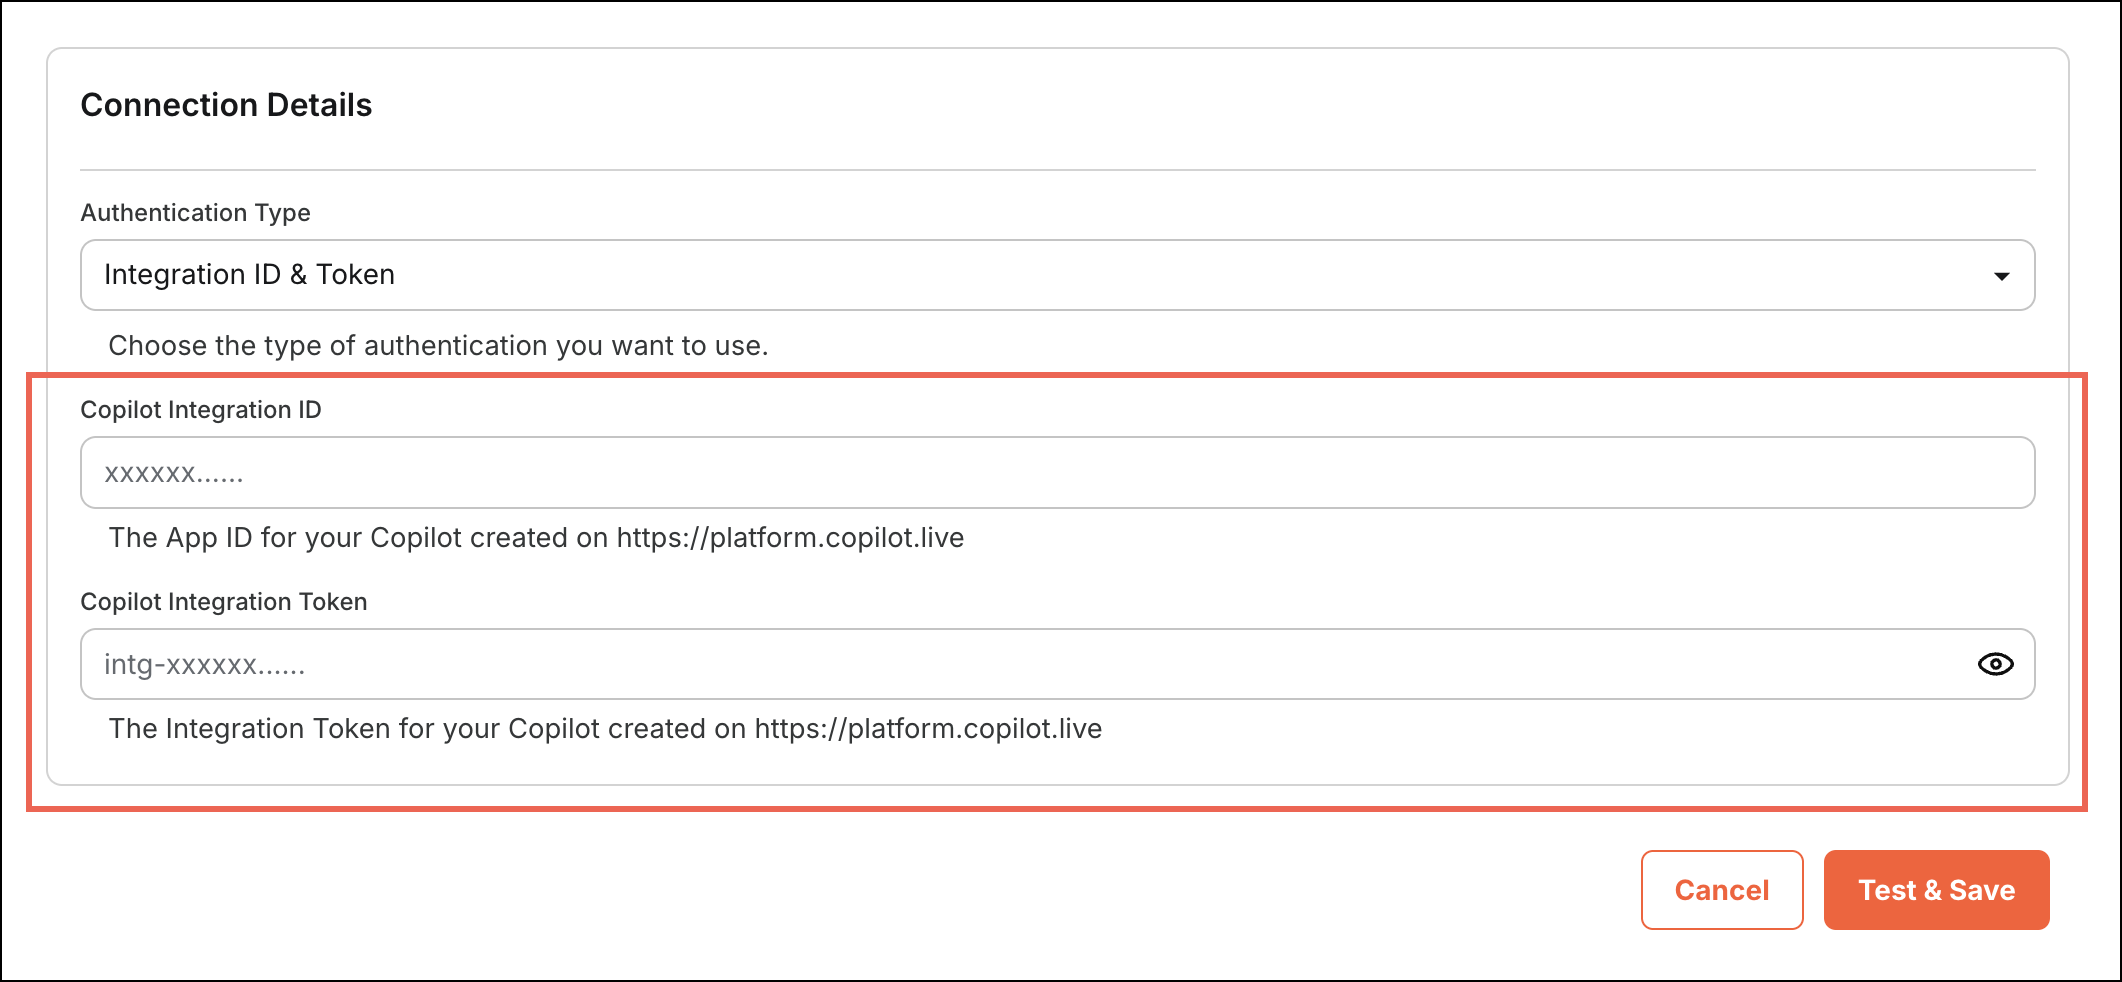 Figure 3: Credential Configuration
Validation
Add a validation check to verify the provided API key by calling a verification endpoint and handling the response accordingly.
Example Code
The following sample shows how an API validation schema can be implemented:
{
    "api_key": {
        "parameters": [
            {
                // ... your parameter definitions here (e.g., api_token)
            }
        ],
        "validate": {
            "url": "https://boltic.io",
            "method": "get",
            "headers": {
                "Accept": "application/json",
                "api-key": "Bearer {{secrets.api_token}}"
            },
            "response": {
                "output": "{{response.data}}",
                "error": {
                    "message": "{{response.data.message}}",
                    "code": "{{response.status}}"
                }
            }
        }
    }
}
Dynamic Token Fetching Workflow
In this example use case, you will learn how to dynamically fetch a refresh token and an access token using credentials.
When interacting with secure APIs, credentials such as username, password, and tokens must be passed securely.
This method dynamically fetches tokens from a secure configuration file.
Suppose logging in with a username and password is required in the third-party application, which validates whether the user's credentials are correct. If valid, instead of typing the username and password for every request, the system returns a token.
Structure of the Authentication File
{
    "parameters": [],
    "api_credentials": {
        "parameters": [],
        "token": {},
        "validate": {},
    }
}
Steps
The authentication process follows these steps:
- Credential Input
- User provides
usernameandpassword. - Missing fields trigger validation errors.
- User provides
- Token Request
- Send a
POSTto the login endpoint. - Request body references secrets:
{{secrets.username}},{{secrets.password}}. - On success, the API returns an access token (and optionally a refresh token).
- Send a
- Token Validation
- Validate the token against a verification endpoint.
- Include required headers and (if applicable) a minimal body. Continue only if valid.
Parameters
This configuration parameter defines the authentication type selection for the integration. It presents a dropdown to the user, allowing them to choose the authentication method. Currently, only the "API Credentials" option is available and required for setup.
{
    "name": "type",
    "meta": {
        "displayName": "Authentication Type",
        "displayType": "select",
        "placeholder": "Select an authentication type",
        "description": "Choose the type of authentication you want to use.",
        "options": [{ "label": "API Credentials", "value": "api_credentials" }],
        "value": "api_credentials", // This value should matches in the credentials section. The parameter will show the username & password fields accordingly.
        "validation": {
            "required": true,
            "requiredDetail": { "errorMsg": "Authentication type is required" }
        }
    }
}
Output
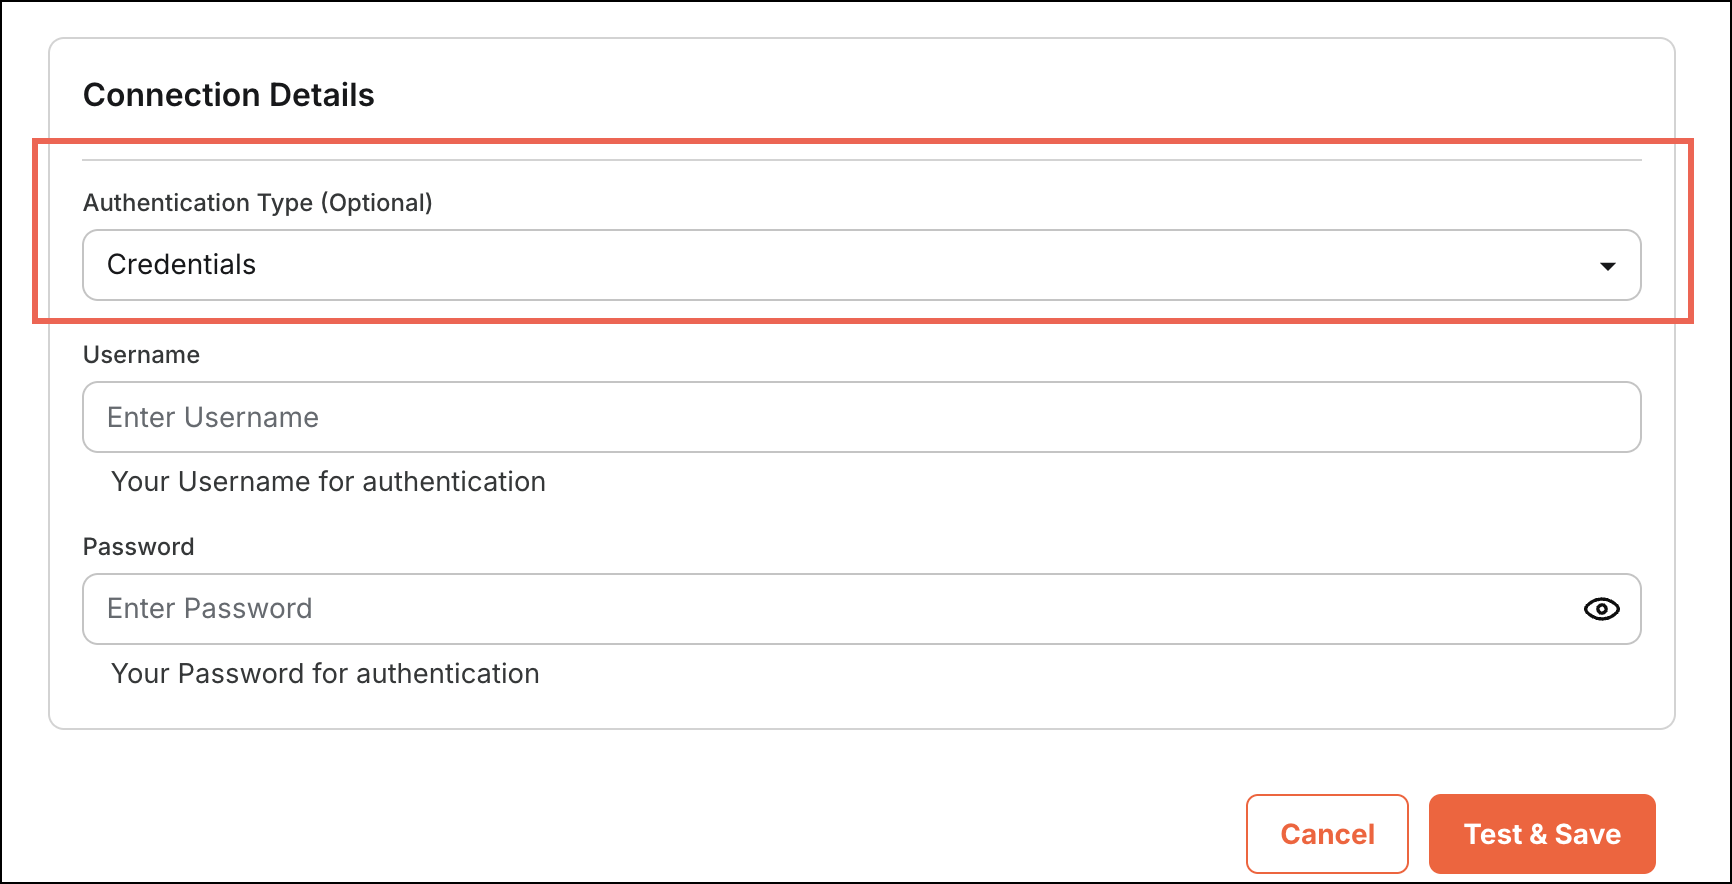 Figure 4: Authentication Parameter
Define Credential Fields
The following code snippet defines the credential fields required for authentication. It specifies two parameters: "username" and "password". Each parameter includes metadata such as display name, input type, placeholder, description, and validation rules to ensure both fields are required for successful authentication.
"api_credentials": {
    "parameters": [
        {
            "name": "username",
            "meta": {
                "displayName": "Username",
                "displayType": "text",
                "placeholder": "Enter Username",
                "description": "Your Username for authentication",
                "validation": {
                    "required": true,
                    "requiredDetail": {
                        "errorMsg": "Username is required"
                    }
                }
            }
        },
        {
            "name": "password",
            "meta": {
                "displayName": "Password",
                "displayType": "password",
                "placeholder": "Enter Password",
                "description": "Your Password for authentication",
                "validation": {
                    "required": true,
                    "requiredDetail": {
                        "errorMsg": "Password is required"
                    }
                }
            }
        }
    ],
    "token": {},    //Refer to Token Request section
    "validate": {}  //Refer to Validation Request section
}
Output
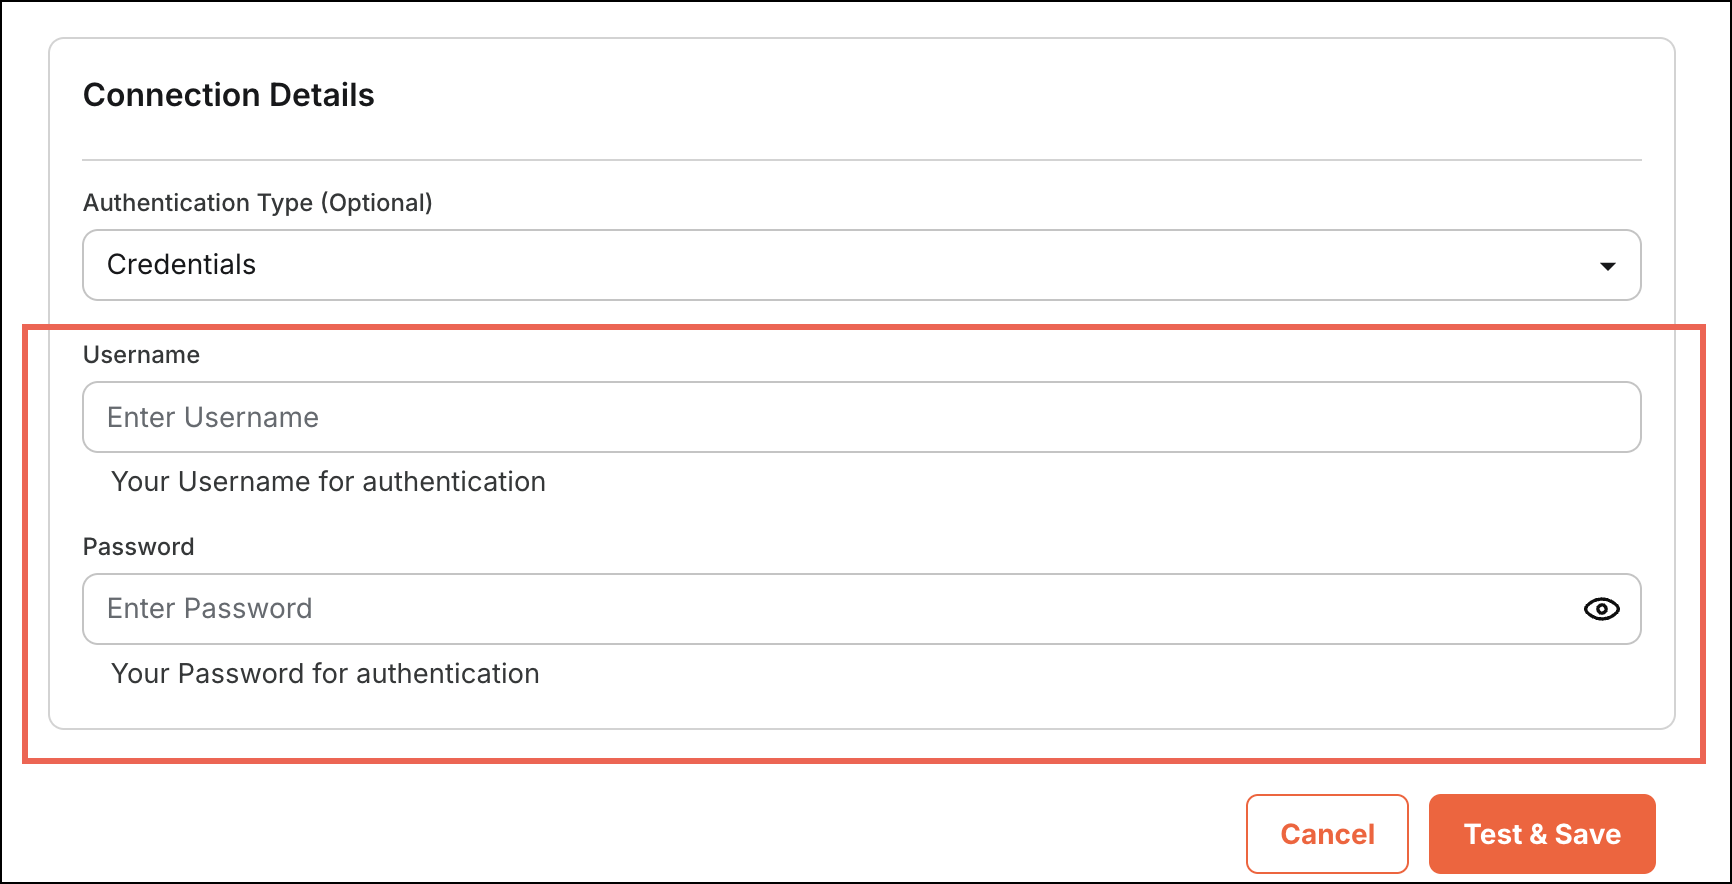 Figure 5: Enter Credentials
Token Request
This configuration enables dynamic token fetching for authentication. When a user provides their username and password, a POST request is sent to the login endpoint. On success, the API returns an access token (and optionally a refresh token) for use in subsequent requests.
"api_credentials": {
    "parameters": [],   //Refer to Define Credential Fields section
    "token": {          // Use the key name "token" to enable dynamic token fetch
        "url": "https://your-api-endpoint/",
        "method": "post",
        "headers": {
            "Content-Type": "application/json",
            "Accept": "application/json"
        },
        "body": {
            "username": "{{secrets.username}}",
            "password": "{{secrets.password}}"
        },
        "response": {
            "output": "{{response.data.data}}",
            "error": {
                "code": "{{response.status}}",
                "message": "{{response.data.error.message}}"
            }
        }
    }
}
Validation Request
This JSON object defines a validation request for verification. It allows the integration to send a request to the third-party application's endpoint API.
Example Code
The headers specify that the request and response should be in JSON format. The response section maps the output to the response data and handles errors by extracting the error message and status code.
{
    "url": "https://your-api-endpoint/",
    "method": "post",
    "headers": {
        "Accept": "application/json",
        "Authorization": "application/json"
    },
    "body": {
        "api_token": "{{secrets.accessToken}}",
        "refresh_token": "{{secrets.refreshToken}}"
    },
    "response": {
        "output": "{{response.data}}",
        "error": {
            "message": "{{response.data.error}}",
            "code": "{{response.status}}"
        }
    }
}